My thoughts on Slackware, life and everything

Category: Recipes (Page 3 of 4)

Recipe: foccaccia

I have enjoyed the BBC’s Great Brithsh Bake Off series a lot. My wife has been watching these episodes longer than I have – she is the real cook – but I got increasingly interested because of the sympathetic presentation by Mary Berry and Paul Hollywood. Always amazing what these amateur bakers can come up with…way out of my league.

In the second series, which aired in 2011, Paul Hollywood set a technical challenge to the contesters: to make an Italian Focaccia bread. Ever since I went to Italy with my girl friend (now wife) and ate a real freshly baked focaccia bread, I have been spoiled by that event. I never got an appetite for the factory-baked ones you can buy in the local supermarket. I remember that the original bread tasted great because it was almost soaking with olive oil and was full of mediterranean flavours.

So I promised myself to bake a focaccia one day. However, I was discouraged by the fact that making a good focaccia dough seems to be quite difficult to make. Also, I wanted to use my hands, not a kneading robot to make the dough.

That is why I carefully watched the Brithsh Bake Off Masterclass session where Paul Hollywood showed how he makes his focaccia, and I used the recipe as outlined in his book “How to Bake“. I split the amounts in half because I wanted to end up with a single bread for a 2-3 persons side-dish.

Time required:

2.5 hours for preparation, 30 minutes for baking.

Ingredients:

  • 250 grams of strong white flour
  • 1 sachet dried fast action yeast
  • 1 teaspoon of salt
  • 1 tablespoon of olive oil
  • 200ml cold water (straight from the tap)
  • olive oil, for drizzling
  • coarse sea salt
  • fresh (preferred) or dried rosemary for sprinkling on top

Preparation:

  • Prepare a bowl for proving the dough, by oiling its inside generously. Put aside for later.
  • Use a kitchen scale to measure the flour and tip it into into a large mixing bowl. Empty the sachet of dried yeast on one side of the bowl and add the salt on the opposite side of the bowl. They need to be separated because the salt will kill the yeast if the two come into direct contact too soon. Then, add the olive oil, and three quarters of the water. Cold water is better than warm water according to Paul Hollywood. Cold water will activate the yeast more slowly and that will have a positive effect on the flavours that will develop in the bread.
  • Stir the ingredients into a dough with a wooden spoon. Instead of using a spoon, you can also use the fingers of one hand to pull the flour into the mix gradually.
  • When the water is absorbed you can gradually add the remaining water bit by bit. Knead until all the water has been absorbed before adding more. Focaccia dough is very wet: the ratio flour to water is almost one to one. The more water, the lighter the bread’s inside will be!
  • Rub your hands with a bit of olive oil and start kneading the dough in the bowl for around 5 minutes. It will be annoyingly sticky. If needed, you can wash your hands, rub them in olive oil and continue kneading.
  • Spread some olive oil on your work surface and dump the dough from the bowl onto the work surface. Continue kneading for another 10 minutes.
  • At this point I was getting quite depressed and despairing… because the dough did not turn into a silky non-stick substance (which is what usually happens after kneading a bread dough for a period of time). Focaccia dough will keep sticking to your hands no matter how long you knead it. Just accept that and move on.
  • Scrape the dough off the work surface and off your hands, and place it into the oiled bowl you had set aside earlier. Cover the bowl with a tea towel or clingfilm and leave it in a warm place to prove for at least an hour, or until the dough has doubled in size.
  • Line a rectangular baking tray (roughly 20 cm by 30 cm in size ) with parchment paper and rub the inside with oil. Gently slide the dough into the tray. Use your fingers to gently stretch and push the dough into the corners of the tray. You do not want to push all the air out!
  • Cover the baking tray with clingfilm or a tea towel and leave it to prove for another hour.
  • Just before the hour is over, pre-heat your oven to 220 degrees centigrade.
  • Remove the towel or cling film. Dip one of your fingers into some flour so that it will not stick, and then firmly push it into the dough, all the way to the bottom of the tray. Repeat this until the focaccia dough has a nice outline of dimples all over its surface.

Baking:

  • Sprinkle the focaccia generously with sea salt and rosemary. Sprinkle a few tablespoons of olive oil on top (or hold your thumb to the aperture of the olive oil bottle and drizzle the oil through the narrow gap you leave open).
  • Bake the focaccia at 220 degrees centigrade, middle of the oven, for about 20 minutes. It should turn an even brown colour.
  • Lift the bread out of the tray using the parchment paper as a handle, and put it on a wire rack. Remove the paper from beneath the bread. Sprinkle with some more olive oil which will get soaked into the bread. Use a high-quality green olive oil if you have that – it will greatly enhance the flavour.
2013-11-03 17.05.20

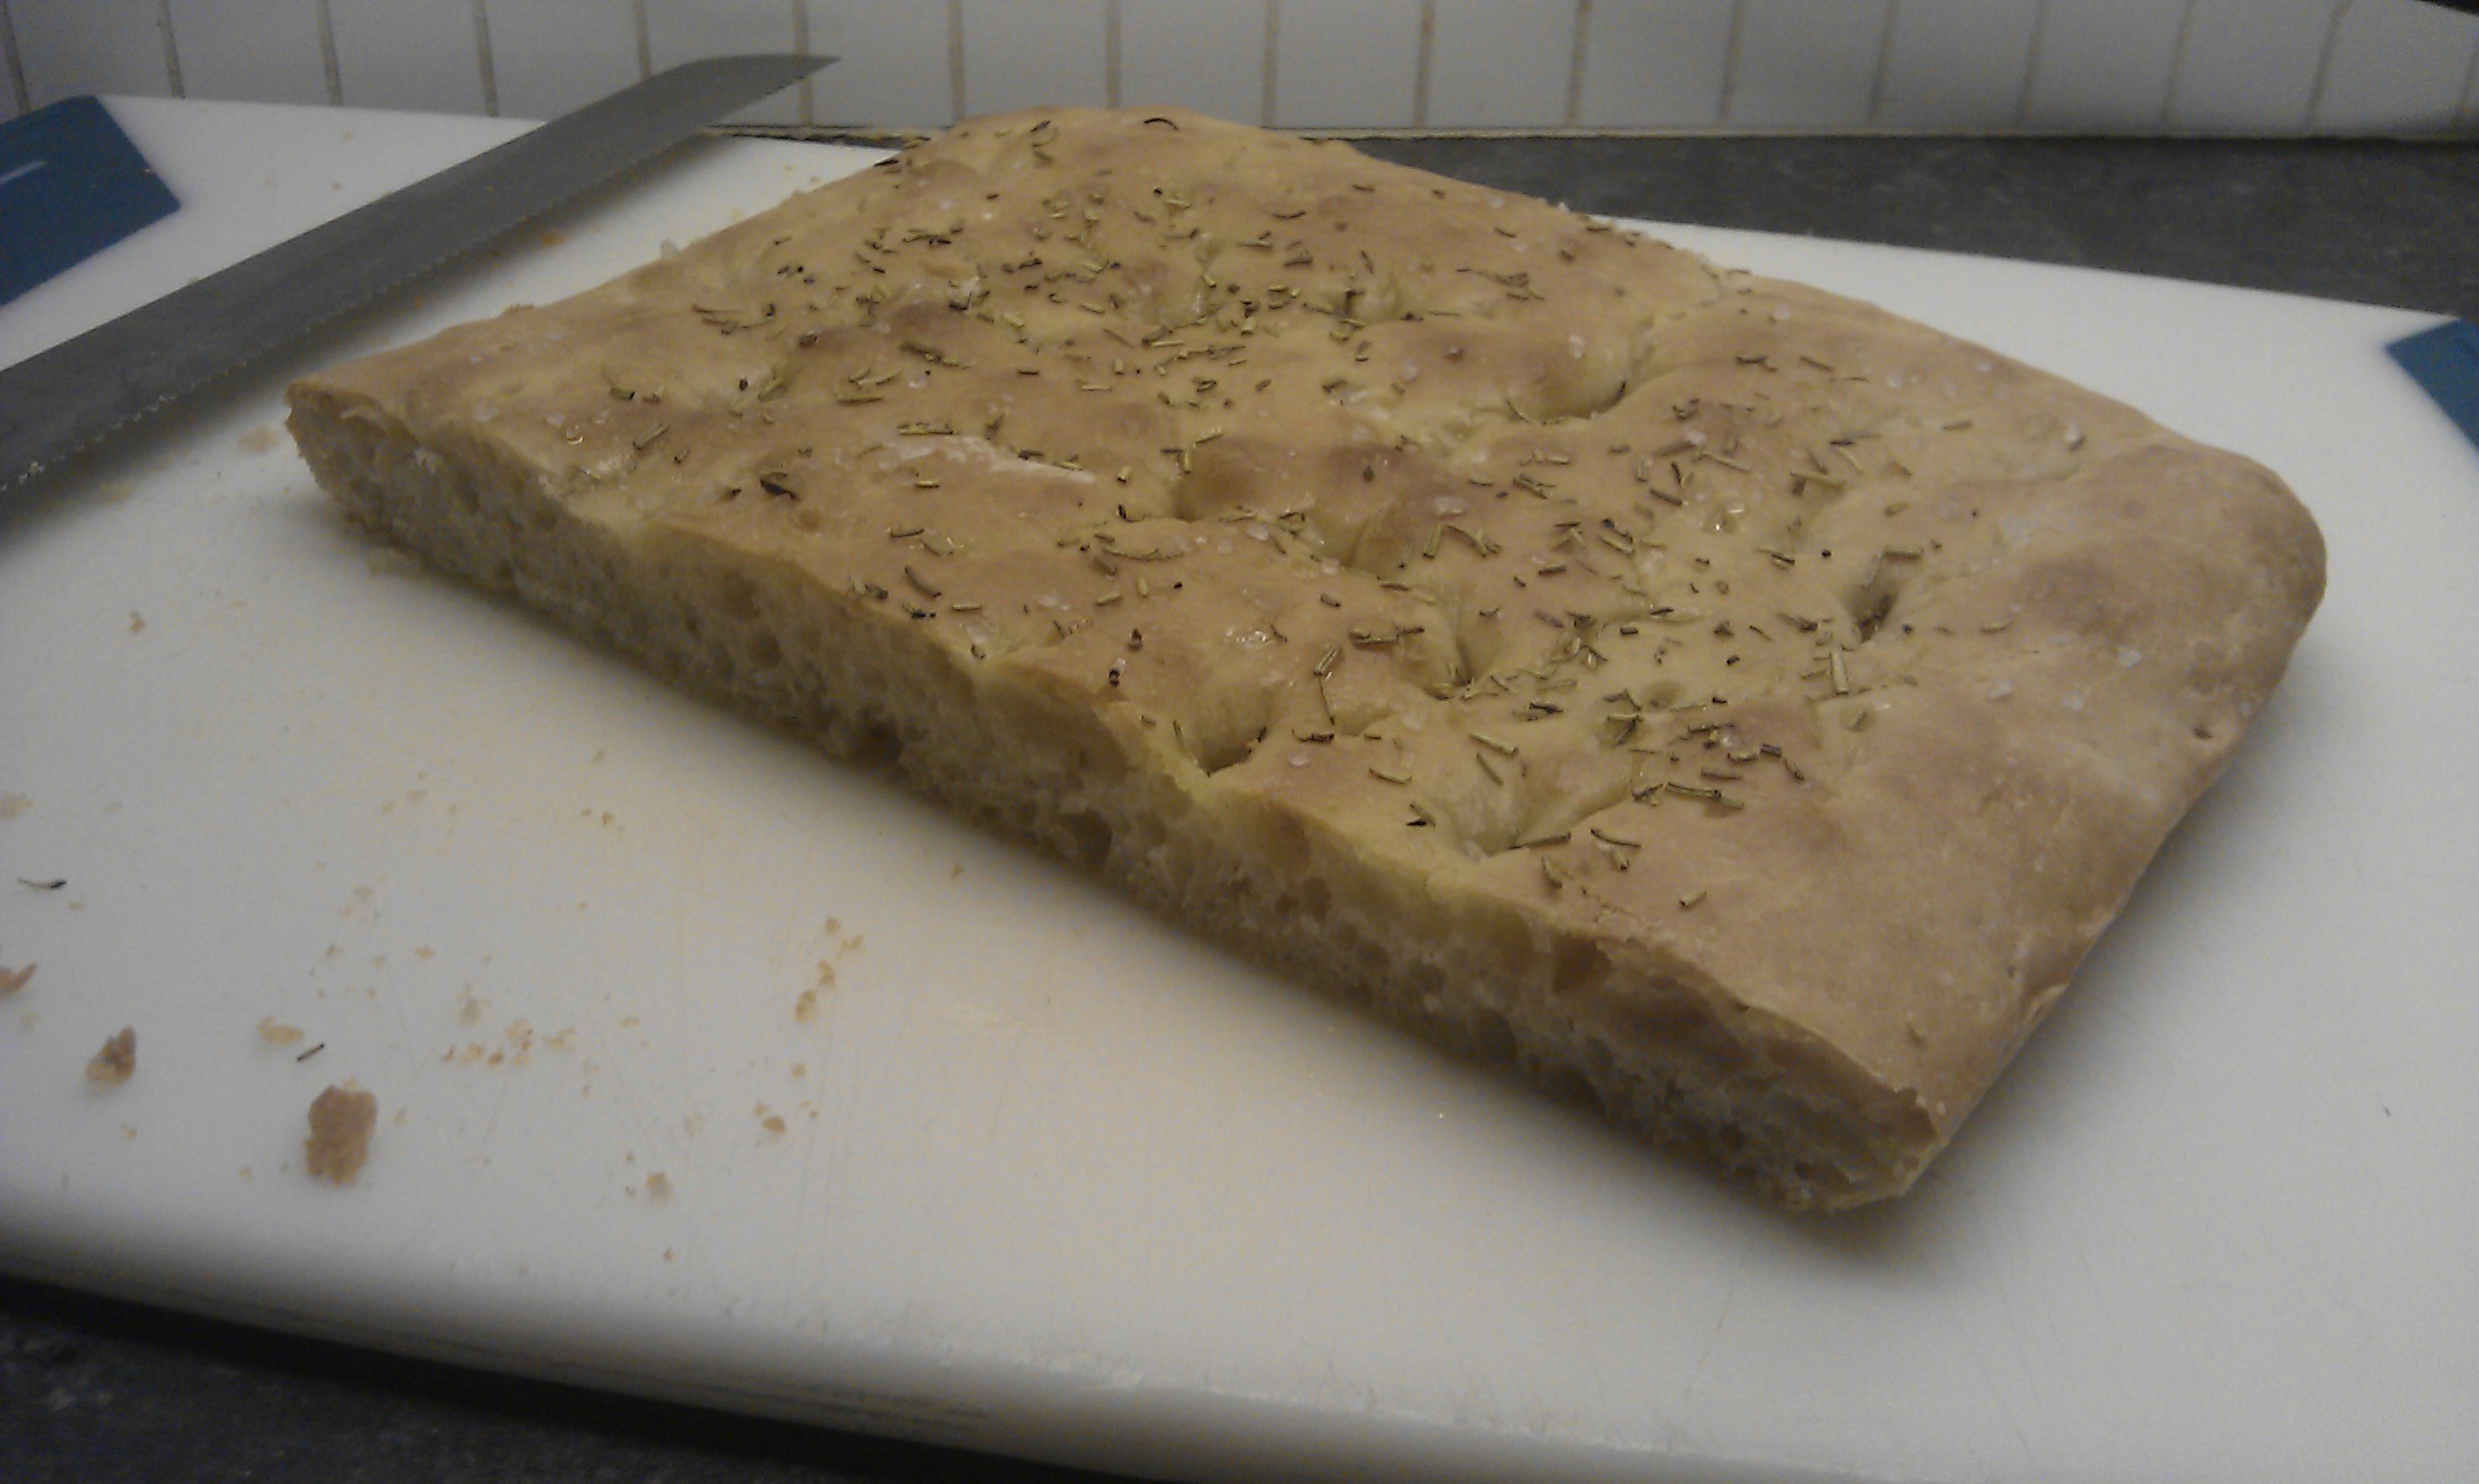
I almost ate all of it before thinking of taking a picture.

The result is a flat bread with a lovely crispy brown crust, and yet light on the inside. The focaccia has lots of air pockets or various sizes- the sign of a good bake. It tasted great! A real mediterranean treat.

The focaccia should be eaten right out of the oven, or while it is still warm, for the best experience.

Eric.

Recipe: zoervleis (sour meat)

I wanted to try something new for diner this weekend, and since my wife had already planned a Lasagna I wanted to compensate with meat & potatoes. I decided to try the dish which is famous in my city of birth Maastricht. It is called zoervleis (a word in the Limburg dialect which translates to sour meat). Even though I have been eating it regularly all my life (my wife likes to cook it) I never actually attempted to make zoervleis myself.

Zoervleis is a stew, typically meant to do something useful with meat that would otherwise not be eaten: by marinating meat, usually horse’s meat, in vinegar for hours or even days, even the toughest meat can be made tender.

In my recipe below, I used pork steak. This does not have to marinate for hours like other types of meat (like beef). Instead, I prepared the stew a day in advance so that the meat can rest in the acid liquid overnight, effectively giving it the same tenderness. If you use beef or horsemeat (zoervleis is typically made with horsemeat) you need to marinate the meat for 12 to 24 hours in the same mix of vinegar, water, cloves, juniper berries and bay leaf which is used below to cook the stew.


Ingredients:

  • 500 grams of meat, cut into 3cm chunks
  • 3 large onions, sliced into (quarter) rings
  • 3 cloves of garlic, finely chopped
  • butter
  • pepper, salt to taste
  • 25 cl vinegar
  • 25 cl water
  • 3 cloves
  • 4 juniper berries
  • 1 bay leaf
  • 2 tbs (tablespoon) of muscovado (brown sugar)
  • 2 tbs sweat-sour apple syrup (the “rinse appelstroop” from the province of Limburg)
  • 1 slice of gingerbread (typical dutch “ontbijtkoek”)

Preparation:

For cooking a stew, you need an iron kettle with a thick bottom. This will ensure that the heat from the flame is distributed evenly and will allow you to simmer the meat on a small fire for a long time.

The night before you serve the zoervleis:

  • Heat the butter until it stops bubbling (which means the watery components have evaporated) and begins to darken. Fry the meat for about 5 minutes until the chunks have a nice brown colour.
  • Turn the heat down a bit and add the sliced onions and chopped garlic. For the next 5 minutes or so, stir the meat plus onions from time to time until the onions have turned a golden brown.
  • Add pepper and salt to taste
  • Add the cloves, juniper berries, bay leaf, vinegar and water (these are the ingredients which you can alternatively use as the marinade if the meat needs tenderizing before you start cooking. Note that the pork steak I used does not need marinating)
  • Bring the mixture back to the boiling point, and then add the muscovado, apple syrup and gingerbread (these ingredients add the necessary sweet counterbalance to the sourness of the vinegar)
  • Put the lid on the kettle, turn the flame down as low as you can, and leave to simmer for at least two hours

The next day:

  • The zoervleis has rested in the acidic liquid overnight, which has allowed the meat to become tender and the aromas to mix. You’ll notice that the stew is no longer watery – the liquid is being bound by the other ingredients.
  • Put a very low flame underneath the kettle and let the stew slowly heat up for an hour.
  • Ready!

You serve zoervleis with apple sauce and pommes frites (french fries if you are american, or chips if you are british).

Instead of serving pommes frites, I cooked a few potatoes for about 10 minutes, let them cool down, cut them into slices of half a centimeter thick and fried those slices in a shallow pan in butter for another 15 minutes. Nice and crispy!

Enjoy this dish from my home county!

Eric


Image taken from http://ah.nl/

Recipe: Hyderabadi Biryani

Long time ago I bought a book with recipes from Pakistan. I cooked quite some of the food from that little book.

One of my favourite dishes (my wife loves it too) is biryani. So, when I had to make up a meal for this weekend, I decided I would do a biryani again. Being too lazy to get up and search for the book, I used Google to find some inspiration. And the first hit was an interesting variation to the Pakistani version I cooked so often. No eggs, no tomatoes, no raisins.

It’s Hyderabadi Biryani. And since I work together on a daily basis with a team  at IBM in Hyderabad, I thought it would be nice to try this one out so we have something else to talk about than work-related issues…

I made some alterations to the original recipe, mostly caused by the (un)availability of ingredients at the local shop.

Picture copied from http://www.indobase.com/

The recipe is not difficult at all. I think you can not fail to produce something that you’ll like! Preparing the marinade takes a bit of time, then you can turn your attention to other things for at least two hours while the meat is marinating. The actual cooking takes 20 minutes.

The moment all the ingredients went into the cooking pot, my wife commented that the aromas were heavenly! She walked over a couple of times to lift the lid and enjoy the scent of the boiling goodness.

The resulting dish is an aromatic and rich comfort food. You will keep eating until your belly protests.

Ingredients (4 persons):

  • 300 g Basmati Rice (semi-cooked / parboiled)
  • 300 g chicken breast, chopped into small pieces
  • 20 g ghee
  • 2 cloves of garlic
  • 2 cm ginger stem
  • 1 onion, sliced
  • 200 g lemon curd
  • 2 green chillis (I admit… I forgot to add those)
  • juice from 1 lime
  • 1 tsp red chilli powder
  • a pinch of caraway seeds
  • 2 twigs of coriander leaves, chopped
  • 2 twigs mint leaves, chopped
  • a pinch of saffron
  • generous amount of cinnamon powder
  • 2 cardamom pods or equivalent cardamom powder
  • 1 drop of saffron color (or use turmeric powder instead)
  • 1 clove
  • vegetable oil
  • salt to taste

Preparation:

Make the ghee yourself if you do not have it ready:

  • Melt 100 g of butter (you will not use all of it in the biryani, so you can store some of it for later). Keep the heat low, do not let the butter turn brown!
  • Let the watery component of the butter boil away for some 10 to 20 minutes.
  • From time to time use a spoon to remove the foamy substance which forms on the surface.
  • When no new foam is forming on the surface, the ghee is ready. It will have a golden colour.
  • We need to get rid of the brown residue on the bottom of the pan. Pour the ghee through a clot or simply use a tea restrainer or other finely meshed sieve. You can store the ghee in the fridge if you prepare this long before the actual meal.

Marinade part one:

  • Grind the garlic and the ginger. Mix this thoroughly through the chopped meat.
  • Put the marinade in the fridge for an hour.
  • In the meanwhile, fry the sliced onions in a heated pan on low heat untill they turn light brown.
  • Let the onions cool down and crush them (or chop them into fine pieces).

Marinade part two:

  • After at least one hour, retrieve the marinating meat.
  • Add the fried onion, lemon curd, lime juice, red chilli powder, green chilli paste, cinnamon, cardamom, caraway seeds, clove, coriander leaves, mint leaves and salt to the marinated meat.
  • Mix thoroughly and place the meat back into the fridge for at least 1 hour.

The finish:

  • Drop the saffron in some water to extract its color and aroma. Or if you do not have saffron, use plenty of turmeric in the next step.
  • Boil 1/2 liter of water. Add salt to taste, cinnamon, cardamom, and the saffron water.
  • Use an iron cooking pot with thick bottom to prevent the rice from burning. Heat a bit of vegetable oil in the pan.
  • Add half the rice and fry for a few minutes. Keep the heat low.
  • Pour the ghee over the rice.
  • Spread the marinated meat on top, and again spread the remaining semi-cooked rice over the meat.
  • Gently pour the boiling water in a circular motion over the rice layer.
  • Keep boiling on a low flame for exactly 15 minutes.
  • Ready! The water should have been absorbed by the rice.

Ideally this biryani is served with some Indian cooked vegetables… but I thought of my son and served broccoli instead.

Enjoy your meal!

Eric

Recipe: traditional moussaka

Last weekend I prepared another diner which I had not cooked for a very long time.

I love rich oven dishes, and traditional greek “moussaka” is a long-time favourite of mine. I learnt how to cook it while I lived in a student home.

There are many variants of moussaka which do not honour the original method of preparation. Things like potatoes do not belong in moussaka.. while cinnamon, oregano and lots of vegetable oil do belong! I try to follow a more traditional approach. Any greek readers, please come up with improvements if your Mom had a different recipe!

The result will be a heavenly smell in your kitchen while the dish is finishing in the oven. Your belly will be all warm and fuzzy after emptying your plate.

The prime ingredient in moussaka is the aubergine, or eggplant. This fruit (commonly mistaken for a vegetable!)  is one of the family of nightshades – like tomatoes, cayenne, and even tobacco. It’s easy to spot in the pic below that this is a fruit – it contains seeds. Like with tomatoes and potatoes, there is a certain bitterness in the eggplant which you can eliminate by “sweating”, steaming or grilling. I am going to grill the eggplant.

Another ingredient which deserves a separate mention, is the béchamel sauce. This sauce of butter, flour and milk is thought by many people to be difficult to make, but in fact it is dead easy, The béchamel, along with grated cheese, will create a beautiful soft-crunchy crust on top of the moussaka.

Ingredients (4 persons):

  • One eggplant
  • one onion, chopped up
  • three cloves of garlic, chopped up (do not squeeze them out)
  • 400 grams of minced lamb meat (beef will do as well)
  • one can of peeled tomatoes
  • 150ml olive oil (sunflower oil will do)
  • plenty of cinnamon and oregano
  • pepper, salt
  • 50 grams of butter
  • 50 grams of flour
  • 1/2 liter of milk
  • 200 grams of grated young cheese

Preparation:

  • Pre-heat the oven to 200°C
  • First we create the meat/tomato sauce. Heat a few tablespoons of oil in a pan, add the chopped onion and garlic and let it cook for a few minutes until the onion gets a nice golden-brown color. Keep stirring with a wooden spoon to prevent the garlic from getting black and bitter.
  • Add the minced meat, turn up the heat and let it cook for a few minutes until all of the meat has turned brown. Add salt and pepper to taste. Add lots of cinnamon powder and oregano. Don’t hold back! In this dish, more is better. In particular, you can never have too much cinnamon.
  • Leave the meat and onions to simmer on a low fire for a few minutes. Then turn up the heat under the pan again, and add the peeled tomatoes. If these are not chopped-up tomato parts, you cut the tomatoes up into smaller pieces before you add them to the pan. Allow the tomato to integrate with the meat and onions; there is a lot of liquid in the tomatoes which needs to boil away. Then turn down the heat and leave it to simmer on low heat with the lid on the pan. We will not need the meat sauce until later and we might just as well allow the flavors to mix for as long as possible – it will enhance the dish. Don’t forget to taste! It may require more salt and cinnamon.
  • We continue with the béchamel and the eggplant. You can work on these in parallel.

Eggplant:

  • If you have a grill-pan, put it on the stove and heat it up. If you do not have a grill-pan, you can do with a flat frying pan, or use the oven grill – we are going to grill the eggplant
  • Cut the top and bottom off the eggplant, removing the leaves. Cut the eggplant along its long side in slices of 0.5 cm (0.2 inch). Once exposed to the air, the slices will color brownish after a while so it is best to cut only a few slices at a time and apply the next step in the preparations.
  • Brush both sides of an eggplant slice with olive oil and place it in the grill-pan. Leave it on the grill for a minute or two and then turn it over. This will make it tender, eliminate the bitter taste and sweeten the eggplant. You can put several slices in the grill pan at a time, to speed up the process.

Béchamel:

  • Melt the butter in a pan (low heat) or in the microwave.
  • Add the flour (all at once) and keep stirring the mixture (with the heat kept low!) so that you get a smooth mixture. Let the mixture (the “roux”) cook on low heat for about 4 minutes, this will eliminate the floury taste. While stirring, take the pan off the fire from time to time to keep the flour from turning brown – we want the béchamel to keep its white color.
  • Gently, add the milk while you keep stirring the mix. Let it cook for another 10 minutes at least, stirring the béchamel sauce from time to time to keep it smooth and prevent burning. Then turn off the heat.

We continue with the final part:

  • Brush the inside of an oven dish with olive oil. More is better. The oil will prevent the eggplant from sticking to the dish when it bakes in the oven.
  • Cover the bottom of the oven dish with slices of grilled eggplant. On top of that, pour half of your meat/tomato sauce until it covers the eggplant. Then, add a new layer of eggplant slices and on top of that you pour the remaining half of the meat/tomato sauce. Sprinkle this with a generous amount of grated cheese. If you still have eggplant slices left, you can place those on top.
  • Grab the pan with the béchamel sauce,, and pour it over the other ingredients in the oven dish. It will trickle down into the dish, but the majority will remain on top. Sprinkle some more grated cheese over the béchamel. Not too much cheese, the béchamel must remain visible! We do not want a burnt cheese crust, we want to create a soft crust of cheese mixed with the béchamel.
  • Place the dish in the middle of your oven and let it bake for 20 minutes. The moussaka is ready when the crust starts turning light brown.

Serve it with some greek white wine like retsina.

I could eat this every week… but it took years to find an opportunity cook it because my son dislikes the taste of the eggplant. He still did not like it much… but he ate it all anyway.

Enjoy your meal!

Eric

Recipe: Spanish chicken

I cooked diner tonight and it was yummy… so I decided to write it down in the blog.

My son who was going to assist me in the kitchen asked to create “something with cheese” before I drove to the supermarket, so I complied and added cheese, but if you are going to cook this recipe, you will find that it works even better without the cheese.

This “spanish chicken with chorizo and potatoes” is a variation on a recipe originally published by Nigella Lawson in her book Kitchen and to which I added some of my own ideas. It will cost you a minimum of effort to prepare this meal, since most of your time will be spent sitting in front of the oven and watching the chicken crackle and pop.

The result tastes deliciously because the combination of the spicy chorizo and the orange peel does wonders. I used an oven-proof pyrex dish which makes for a nice presentation when you serve it at the diner table.

Don’t take the amounts too seriously… this dish can not fail you. If you want, just add more chorizo and onion, or try and leave the tomatoes out.

Ingredients (4 persons):

  • 8 chicken drumsticks
  • one onion, cut into rings
  • two table spoons of vegetable oil (olive or sunflower)
  • black pepper, paprika powder
  • 500 grams of chorizo sausages
  • 600 grams of potatoes
  • 300 grams of cherry tomatoes, cut in halves
  • one orange
  • grated young cheese
  • dried oregano

Preparation:

  • Pre-heat the oven to 220°C
  • Cook the potatoes for about 10 minutes. If you do not cook them before they go into the oven, they might not be fully cooked when it is time to serve the dish.
  • While you are waiting for the poratoes, you can continue with the preparations. Pour two table spoons of vegetable oil into a shallow roast pan or pyrex oven dish and mix in a generous sprinkle of paprika powder and ground black pepper.
  • Add the chicken drumsticks to the oily mixture and use your hands to rub the oil into the skin of the drumsticks. If you like to keep your hands clean, you can just as well put the oil, spices and drumsticks into a plastic bag and mix the ingredients thoroughly, then dump them into the roasting pan. Make sure that the skin side of the chicken is pointing upward.
  • Add the chorizo sausages in between the drumsticks. If you bought a large chorizo, chop it up into chunks of a centimeter first.
  • Use a grater or a vegetable peeler to scrape the outer skin off the orange. be sure not to cut into the white inner skin! That tastes foul. We only want the orange outer skin. You end up with orange peel, or zest. Keep the zest. If you want, you can squeeze the juice out of the orange and drink it, we won’t need the juice for this recipe.
  • By now the potatoes will have cooked long enough. Cut them into slices of half a centimetre and place them inbetween the drumsticks, preferable on the bottom of the roasting pan so that they will be fried in the oil (children will love that)
  • The onion rings and the halved cherry tomatoes are placed in between the other ingredients
  • Sprinkle the orange peel on top – the aromatic smell of the zest is enough to make my mouth water!
  • Sprinkle generously with dried oregano
  • Put the dish in the oven and let it cook for 40 minutes. Be sure to open the oven door from time to time and watch those chickens sizzle!
  • If you want to try this with cheese, you have to get the dish out of the oven after 30 minutes and spread grated young cheese on top, accompanied by another sprinkle of oregano.. The final 10 minutes of oven time will allow for a nice layer of molten cheese.

I served this with a green salad mixed with ground nuts, raspberries and spicy cheese (cut into small cubes) and a vinaigrette of raspberry-flavored balsamico (the salad was another idea from my son, which he executed while I was busy with the chicken).

Enjoy your meal!

Eric

« Older posts Newer posts »

© 2024 Alien Pastures

Theme by Anders NorenUp ↑