 It took me a while to get to a level where I could do another public update of my “liveslak” scripts for the Slackware Live Edition. The previous two articles about the Live OS generated quite some feedback and I think I was able to address a lot of those remarks and suggestions in the updated code. My TODO has however only shrunk with one item…
A “Beta3” is what we have now. My milestone for emitting a new Beta was to have a working UEFI boot. And I hope I managed that. Works here… for what it’s worth.
What is Slackware Live Edition?
Please read the previous two articles, “Slackware Live Edition” and “Beta 2” to get a better understanding and so that I do not have to repeat myself too much 🙂
Update 06-jan-2016: please continue reading and commenting in my follow-up article on “Beta 5“.
We’re talking about a “live OS” here, which you can run off a CDROM, a DVD or a USB stick and does not have to be installed to a computer hard drive. You can carry the USB stick version with you in your pocket. You’ll have a pre-configured Slackware OS up & running in a minute wherever you can get your hands on a computer with a USB port. The USB version is “persistent” meaning that the OS stores your updates on the stick. The CD/DVD versions (and the USB stick if you configure it accordingly) run without persistence, which means that all the changes you make to the OS are lost on reboot.
I created “Slackware Live Edition” as a showcase for the development of Slackware. It is not meant as a generic Live Distro generator – it will only support the latest slackware-current. A tool to satisfy your curiosity!
The main script “make_slackware_live.sh” creates an ISO from scratch. The script installs Slackware packages or package sets into compressed “squashfs” modules, configures and optimizes the target filesystem to be run as a Live environment, and then generates an initial ramdisk that will assemble the Live environment when you boot. All that is put into a bootable ISO image file. Thanks to Linux kernel 4.x and the squashfs-tools package added to Slackware-current, the process requires no compilation nor does it need non-standard packages to create a Slackware Live Edition (of course, the Plasma, Mate and Cinnamon flavours do require 3rd party packages). The downside is that the ISO has to be created on Slackware-current (older versions of Slackware do not have the proper tools). It follows that the only Slackware release which is supported as a Live Edition is the “-current” development tree. All future releases will be supported too of course.
The “liveslak” scripts can generate a variety of Slackware flavors. The default script action is to create an ISO from scratch that will give you a complete 64bit Slackware-current Live Edition. The scripts can also create a 700 MB slimmed-down XFCE version with XDM as the graphical login manager which fits on a CDROM medium or a 1 GB USB stick; and for my own enjoyment (as well as yours I may hope) it can create a 3.0 GB ISO image of Slackware64-current but containing Plasma 5 instead of KDE 4, as well as an addition of several other packages I maintain: vlc, libreoffice, calibre, qbittorrent, ffmpeg, chromium, openjdk, veracrypt.
Since Beta 2 the scripts are also capable of generating a Mate and a Cinnamon flavour of Slackware (replacing Slackware’s KDE 4) courtesy of Willy Sudiarto Raharjo’s repositories.
How to create a persistent USB stick?
The ISO can be burnt to a DVD or copied to USB stick using ‘dd’ or just plain ‘cp’, but that will give you a read-only medium where all changes to the Live OS happen in RAM. You can use the ‘iso2usb.sh‘ script to create a Live OS on the USB device with persistence. Changes you make while running Slackware Live will then be preserved across reboots because the OS will write all these changes to the directory “persistence” in the root of the USB device. Typically you would run the script with an input and an output parameter at a minimum:
# ./iso2usb.sh -i ~/Download/slackware64-live-current.iso -o /dev/sdX
… where /dev/sdX is the device name of your USB stick which will get formatted – erasing all data currently stored on it. The iso2usb.sh script will pause to show you the characteristics of the target device and ask you once more if you really want to continue erasing it. You will not easily destroy your harddrive unless you are really not paying attention!
Booting the Live OS
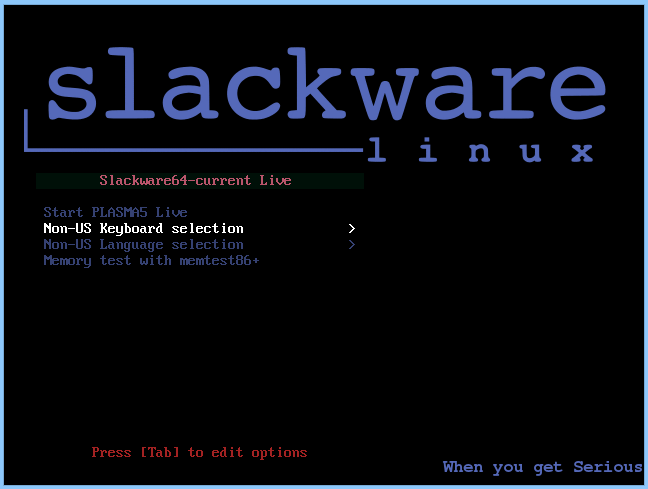
When you boot Slackware Live on a BIOS computer, Syslinux will handle the boot and show the following menu:
- Start (SLACKWARE | PLASMA5 | XFCE | MATE) Live (depending on which of the ISOs you boot)
- Non-US Keyboard selection
- Non-US Language selection
- Memory test with memtest86+
You can select a keyboard mapping that matches your computer’s. And/or boot Slackware in another language than US English. You will probably want to change the timezone; syslinux allows you to edit the boot commandline by pressing <TAB> because the syslinux bootmenu does not offer you a selection of timezones.
On UEFI computers, GRUB2 handles the boot and it will show a menu similar (and similarly themed) as the Syslinux menu:
- Start (SLACKWARE | PLASMA5 | XFCE | MATE) Live (depending on which of the ISOs you boot)
- Non-US Keyboard selection
- Non-US Language selection
- Non-US Timezone selection
- Detect/boot any installed operating system
- Memory test with memtest86+
Grub understands variables, which simplified the creation of the menu greatly and allowed me to add a timezone selection menu. Editing a Grub menu is possible by pressing the ‘e’ key. After making your changes to the boot commandline, press <F10> to boot.
Another difference between Syslinux and Grub menus: in Grub you select keyboard, language and/or timezone and you’ll return to the main menu every time. You still have to select “Start Slackware Live” to boot. In the Syslinux menu, only the keyboard selection menu will return you to (apparently bot not actually) the same main menu. The non-US language selection will boot you into Slackware Live immediately without returning to the main menu. A limitation of syslinux, which could only be overcome by generating a lot more syslinux menu files than we already have.
Boot parameters & tweaks
You can use the following tweaks to the boot commandline:
- 0|1|2|3|4|5|6|S|s|single (Select another runlevel to start with; the default is 4 for graphical login)
- lang=nl_NL kbd=nl tz=Europe/Amsterdam (Example of language, keyboard and/or timezone customization)
- nop (No persistence, i.e. boot the virgin installation in case your ‘persistence’ directory got corrupted)
- nomodeset (Boot with kernel mode setting for graphics — needed with some machines)
- load=nvidia (Load and configure binary Nvidia drivers that are present in some of the ISOs)
- rootdelay=10 (Add 10 second delay to give the kernel more time to initialize USB – try this if the Live OS fails to boot)
- hostname=aliens (Change the hostname for the OS; default hostname is “darkstar“
- livepw=”somestring” (Change the password for the ‘live’ user)
- rootpw=”somestring” (Change the password for the ‘root’ user)
- load=mod1[,mod2[…]] (load one or more squashfs modules that are present in the directory “/liveslack/optional”; by default none of the modules in the “optional” directory are loaded)
- noload=mod1[,mod2[…]] (Prevent loading of one or more squashfs modules that are present in the directory “/liveslack/addons”; by default all of the modules in the “addons” directory are loaded on boot)
- rescue (After initialization, you will be dropped in a rescue shell where you can perform lowlevel maintenance; the same happens anyway if the OS fails to boot)
- debug (During init, pause at strategical locations while assembling the overlay filesystem and show relevant mount information)
- swap (Allow the Live OS to activate all swap partitions it finds on the local hardware; by default, the hard drive will not be touched at all)
- livemedia=/dev/sdX (Tell the init script which partition contains the Slackware Live OS you want to boot; this can become necessary if you have another copy of Slackware Live already installed to another drive partition)
- livemain=directoryname (Use this if you copied the content of the ISO to a different directory than the default “liveslak” directory)
Download the ISO images
I have created ISO images for the SLACKWARE, XFCE, PLASMA5 and MATE flavours using the latest packages available today. You can find them at any of the following locations:
- Primary location: http://taper.alienbase.nl/mirrors/slackware-live/ (rsync URI: rsync://taper.alienbase.nl/mirrors/slackware-live/)
- Willy’s mirror: http://repo.ukdw.ac.id/slackware-live/
- Ryan’s mirror: https://seattleslack.ryanpcmcquen.org/mirrors/slackware-live/
- Shasta’s mirror: http://ftp.slackware.pl/pub/slackware-live/ (rsync: rsync://ftp.slackware.pl/slackware-live/)
Please allow some time to synchronize these mirror servers.
The ISOs have two user accounts: root (with password ‘root’) and live (with password ‘live’). My advice: login as user live and use “su” or “sudo” to get root access.
Can I create an ISO myself?
Certainly! You can download my sources and have a go at it. Apart from the sources & scripts, you will need local copies of the repositories where the packages will be taken from. The Slackware and XFCE ISOs will of course need a mirror of the official Slackware64-current package tree. The Plasma5 ISO requires that you have mirrored my ‘ktown‘ repository as well as my regular SlackBuild repository. The Mate ISO depends on the Slackware mirror as well as Willy’s Mate mirror.
The git repository for the scripts can be found here: http://taper.alienbase.nl/cgit/liveslak/
A checkout of this repository can be found in http://www.slackware.com/~alien/liveslak/ and http://taper.alienbase.nl/mirrors/people/alien/liveslak/
If you wonder how I created the squashfs module (0060-nvidia-352.63_4.1.15-current-x86_64.sxz) containing the Nvidia drivers: I used the SBo scripts for nvidia-kernel and nvidia-driver to compile two packages. I then created a temporary directory and installed the resulting nvidia-kernel, nvidia-driver packages together with Slackware’s xf86-video-nouveau-blacklist package all into that directory (using the command “installpkg –root”). Then I ran the “makemod” script with the temporary directory as first parameter and “0060-nvidia-352.63_4.1.15-current-x86_64.sxz” as the second parameter which created the .SXZ squashfs module which you find in ./graphics/. Simple!
Happy hacking! Eric
Recent comments