 Welcome, music-making (Slackware) Linux-using friends. This article will be an interactive work and probably never finished. I am looking for the best possible setup of my Slackware system for making music without having to revert to a custom Linux Distro like the revered StudioWare.
Please supplement my writings with your expert opinions and point out the holes and/or suggest improvements/alternatives to my setup. Good suggestions in the comments section will be incorporated into the main article.
Your contributions and knowledge are welcomed!
 What is a DAW?
In simple terms, a Digital Audio Workstation is a device where you create and manipulate digital audio.
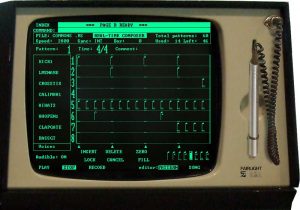
Before the era of personal computing, a DAW would be a complex piece of (expensive) hardware which was only within reach of music studios or artists of name and fame. A good example of an early DAW is the Fairlight CMI (Computer Musical Instrument), released in the late 70’s of the previous century. This Fairlight was also one of the first to offer a digital sampler. The picture at the left of this page is its monitor with a light-pen input.
These days, the name “DAW” is often used for the actual software used to produce music, like the free Ardour, LMMS, or the commercial Ableton Live, FL Studio, Cubase, Pro Tools, etcetera.
But “Digital Audio Workstation” also applies to the computer on which this software is running and whose software and hardware is tailored to the task of creating music. To make it easier for musicians who use Linux, you can find a number of custom distributions with a focus on making electronic music, such as StudioWare (Slackware based but studioware.org seems to be abandoned), AV Linux (Debian based), QStudio64 (Mint based), so that you do not have to spend a lot of time configuring your Operating System and toolkits.
A ready-to-use distro targeting the musician’s workflow is nice, but I am not the average user and want to know what’s going on under the hood. What’s new… And therefore, in the context of this article I am going to dive into the use of a regular Slackware Linux computer as a DAW.
I wrote an earlier article where I focused on the free programs that are available on a Linux platform and for which I created Slackware packages: Explorations into the world of electronic music production.
That article provided a lot of good info (and reader feedback!) about creating music. What lacked, was a good description of how to setup your computer as a capable platform to use all that software on. Slackware Linux out of the box is not setup as a real-time environment where you have low-latency connectivity between your musical hardware and the software. But these capabilities are essential if you want to produce electronic music by capturing the analog signals of physical instruments and converting them to digital audio, or if you want to add layers of CPU intensive post-processing to the soundscape in real-time.
Achieving that will be the topic of the article.
Typical hardware setup
The software you use to create, produce and mix your music… it runs on a computer of course. That computer will benefit from ample RAM and a fast SSD drive. It will have several peripherals connected to it that allow you to unleash your musical creativity:
- a high-quality sound card or external audio interface with inputs for your physical music instruments and mics, sporting a good Analog to Digital Converter (DAC) and adding the least amount of latency.
- an input device like a MIDI piano keyboard or controller, or simply a mouse and typing keyboard.
- a means to listen to the final composite audio signal, i.e. a monitor with a flat frequency response.
In my case, this means:
- USB Audio Interface: FocusRite Scarlett 2i4 2nd Gen
- Voice and instrument recording mics connected to the USB audio interface:
- Rode NT1-A studio microphone with a pop-filter, or
- Behringer C-2 2 studio condenser microphones (matched pair)
- MIDI Input: Novation Launchkey 25 MK2 MIDI keyboard
- Monitor: I use Devine PRO 5000 studio headphones instead of actual studio monitors since i am just sitting in the attic with other people in the house…
- And a computer running Slackware Linux and all the tools installed which are listed in my previous article.
Configuring Slackware OS
We will focus on tweaking OS parameters in such a way that the OS essentially stays ‘out of your way’ when you are working with digital audio streams. You do not want audio glitches, drop-outs or experience out-of-sync inputs. If you are adding real-time audio synthesis and effects, you do not want to see delays. You do not want your computer to start swapping out to disk and bogging down the system. And so on.
Note that for real-time behavior of your applications, you do not have to install a real-time (rt) kernel!
The ‘audio’ group
The first thing we’ll do is decide that we will tie all the required capabilities to the ‘audio’ group of the OS. If your user is going to use the computer as a DAW, you need to add the user account to the ‘audio’ group:
# gpasswd -a your_user audio
All regular users stay out of that ‘audio’ group as a precaution. The ‘audio’ members will be able to claim resources from the OS that can lock or freeze the computer if misused. Your spouse and kids will still be able to fully use the computer – just not wreck havoc.
The kernel
A Slackware kernel has ‘CONFIG_HZ_1000’ set to allow for a responsive desktop, and ‘CONFIG_PREEMPT_VOLUNTARY’ as a sensible trade-off between having good overall throughput (efficiency) of your system and providing low latency to applications that need it.
So you are probably going to be fine with the stock ‘generic’ kernel in Slackware. One tweak though is going to improve on low-latency. One important part of the ‘rt-kernel’ patch set was added to the Linux source code, and that is related to interrupt handling. Threaded IRQs are meant to minimize the time your system spends with all interrupts disabled. Enabling this feature in the kernel is done on the boot command-line, by adding the word ‘threadirqs’ there.
- If you use lilo, open “/etc/lilo.conf” in an editor and add “threadirqs” to the value of the “append=” keyword, and re-run ‘lilo’.
- If you use elilo, open /boot/efi/EFI/Slackware/elilo.conf and add “threadirqs” to the value of the “append = ” keyword
- If you are using Grub, then open “/etc/default/grub” in an editor and add “threadirqs” to the (probably empty) value for “GRUB_CMDLINE_LINUX_DEFAULT”. Then re-generate your Grub configuration.
CPU Frequency scaling
Your Slackware computer is configured by default to use the “ondemand” CPU frequency scaling governor. The kernel will reduce the CPU clock frequency (modern CPU’s support this) if the system is not under high load, to conserve energy. However, much of the load in a real-time audio system is on the DSP, not on the CPU, and the scaling governor will not catch that. It could result in buffer underruns (also called XRUNs). Therefore, it is advised to switch to the “performance” governor instead which will always keep your CPU cores at max clock frequency. To achieve this, open the file “/etc/default/cpufreq” in an editor and add this line (make sure that all other lines are commented out with a ‘#” at the beginnning!):
SCALING_GOVERNOR=performance
After reboot, this modification will be effective.
Note: if you want to use your laptop as a DAW, you may want to re-consider this modification. You do not want to have your CPU’s running at full clockspeed all of the time, it eats your battery life. Make use of this “performance” feature only when you need it.
Real-time scheduling
Your DAW and the software you use to create electronic music, must always be able to carry out their task irrespective of other tasks your OS or your Desktop Environment want to slip in. This means, your audio applications must be able to request (and get) real-time scheduling capabilities from the kernel.
How you do this depends on whether your Slackware uses PAM, or not.
If PAM is installed, RT Scheduling and the ability to claim Locked Memory is configured by creating a file in the “/etc/security/limits.d/” directory – let’s name the file “/etc/security/limits.d/rt_audio.conf” (the name is not relevant, as long as it ends on ‘.conf’) and add the following lines.
# Real-Time Priority allowed for user in the 'audio' group:
# Use 'unlimited' with care,a misbehaving application can
# lock up your system. Try reserving half your physical memory:
#@audio - memlock 2097152
@audio - memlock unlimited
@audio - rtprio 95
If PAM is not part of your system, we use a feature which is not so widely known to achieve almost the same thing: initscript (man 5 initscript). When the shell script “/etc/initscript” is present and executable, the ‘init’ process will use it to execute the commands from inittab. This script can be used to set things like ulimit and umask default values for every process.
So, let’s create that file “/etc/initscript”, add the following block of code to it:
# Set umask to safe level:
umask 022
# Disable core dumps:
ulimit -c 0
# Allow unlimited size to be locked into memory:
ulimit -l unlimited
# Address issue of jackd failing to start with realtime scheduling:
ulimit -r 95
# Execute the program.
eval exec "$4"
And make it executable:
# chmod +x /etc/initscript
The ulimit and umask values that have been configured in this script will now apply to every program started by every user of your computer. Not just members of the ‘audio’ group. You are warned. Watch your kids.
Use sysctl tweaks to favor real-time behavior
The ‘sysctl’ program is used to modify kernel parameters at runtime. We need it in a moment, but first some preparations.
A DAW which relies on ALSA MIDI, benefits from access to the high precision event timer (HPET). We will allow the members of the ‘audio’ group to access the HPET and real-time clock (RTC) which by default are only accessible to root.
We achieve this by creating a new UDEV rule file “/etc/udev/rules.d/40-timer-permissions.rules”. Add the following lines to the file and then reboot to make your changes effective:
KERNEL=="rtc0", GROUP="audio"
KERNEL=="hpet", GROUP="audio"
With access to the HPET arranged, we can create a sysctl configuration file which the kernel will use on booting up. There are a number of audio related ‘sysctl‘ settings that allow for better real-time performance, and we add these settings to a new file “/etc/sysctl.d/daw.conf”. Add the following lines to it:
dev.hpet.max-user-freq = 3072
fs.inotify.max_user_watches = 524288
vm.swappiness = 10
The first line allows the user to access the timers at a higher frequency than the default ’64’. Note that the max possible value is 8192 but a sensible minimum for achieving lower latency is 1024. The second line is suggested by the ‘realtimeconfigquickscan‘ tool, and increases the maximum number of files that the kernel can track on behalf of the programs you are using (no proof that this actually improves real-time behavior). And the third line will prevent your system from starting to swap too early (its default value is ’60’) which is a likely cause for XRUNs.
Disable scheduled tasks of the OS and your DE
The suggestions above are mostly kernel related, but your own OS and more specifically, the Desktop Environment you are using can get in the way of real-time behavior you want for your audio applications.
General advice:
- Disable your desktop’s Compositor (KWin in KDE Desktop, Compiz on XFCE and Gnome Desktop). Compositing requires a good GPU supporting OpenGL hardware acceleration but still this will put a load on your CPU and in particular on the application windows.
Desktop-specific:
- Plasma 5 Desktop
- The most obvious candidate to mess with your music making process is Baloo, the file indexer. The first time Baloo is started on a new installation, it will seriously bog down your computer and eat most of its CPU cycles while it works its way through your files.
If you really want to keep using Baloo (it allows for a comfortable file search in Plasma5) you could at least disable file content indexing and merely let it index the filenames (similar to console-based ‘locate’).
Go to “System Settings > Workspace > Search > File search” and un-check “also index file content”
If you want to completely disable Baloo so that you can not re-enable it anymore with any command or tool, do a manual edit of ${HOME}/.config/baloofilerc and make sure that the “[Basic Settings]” section contains the following line:
Indexing-Enabled=false - In KDE, the Akonadi framework is responsible for providing applications with a centralized database to store, index and retrieve the user’s personal information including the user’s emails, contacts, calendars, events, journals, alarms, notes, etc. The alerts this framework generates can interfere with real-time audio recording, so you can disable Akonadi if you want by running “akonadictl stop” in a terminal, under your own user account. Then make sure that your desktop does not auto-start applications which use Akonadi, Also, open the configuration of your desktop Clock and uncheck “show events” to prevent a call into Akonadi.
Read more on https://userbase.kde.org/Akonadi/nl#Disabling_the_Akonadi_subsystem - Compositing is another possible resource hog, especially when your computer is in the middle-or lower range. You can easily toggle (disable/re-enable) the desktop compositor by pressing the “Shift-Alt-F12” key combo.
Note that if you use Latte-dock as your application starter, this will not like the absence of a Compositor. You’ll have to switch back to KDE Plasma’s standard menus to start your applications.
- The most obvious candidate to mess with your music making process is Baloo, the file indexer. The first time Baloo is started on a new installation, it will seriously bog down your computer and eat most of its CPU cycles while it works its way through your files.
Selecting your audio interface
You may not always have your high-quality USB audio interface connected to your computer. When the computer boots, ALSA will decide for itself which device will be your default audio device and usually it will be your internal on-board sound card.
You can inspect your computer’s audio devices that ALSA knows about. For instance, my computer has onboard audio, then the HDMI connector on the Nvidia GPU provides audio-out; I have a FocusRite Scarlett 2i4, an old Philips Web Cam with an onboard microphone and I have loaded the audio loopback module. That makes 5 audio devices, numbered by the kernel from 0 to 4 with the lowest number being the default card:
$ cat /proc/asound/cards
0 [NVidia_1    ]: HDA-Intel - HDA NVidia
                  HDA NVidia at 0xdeef4000 irq 22
1 [NVidia      ]: HDA-Intel - HDA NVidia
                  HDA NVidia at 0xdef7c000 irq 19
2 [USB         ]: USB-Audio - Scarlett 2i4 USB
                  Focusrite Scarlett 2i4 USB at usb-0000:00:02.1-2, high speed
3 [U0x4710x311 ]: USB-Audio - USB Device 0x471:0x311
                  USB Device 0x471:0x311 at usb-0000:00:02.0-3, full speed
4 [Loopback ]: Loopback - Loopback
               Loopback 1
Note that these cards can be identified when using ALSA commands and configurations, both by their hardware index (hw0, hw2) and by their ‘friendly name‘ (‘Nvidia_1’, ‘USB’).
Once you know which cards are present, you can inspect which kernel modules are loaded for these cards – The same indices as shown in the previous ‘cat /proc/asound/cards‘ command are also listed in the output of the next command:
$ cat /proc/asound/modules
0 snd_hda_intel
1 snd_hda_intel
2 snd_usb_audio
3 snd_usb_audio
4 snd_aloop
You’ll notice that some cards use the same kernel module. If you want to deterministically number your sound devices instead allowing the kernel to probe and enumerate your hardware, you’ll have to perform some wizardry in the /etc/modprobe.d/ directory.
Using pulseaudio you can change the default audio output device on the fly.
First you determine the naming of devices in pulseaudio (it’s quite different from what you saw in ALSA) with the following command which lists the available outputs (called sinks by pulseaudio):
$ pactl list short sinks
0 alsa_output.usb-Focusrite_Scarlett_2i4_USB-00.analog-surround-40 module-alsa-card.c s32le 4ch 48000Hz SUSPENDED
1 alsa_output.pci-0000_00_05.0.analog-stereo module-alsa-card.c s32le 2ch 48000Hz SUSPENDED
3 alsa_output.platform-snd_aloop.0.analog-stereo module-alsa-card.c s32le 2ch 48000Hz SUSPENDED
4 jack_out module-jack-sink.c float32le 2ch 48000Hz RUNNING
11 alsa_output.pci-0000_02_00.1.hdmi-stereo-extra1 module-alsa-card.c s32le 2ch 48000Hz SUSPENDED
You see which device is the default because that will be the only one that is in ‘RUNNING’ state and not ‘SUSPENDED’. Subsequently you can change the default output device, for instance to the FocusRite interface:
$ pactl set-default-sink alsa_output.usb-Focusrite_Scarlett_2i4_USB-00.analog-surround-40
You can use these commands to help you deciding which to use as your default device if you un-plug your USB audio interface, or if you want to let your system sounds be handled by an on-board card while you are working on a musical production using your high-quality USB audio interface – each device with their own set of speakers.
Connecting the dots: ALSA -> Pulseaudio -> Jack
![]() The connecting element in all the software tools of your DAW is the Jack Audio Connection Kit, or Jack for short. Jack is a sound server – it provides the software infrastructure for audio applications to communicate with each other and with your audio hardware. All my DAW-related software packages have been compiled against the Jack libraries and thus can make use of the Jack infrastructure once Jack daemon is started.
The connecting element in all the software tools of your DAW is the Jack Audio Connection Kit, or Jack for short. Jack is a sound server – it provides the software infrastructure for audio applications to communicate with each other and with your audio hardware. All my DAW-related software packages have been compiled against the Jack libraries and thus can make use of the Jack infrastructure once Jack daemon is started.
Once Jack takes control, it talks directly to ALSA sound system.
Slackware uses the ALSA sound architecture since replacing the old OSS (open sound system) with it, many years ago. ALSA is the kernel-level interface to your audio hardware combined with a set of user-land libraries and binaries to allow your applications to use your audio hardware.
Pulseaudio is a software layer which was added to Slackware 14.2. Basically it is a sound server (similar to Jack) which interfaces between ALSA and your audio applications, providing mixing and re-sampling capabilities that expand on what ALSA already provides. It deals with dynamic adding and removing of audio hardware (like head-phones) and can transfer audio streams over the network to other Pulseaudio servers.
Musicians and audiophiles sometimes complain that Pulseaudio interferes with the quality of the audio. Mostly this is caused by the resampling that Pulseaudio may do when combining different audio streams but this can be avoided by configuring your system components to all use a single sample rate like 44,1 or 48 KHz. Also, in recent years the quality of the Pulseaudio software has improved quite a bit.
When Jack starts it will interface directly to ALSA, bypassing Pulseaudio entirely. What that means is that all your other applications that are not Jack-aware suddenly stop emitting sound because they still play via Pulseaudio. Luckily, we can fix that easily, and without using any custom scripting.
All it takes is the Jack module for Pulseaudio. The source code for this module is part of Pulseaudio but it is not compiled and installed in Slackware since Slackware does not contain Jack. So what I did is create a package which compiles just that Pulseaudio Jack module. You should install my “pulseaudio-jack” package from my repository. The module contains a library responsible for detecting when jack starts and then enables ‘source’ and ‘sink’ for Pulseaudio-aware applications to use.
The main pulseaudio configuration file “/etc/pulse/default.pa” already contains the necessary lines to support the pulseaudio-jack module:
### Automatically connect sink and source if JACK server is present
.ifexists module-jackdbus-detect.so
.nofail
load-module module-jackdbus-detect channels=2
.fail
.endif
The only thing you need to do is ensuring that jackdbus is started. If you use qjackctl to launch Jack, you need to check the “Enable D-Bus interface” and “Enable JACK D-Bus interface” boxes in “Setup -> Misc”. See next section for more details on using QJackCtl.
In 2020 this is all it takes to route all output from your ALSA and Pulseaudio applications through Jack.
Easy configuration of Jack through QJackCtl
The Jack daemon can be started and configured all from the commandline and through scripts. But when your graphical DAW software runs inside a modern Desktop Environment like XFCE or KDE Plasma5, why not take advantage of graphical utilities to control the Jack sound server?
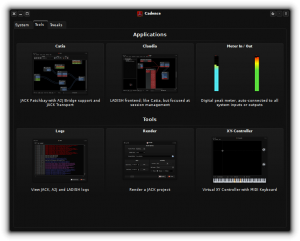
DAW-centric distros will typically ship with the Cadence Tools, which is a set of Qt5 based applications written for the KXStudio project (consisting of Cadence itself and also Catarina, Catia and Claudia) to manage your Jack audio configuration easily. Note that I have not created packages for Cadence Tools but if there’s enough demand I will certainly consider it, since this toolkit should work just fine in Slackware:
For a Qt5 based Desktop Environment like KDE Plasma5, a control application like QJackCtl will blend in just as well. While it’s more simplistic than Cadence, it does a real good job nevertheless. Its author offers several other very nice audio programs at https://www.rncbc.org/ like QSampler and the Vee One Suite of old-skool synths.
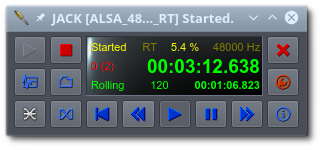
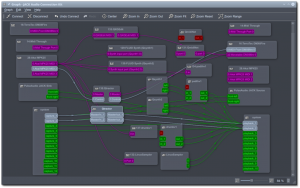
Like Cadence, QJackCtl offers a graphical user interface to connect your audio inputs and outputs, allowing you to create any setup you can imagine:
 QJackCtl can be configured to run the Jack daemon on startup and enable Jack’s Dbus interface. Stuff like defining the samplerate, the audio device to use, the latency you allow, etcetera is also available. And if you tell the Desktop Session Manager to autostart qjackctl when you login, you will always have Jack ready and waiting for you.
Turning theory into practice
The reason for writing up this article was informational of course, since this kind of comprehensive detail is not readily available for Slackware. With all the directions shared above you should now be able to tune your computer to make it suited for some good music recording and production, and possibly live performances.
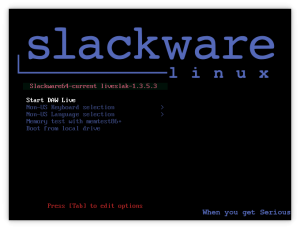
A secondary goal of the research into the article’s content was to gain a better understanding of how to put together my own Slackware based DAW Live OS. All of the above knowledge is being put into the liveslak scripts and Slackware Live Edition now has a new variant next to PLASMA5, SLACKWARE, XFCE, etc… it is “DAW“.
I am posting ISO images of this Slackware Live DAW Edition to https://martin.alienbase.nl/mirrors/slackware-live/pilot/ and hope some of you find it an interesting enough concept that you want to try it out.
Note that you’ll get a ~ 2.5 GB ISO which boots into a barebones KDE Plasma5 Desktop with all my DAW tools present and Jack configured, up and running. User accounts are the same as with any Slackware Live Edition: users ‘live‘ and ‘root‘ with passwords respectively ‘live‘ and ‘root‘.
Why KDE Plasma5 as the Desktop of choice? Isn’t this way too heavy on resources to provide a low-latency workflow with real-time behaviour?
Well actually… the resource usage and responsiveness of KDE Plasma5 is on par or even better than the light-weight XFCE. Which is the reason why an established distro like Ubuntu Studio is migrating from XFCE to KDE Plasma5 for their next release (based on Ubuntu 20.10) and KXStudio targets the KDE Plasma5 Desktop as well.
You can burn the ISO to a DVD and then use it as a real ‘live’ OS which is fresh and pristine on every boot, or use the ‘iso2usb.sh’ script which is part of liveslak to copy the content of the ISO to a USB stick – which adds persistency, application state saving and additional storage capability. The USB option also allows you to set new defaults for such things as language, keyboard layout, timezone etc so that you do not have to select those everytime through the bootmenus.
If your computer has sufficient RAM (say, 8 GB or more), you should consider loading the whole Live OS into RAM (using the ‘toram’ boot parameter) and have a lightning-fast DAW as a result. My tests with a USB stick with USB-3 interface was that it takes 2 to 3 minutes to load the 2.5 GB into RAM, which compares to nothing if your DAW session will be running for hours.
Shout out
A big help was the information in the Linux Audio Wiki, particularly this page: https://wiki.linuxaudio.org/wiki/system_configuration. In fact, I recommend that you absorb all of the information there.
On that page, you will also find a link to a Perl program “realtimeconfigquickscan” which can scan your system and report on the readiness of your computer for becoming a Digital Audio Workstation.
Good luck! Eric
Recent comments