Hi all!
 This is already the third episode in a series of articles I am writing about using Slackware as your private/personal ‘cloud server’. Time flies when you’re having fun.
We’re still waiting for Slackware 15.0 and in the meantime, I thought I’d speed up the release of my article on Video Conferencing. My initial plan was to release one article per week after Slackware 15 had been made available. The latter still did not happen (unstuck in time again?) but then I realized, an article about Docker and another about Keykloak still won’t give you something tangible and productive to run and use. So here is Episode 3, a couple of days earlier than planned, to spend your lazy sunday on: create your own video conferencing platform.
Episodes 4 and 5 won’t be far off, since I have already written those as well.
Check out the list below which shows past, present and future episodes in the series, if the article has already been written you’ll be able to click on the subject.
The first episode also contains an introduction with some more detail about what you can expect.
- Episode 1: Managing your Docker Infrastructure
- Episode 2: Identity and Access management (IAM)
- Episode 3 (this article): Video Conferencing
Setting up Jitsi Meet – the Open Source video conferencing platform. This makes us independent of cloud conferencing services like MS Teams, Zoom or Google Meet. The Jitsi login is offloaded to our Keycloak IAM provider.- Jitsi Meet on Docker
- Preamble
- Initial Configuration
- Adding Etherpad integration
- Creating application directories
- Starting Jitsi Meet
- Considerations about the “.env” file
- Upgrading Docker-Jitsi-Meet
- Apache reverse proxy setup
- Fixing Etherpad integration
- Network troubleshooting
- Creating internal Jitsi accounts
- Connecting Jitsi and Keycloak
- Adding jitsi-keycloak
- Configuration of jitsi-keycloak in the Keycloak Admin console
- Remaining configuration done in jitsi-keycloak
- Configure docker-jitsi-meet for use of jitsi-keycloak
- Firing up the bbq
- Thanks
- Attribution
- Episode 4: Productivity Platform
- Episode 5: Collaborative document editing
- Episode 6: Etherpad with Whiteboard
- Episode 7: Decentralized Social Media
- Episode 8: Media streaming platform
- Episode 9: Cloudsync for 2FA Authenticator
- Episode X: Docker Registry
Secure Video Conferencing
Actually, my original interest in Docker was raised in the beginning of 2020 when the Corona pandemic was new, everybody was afraid and people were sent home to continue work and school activities from there.
One of the major challenges for people was to stay connected. Zoom went from a fairly obscure program to a hugely popular video conferencing platform in no time at all (until severe security flaws made a fair-sized dent in its reputation); Microsoft positioned its Teams platform as the successor of Skype but targets mostly corporate users; Google Hangouts became Google Meet and is nowadays the video conferencing platform of choice for all corporations that have not yet been caught in the Microsoft vendor lock-in.
None of these conferencing platforms are open source and all of them are fully cloud-hosted and are inseparable from privacy concerns. In addition, un-paid use of these platforms imposes some levels of limitation to the size and quality of your meetings. As a user, you do not have control at all.
Enter Jitsi, whose Jitsi Meet platform is available for everybody to use online for free and without restrictions. Not just free, but Open Source, end-to-end encrypted communication and you can host the complete infrastructure on hardware that you own and control.
People do not even have to create an account in order to participate – the organizer can share a URL with everyone who (s)he wants to join a session.
![]() Jitsi is not as widely known as Zoom, and that is a pity. Therefore this Episode in my Slackware Cloud Server series will focus on getting Jitsi Meet up and running on your server, and we will let login be handled by the Keycloak Identity and Access Management (IAM) tool which we have learnt to setup in the previous Episode.
Jitsi is not as widely known as Zoom, and that is a pity. Therefore this Episode in my Slackware Cloud Server series will focus on getting Jitsi Meet up and running on your server, and we will let login be handled by the Keycloak Identity and Access Management (IAM) tool which we have learnt to setup in the previous Episode.
In early 2020, when it became clear that our Slackware coreteam member Alphageek (Erik Jan Tromp) would not stay with us for long due to a terminal illness, I went looking for a private video conferencing platform for our Slackware team and found Jitsi Meet.
I had no success in getting it to work on my Slackware server unfortunately. Jitsi Meet is a complex product made of several independent pieces of software which need to be configured ‘just right‘ to make them work together properly. I failed. I was not able to make it work in time to let alphageek use it.
But I also noticed that Jitsi Meet was offered as a Docker-based solution. That was the start of a learning process full of blood sweat & tears which culminated in this article series.
With this article I hope to give you a jump-start in getting your personal video conferencing platform up and running. I will focus on the basic required functionality but I will leave some of the more advanced scenarios for you to investigate: session recording; automatic subtitling of spoken word; integrating VOIP telephony; to name a few.
Jitsi Meet on Docker
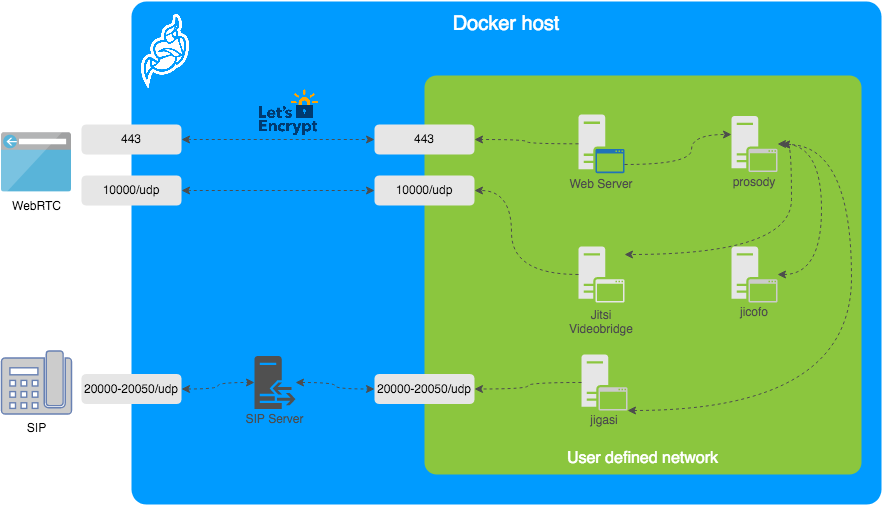
Docker-Jitsi-Meet is a Jitsi Github project which uses Docker Compose to create a fully integrated Jitsi application stack which works out of the box. All internal container-to-container configurations are pre-configured.
As you can see from the picture below, the only network ports that need to be accessible from the outside are the HTTPS port (TCP port 443) of your webserver, UDP port 10000 for the WebRTC (video) connections and optionally (not discussed in my article) UDP port range 20000 – 20050 for allowing VOIP telephones to take part in Jitsi meetings.
![]() These ports need to be opened in your server firewall.
These ports need to be opened in your server firewall.
Installing docker-jitsi-meet is relatively straight-forward if you go the quick-start page and follow the instructions to the letter. Integrating Jitsi with Keycloak involves using a connector which is not part of either programs; I will show you how to connect them all.
You will be running all of this in Docker containers eventually, but there’s stuff to download, edit and create first. I did not say it was trivial…
Preamble
For the sake of this instruction, I will use the hostname “https://meet.darkstar.lan” as the URL where users will connect to their conferences; The server’s public IP address will be “10.10.10.10“.
Furthermore, “https://sso.meet.darkstar.lan” will be the URL for the connector between Jitsi and Keycloak and “https://sso.darkstar.lan/auth” is the Keycloak base URL (see Episode 2 for how we did the Keycloak setup).
Setting up your domain (which will hopefully be something else than “darkstar.lan”…) with new hostnames and then setting up web servers for the hostnames in that domain is an exercise left to the reader. Before continuing, please ensure that your equivalents for the following two hosts have a web server running. They don’t have to serve any content yet but we will add some blocks of configuration to their VirtualHost definitions during the steps outlined in the remainder of this article:
- meet.darkstar.lan
- sso.meet.darkstar.lan
I expect that your Keycloak application is already running at your own real-life equivalent of https://sso.darkstar.lan/auth .
Using a Let’s Encrypt SSL certificate to provide encrypted connections (HTTPS) to your webserver is documented in an earlier blog article.
Note that I am talking about webserver “hosts” but in fact, all of these are just virtual webservers running on the same machine, at the same IP address, served by the same Apache httpd program, but with different DNS entries. There is no need at all for multiple computers when setting up your Slackware Cloud server.
Initial Configuration
Download and extract the tarball of the latest stable release: https://github.com/jitsi/docker-jitsi-meet/releases/latest into the “/usr/local/” directory. Basically any directory will do but I am already backing up /usr/local so the Jitsi stuff will automatically be taken into backup with all the rest.
At the moment of writing, the latest stable version number is ‘6826‘. Which means, after extracting the tarball we do:
cd /usr/local/docker-jitsi-meet-stable-6826/
A Jitsi Meet container stack for Docker Compose is defined in the file “docker-compose.yml” which you find in this directory.
In addition to this YAML file, the ‘docker-compose‘ program parses a file named “.env” if it exists in the same directory. Its content is used to initialize the container environment. You can for instance store passwords and other secrets in “.env” but also all the configuration variables that define how your stack will function.
Docker-Jitsi-Meet ships an example environment file containing every configurable option, but mostly commented-out.
Configuration:
We start with creating a configuration file “.env” from the example file “env.example“:
$ cp -i env.example .env
And then edit the “.env” file to define our desired configuration.
First of all,
- Change “
CONFIG=~/.jitsi-meet-cfg” to “CONFIG=/usr/share/docker/data/jitsi-meet-cfg” because I do not want application data in my user’s or root’s homedirectory.
Then the ones that are easy to understand:
- Change “
HTTP_PORT=8000” to"HTTP_PORT=8440” because port 8000 is used by far too many applications. Port 8440 is what we will use again in the reverse proxy configuration. - Change “
TZ=UTC” to “TZ=Europe/Amsterdam” or whatever timezone your server is in. - Change “
#PUBLIC_URL=https://meet.example.com” to “PUBLIC_URL=https://meet.darkstar.lan/” i.e. change it to the URL where you want people to connect. The connections will be handled by your Apache httpd server who will manage the traffic back and forth between Jitsi container and the client. - Change “
#DOCKER_HOST_ADDRESS=192.168.1.1” to “DOCKER_HOST_ADDRESS=10.10.10.10” where of course “10.10.10.10” needs to be replaced by your server’s actual public Internet IP address.
Other settings that I would explicitly enable but their commented-out values are the default values anyway (matter of taste, it avoids getting bitten by a future change in application default settings):
- “
ENABLE_LOBBY=1“; “ENABLE_PREJOIN_PAGE=1“; “ENABLE_WELCOME_PAGE=1“; “ENABLE_BREAKOUT_ROOMS=1“; “ENABLE_NOISY_MIC_DETECTION=1“.
IPv6 Network consideration:
- Change “
#ENABLE_IPV6=1” to “ENABLE_IPV6=0” if your Docker installation has ipv6 disabled. This is a requirement if your host server would have ipv6 disabled.
You can find out whether ipv6 is disabled in Docker, because in that case the file “/etc/docker/daemon.json” will contain this statement:{ "ipv6": false }
Connection encryption:
- Change “
#DISABLE_HTTPS=1” to “DISABLE_HTTPS=1“. We disable HTTPS in the container because we will again use Apache http reverse proxy to handle encryption. - Change “
#ENABLE_LETSENCRYPT=1” to “ENABLE_LETSENCRYPT=0” because we do not want the container to handle automatic certificate renewals – it’s just too much of a hassle on a server where you already run a webserver on ports 80 and 443. Our Apache reverse proxy is equipped with a Let’s Encrypt SSL certificate and I want to handle SSL certificate renewals centrally – on the host.
Authentication:
The authentication will be offloaded to Keycloak using JSON Web Tokens aka ‘JWT‘ for the inter-process communication. The following variables in “.env” need to be changed:
- “
#ENABLE_AUTH=1” should become “ENABLE_AUTH=1“ - “
#ENABLE_GUESTS=1” should become “ENABLE_GUESTS=1“ - “
#AUTH_TYPE=internal” should become “AUTH_TYPE=jwt“ - “
TOKEN_AUTH_URL=https://auth.meet.example.com/{room}” should become “TOKEN_AUTH_URL=https://sso.meet.darkstar.lan/{room}“ - “
#JWT_APP_ID=my_jitsi_app_id” should become “JWT_APP_ID=jitsi“ - “
#JWT_APP_SECRET=my_jitsi_app_secret” should become “JWT_APP_SECRET=NmjPGpn+NjTe7oQUV9YqfaXiBULcsxYj“
Actually, to avoid confusion: my proposed value of “
JWT_APP_SECRET"(the string “NmjPGpn+NjTe7oQUV9YqfaXiBULcsxYj”) is a value which you will be generating yourself a few sections further down. It is a string which is used by two applications to establish mutual trust in their intercommunication.
We will re-visit the meaning and values of JWT_APP_ID and JWT_APP_SECRET in a moment.
When our modifications to the “.env” file are complete, we run a script which will fill the values for all PASSWORD variables with random strings (this can be done at any time really):
$ ./gen-passwords.sh
Note that in later versions of docker-jitsi-meet, the
env.examplefile has become a lot smaller. Docker Jitsi has implemented all variables with default values. Beware that these defaults might not be working for your case!
The full documentation on configurable parameters is found at:
https://jitsi.github.io/handbook/docs/devops-guide/devops-guide-docker
Adding Etherpad integration
Etherpad is an online editor for real-time collaboration. The Docker version of Jitsi Meet is able to integrate Etherpad into your video conferences. I am going to show you how to run Etherpad on your Slackware Cloud server and integrate collaborative editing into your video meetings.
The git checkout of ‘docker-jitsi-meet‘ into /usr/local/docker-jitsi-meet-stable-6826/will have given you not only a docker-compose.yml file which starts Jitsi and its related containers, but also a file etherpad.yml. This is a Docker Compose file which starts an Etherpad container and connects it to the Jitsi Meet container stack.
FYI: you can use Docker Compose to process multiple YAML files in one command-line instead of implicitly processing only the ‘docker-compose.yml’ file (which happens if you do not explicitly mention the YAML filename in a “-f” parameter).
For instance if you wanted to start Jitsi and Etherpad together, you would use a command like this, using two “-f” parameters to specify the two YAML files:
# docker-compose -f docker-compose.yml -f etherpad.yml up -d
But I found out the hard way that this is risky.
Because sometime in the future you may want to bring that container stack down, for instance to upgrade Jitsi Meet to the latest version. If you forget that you had actually started two stacks (I consider the ‘etherpad.yml’ as the source for a second stack ) and you simply run “docker-compose down” in the directory… then only the Jitsi Meet stack will be brought down and Etherpad will happily keep running.
To protect myself from my future self, I have copied the content of ‘etherpad.yml‘ and added it to the bottom of ‘docker-compose.yml‘, so that I can simply run:
# docker-compose up -d
I leave it up to you to pick either scenario. Whatever works best for you.
Now on to the stuff that needs fixing because the standard configuration will not result in a working Etherpad integration.
First of all, add a “ports” configuration to expose the Etherpad port outside of the container. This is how that looks in the YAML file:
# Etherpad: real-time collaborative document editing
etherpad:
    image: etherpad/etherpad:1.8.6
    restart: ${RESTART_POLICY}
    ports:
        - '127.0.0.1:9001:9001'
    environment:
        - TITLE=${ETHERPAD_TITLE}
        - DEFAULT_PAD_TEXT=${ETHERPAD_DEFAULT_PAD_TEXT}
        - SKIN_NAME=${ETHERPAD_SKIN_NAME}
        - SKIN_VARIANTS=${ETHERPAD_SKIN_VARIANTS}
networks:
    meet.jitsi:
        aliases:
            - etherpad.meet.jitsi
You will also have to edit the “.env” file a bit more. Look for the ETHERPAD related variables and set them like so:
# Set etherpad-lite URL in docker local network (uncomment to enable)
ETHERPAD_URL_BASE=http://etherpad.meet.jitsi:9001
# Set etherpad-lite public URL, including /p/ pad path fragment (uncomment to enable)
ETHERPAD_PUBLIC_URL=https://meet.darkstar.lan/pad/p/
# Name your etherpad instance!
ETHERPAD_TITLE=Slackware EtherPad Chat
# The default text of a pad
ETHERPAD_DEFAULT_PAD_TEXT="Welcome to Slackware Web Chat!\n\n"
The most important setting is highlighted in green: “https://meet.darkstar.lan/pad/p/” . This is the external URL where we will expose our Etherpad. Since the Docker container exposes Etherpad only at the localhost address “127.0.0.1:9001” we need to setup yet another Apache reverse proxy. See the section “Apache reverse proxy setup” below.
There is one potential snag and you have to consider the implications: in the above proposed setup we expose Etherpad in the “/pad/” subdirectory of our Jitsi Meet server. But the Jitsi conference rooms also are exposed as a subdirectory, but then without the trailing slash. Which means everything will work just fine as long as nobody decides to call her conference room “pad” – that can lead to unexpected side effects. You could remedy that by choosing a more complex string than “/pad/” for Etherpad, or else setup a separate web host (for instance “etherpad.darkstar.lan“) just for Etherpad.
In any case, with all the preliminaries taken care of, you can continue with the next sections of the article.
Note: After starting the containers, you will have to do one last edit in the configuration of Jitsi Meet to actually make Etherpad available in your videomeetings. See the section “Fixing Etherpad integration” below.
I am still investigating the integration of Keycloak authentication with Etherpad. Once I am sure I have a working setup, I will do a write-up on the subject in a future article in this series. In the meantime, you need to realize that your Etherpad is publicly accessible.
Creating application directories
The various Docker containers that make up Docker-Jitsi-Meet need to write data which should persist across reboots. The “CONFIG” variable in “.env” points to the root of that directory structure and we need to create the empty directory tree manually before firing up the containers.
Using one smart command which will be expanded by Bash to a lot of ‘mkdir‘ commands:
# mkdir -p /usr/share/docker/data/jitsi-meet-cfg/{web/letsencrypt,transcripts,prosody/config,proso
dy/prosody-plugins-custom,jicofo,jvb,jigasi,jibri}
Starting Jitsi Meet
# cd /usr/local/docker-jitsi-meet-stable-*

# docker-compose up -d
With an output that will look somewhat like:
Creating network "docker-jitsi-meet-stable-4548-1_meet.jitsi" with the default driver
Creating docker-jitsi-meet-stable-4548-1_prosody_1 ... done
Creating docker-jitsi-meet-stable-4548-1_web_1 ... done
Creating docker-jitsi-meet-stable-4548-1_jicofo_1 ...
Creating docker-jitsi-meet-stable-4548-1_jvb_1 ...
...
Pulling web (jitsi/web:stable-4548-1)...
stable-4548-1: Pulling from jitsi/web
b248fa9f6d2a: Pull complete
173b15edefe3: Pull complete
3242417dae3a: Pull complete
331e7c5436be: Pull complete
6418fea5411e: Pull complete
0123aaecd2d8: Pull complete
bd0655288f32: Pull complete
f2905e1ad808: Pull complete
8bcc7f5a0af7: Pull complete
20878400e460: Extracting [====================================> ]
84.67MB/114.9MBB
..... etcetera
And that’s it. Our Jitsi Meet video conferencing platform is up and running.
But it is not yet accessible: we still need to connect the container stack to the outside world. This is achieved by adding an Apache httpd reverse proxy between our Docker stack and the users. See below!
Considerations about the “.env” file
Note that the “.env” file is only used the very first time ‘docker-compose‘ starts up your docker-jitsi-meet container stack, in order to populate /usr/share/docker/data/jitsi-meet-cfg/ and its subdirectories.
After that initial start of the docker-jitsi-meet container stack you can tweak your setup by editing files in the /usr/share/docker/data/jitsi-meet-cfg/ directory tree, since these directories are mounted inside the various containers that make up Docker-Jitsi-Meet.
But if you ever edit that “.env” file again… you need to remove and re-create the directories below /usr/share/docker/data/jitsi-meet-cfg/ and restart the container stack.
NOTE: ‘docker-compose stop‘ stops all containers in the stack which was originally created by the ‘docker-compose up -d‘ command. Using ‘down‘ instead of ‘stop‘ will additionally remove containers and networks as defined in the Compose file(s). After using ‘down‘ you would have to use ‘up -d‘ instead of ‘start‘ to bring the stack back online.
This is how you deal with “.env” configuration changes:
# cd /usr/local/docker-jitsi-meet-stable-*
# docker-compose stop
# vi .env
# ... make your changes
# rm -rf /usr/share/docker/data/jitsi-meet-cfg/
# mkdir -p /usr/share/docker/data/jitsi-meet-cfg/{web/letsencrypt,transcripts,prosody/config,prosody/prosody-plugins-custom,jicofo,jvb,jigasi,jibri}
# docker-compose start
Upgrading Docker-Jitsi-Meet
You don’t need to follow the above process if you want to upgrade Docker-Jitsi-Meet to the latest stable release as part of life cycle management, but with an un-changed “.env” file. In such a case, you simply execute:
# cd /usr/local/docker-jitsi-meet-stable-*

# docker-compose down

# docker-compose pull

# docker-compose up -d
Apache reverse proxy setup
We need to connect the users of our Jitsi and Etherpad services to the containers. Since these containers are exposed by Docker only at the loopback address (127.0.0.1 aka localhost) we use the Apache httpd’s ‘reverse proxy‘ feature.
These three blocks of text need to be added to the VirtualHost definition for your “meet.darkstar.lan” webserver so that it can act as a reverse proxy and connects your users to the Docker Jitsi Meet and Etherpad containers:
Generic block:
SSLProxyEngine on
RequestHeader set X-Forwarded-Proto "https"
ProxyTimeout 900
ProxyVia On
ProxyRequests Off
ProxyPreserveHost On
Options FollowSymLinks MultiViews
AllowOverride All
Order allow,deny
allow from all
Specific to Jitsi Meet:
<Location />
    ProxyPass http://127.0.0.1:8440/
    ProxyPassReverse http://127.0.0.1:8440/
</Location>
# Do not forget WebSocket proxy:
RewriteEngine on
RewriteCond %{HTTP:Connection} Upgrade [NC]
RewriteCond %{HTTP:Upgrade} websocket [NC]
RewriteRule ^/?(.*) "ws://127.0.0.1:8440/$1" [P,L]
And specific to Etherpad:
<Location /pad/>
    ProxyPass http://127.0.0.1:9001/ retry=0 timeout=30
    ProxyPassReverse http://127.0.0.1:9001/
    AddOutputFilterByType SUBSTITUTE text/html
    Substitute "s|meet.darkstar.lan/|meet.darkstar.lan/pad/|i"
</Location>
<Location pad/socket.io>
    # This is needed to handle websocket transport through the proxy, since
    # etherpad does not use a specific sub-folder, such as /ws/
    # to handle this kind of traffic.
    RewriteEngine On
    RewriteCond %{QUERY_STRING} transport=websocket [NC]
    RewriteRule /(.*) ws://127.0.0.1:9001/socket.io/$1 [P,L]
    ProxyPass http://127.0.0.1:9001/socket.io retry=0 timeout=30
    ProxyPassReverse http://127.0.0.1:9001/socket.io
    AddOutputFilterByType SUBSTITUTE text/html
    Substitute "s|meet.darkstar.lan/|meet.darkstar.lan/pad/|i"
</Location>
In “127.0.0.1:8440” you will recognize the TCP port 8440 which we configured for the Jitsi container in the “.env" file earlier. The “127.0.0.1:9001” corresponds to the port 9001 which we exposed explicitly in the ‘docker-compose.yml‘ file for the Etherpad service.
After adding this reverse proxy configuration and restarting Apache httpd. your video conference server will be publicly accessible at https://meet.darkstar.nl/ .
Fixing Etherpad integration
I told you earlier that you needed to make a final edit after the Jitsi Meet stack is up & running to fix the Etherpad integration.
Open the stack’s global config file “/opt/jitsi-meet-cfg/web/config.js” in your editor and look for this section of text:
// If set, add a "Open shared document" link to the bottom right menu that

// will open an etherpad document.

// etherpad_base: 'https://meet.darkstar.lan/pad/p/',
You need to un-comment the last line so that this section looks like:
// If set, add a "Open shared document" link to the bottom right menu that

// will open an etherpad document.

etherpad_base: 'https://meet.darkstar.lan/pad/p/',
It’s a long-standing bug apparently.
Note that in newer releases of docker-jitsi-meet, this manual edit in web/config.js is no longer needed for proper Etherpad integration, It’s automatically added there now as:
config.etherpad_base = 'https://meet.darkstar.lan/pad/p/';
The ‘ports’ section still needs to be added to the etherpad definition in ourdocker-compose.ymlfile.
Now, when you join a Jitsi Meeting, the menu which opens when you click the three-dots “more actions” menu in the bar at the bottom of your screen, will contain an item “Open shared document“:
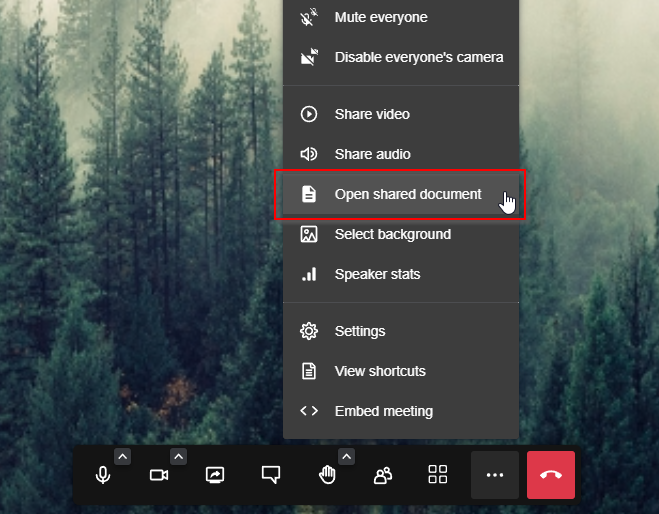
If you select this, your video will be replaced by an Etherpad “pad” with the name of your Jitsi meeting room.
Externally i.e. outside of the Jitsi videomeeting, your Etherpad ‘pad‘ will be available as “https://meet.darkstar.lan/pad/p/jitsiroom” where “jitsiroom” is the name you gave your Jitsi videomeeting aka ‘room‘. This means that people outside of your videomeeting can still collaborate with you in real-time.
Network troubleshooting
Docker’s own dynamic management of iptables chains and rulesets will be thwarted if you decide to restart your host firewall. The custom Docker chains disappear and the docker daemon gets confused. If you get these errors in logfiles when starting the Docker-Jitsi-Meet containers, simply restart the docker daemon itself (/etc/rc.d/rc.docker restart):
> driver failed programming external connectivity on endpoint docker-jitsi-meet

> iptables failed

> iptables: No chain/target/match by that name
Creating internal Jitsi accounts
Just for reference, in case you want to play with Jitsi before integrating it with Keycloak.
Internal Jitsi users must be created with the “prosodyctl” utility in the prosody container.
In order to run that command, you need to first start a shell in the corresponding container – and you need to do this from within the extracted tarball directory “/usr/local/docker-jitsi-meet-stable-*“:
# cd /usr/local/docker-jitsi-meet-stable-*

# docker-compose exec prosody /bin/bash
Once you are at the prompt of that shell in the container, run the following command to create a user:
> prosodyctl --config /config/prosody.cfg.lua register TheDesiredUsername meet.jitsi TheDesiredPassword
Note that the command produces no output. Example for a new user ‘alien‘:
> prosodyctl --config /config/prosody.cfg.lua register alien meet.jitsi WelcomeBOB!
Now user “alien” will be able to login to Jitsi Meet and start a video conference.
Connecting Jitsi and Keycloak
The goal is of course to move to a Single Sign On solution instead of using local accounts. Jitsi supports JWT Tokens which it should get from a OAuth/OpenID provider. We have Keycloak lined up for that, since it supports OAuth, OpenID, SAML and more.
Adding jitsi-keycloak
Using Keycloak as OAuth provider for Jitsi Meet is not directly possible, since unfortunately Keycloak’s JWT token is not 100% compatible with Jitsi. So a ‘middleware‘ is needed, and jitsi-keycloak fills that gap.
We will download the middleware from their git repository and setup a local directory below “/usr/share/docker/data” where we have been storing configurations for all our applications so far. All we are going to use from that repository checkout is the Docker Compose file you can find in there. The actual ‘jitsi-keycloak‘ middleware will eventually be running as yet another Docker container.
# cd /usr/local/
# git clone https://github.com/d3473r/jitsi-keycloak jitsi-keycloak
# mkdir -p /usr/share/docker/data/jitsi-keycloak/config
# cp ./jitsi-keycloak/example/docker-compose.yml /usr/share/docker/data/jitsi-keycloak/
Edit our working copy ‘/usr/share/docker/data/jitsi-keycloak/docker-compose.yml‘ to provide the correct environment variables for our instances of our already running Jitsi and Keycloak containers:
# --- start ---
version: '3'

services:
    jitsi-keycloak:
    image: d3473r/jitsi-keycloak
    container_name: jisi-keycloak
    hostname: jisi-keycloak
    restart: always
environment:
    JITSI_SECRET: NmjPGpn+NjTe7oQUV9YqfaXiBULcsxYj
    DEFAULT_ROOM: welcome
    JITSI_URL: https://meet.darkstar.lan/
    JITSI_SUB: meet.darkstar.lan
volumes:
    - /usr/share/docker/data/jitsi-keycloak/config:/config
ports:
    - "3000:3000"
networks:
    keycloak0.lan:
    ipv4_address: 172.20.0.6
aliases:
    - jitsi-keycloak.keycloak0.lan

networks:
    keycloak0.lan
    external: true
# --- end ---
The string value for the JITSI_SECRET variable needs to be the same string we used in the definition of the Jitsi container earlier, where the variable is called JWT_APP_SECRET.
Hint: in Bash you can create a random 32 character string like this:
$ cat /dev/urandom | tr -dc 'a-zA-Z0-9' | fold -w 32 | head -n 1
BySOoKBDIC1NWfeYpktvexJIqOAcAMEt
If you have nodejs installed, generate a random ‘secret’ string using this ‘node’ command:
$ node -e "console.log(require('crypto').randomBytes(24).toString('base64'));"
NmjPGpn+NjTe7oQUV9YqfaXiBULcsxYj
Configuration of jitsi-keycloak in the Keycloak Admin console
Point your browser to the Keycloak Admin console https://sso.darkstar.lan/auth/admin/ to start the configuration process.
Add a public openid-connect client in the ‘foundation‘ Keycloak realm (the realm where you created your users in the previous Episode of this article series):
- Select ‘foundation‘ realm; click on ‘Clients‘ and then click ‘Create‘ button.
- ‘Client ID‘ = “jitsi“
- ‘Client Protocol‘ = “openid-connect” (the default)
- Save.
- Also in ‘Settings‘, allow this app from Keycloak.
Our Jitsi-keycloak container is running onhttps://sso.meet.darkstar.lan. Therefore we add- ‘Valid Redirect URIs‘ = https://sso.meet.darkstar.lan/*
- ‘Web Origins‘ = https://sso.meet.darkstar.lan
- Save.
- Download the ‘
keycloak.json‘ file for this new client. Its contents look like this:# --- { "realm": "foundation", "auth-server-url": "https://sso.darkstar.lan/auth", "ssl-required": "external", "resource": "jitsi", "public-client": true, "confidential-port": 0 } # ---To obtain this file;
On Keycloak < 20.x,- Go to ‘Installation‘ tab
- ‘Format Option‘ = “Keycloak OIDC JSON”
- Click ‘Download‘ which downloads a file “
keycloak.json” with the below content:
On Keycloak >= 20.x,
-
- Go to ‘Clients‘ tab
- Select the ‘jitsi‘ client
- Click the ‘Action‘ dropdown in the top right of the page
- Select ‘Download adapter config‘ and keep the default format option ‘Keycloak OIDC JSON‘
- Click ‘Download‘ or else copy/paste the JSON code which is displayed on-screen.
Remaining configuration done in jitsi-keycloak
Back at your server’s shell prompt again, do as follows:
Copy the downloaded “keycloak.json” file into the ‘/config‘ directory of jitsi-keycloak (the container’s /config is exposed in the host filesystem as /usr/share/docker/data/jitsi-keycloak/config).
# cp ~/Download/keycloak.json /usr/share/docker/data/jitsi-keycloak/config/
Start the jitsi-keycloak container in the directory where we have our tailored ‘docker-compose.yml‘ file:
# cd /usr/share/docker/data/jitsi-keycloak

# docker-compose up -d
Once the container is running, we make jitsi-keycloak available at https://sso.meet.darkstar.lan/ using a reverse-proxy setup (jitsi-keycloak will not work in a sub-folder).
Add these reverse proxy lines to your VirtualHost definition of the “sso.meet.darkstar.lan” web site configuration and restart httpd:
# ---
# Reverse proxy to jitsi-keycloak Docker container:
SSLProxyEngine On
SSLProxyCheckPeerCN on
SSLProxyCheckPeerExpire on
RequestHeader set X-Forwarded-Proto: "https"
RequestHeader set X-Forwarded-Port: "443"

<Location />
    AllowOverride None
    Require all granted
    Order allow,deny
    Allow from all
</Location>

ProxyPreserveHost On
ProxyRequests Off
ProxyVia on
ProxyAddHeaders On
AllowEncodedSlashes NoDecode

# Jitsi-keycloak:
ProxyPass / http://127.0.0.1:3000/
ProxyPassReverse / http://127.0.0.1:3000/
# ---
Configure docker-jitsi-meet for use of jitsi-keycloak
Actually, you have already done all the correct changes which are needed in the ‘.env‘ file for Docker Compose!
The docker-jitsi-meet configurations that are relevant for jitsi-keycloak are as follows:
ENABLE_AUTH=1

AUTH_TYPE=jwt

JWT_APP_ID=jitsi

JWT_APP_SECRET=NmjPGpn+NjTe7oQUV9YqfaXiBULcsxYj

# To enable an automatic redirect from Jitsi to the Keycloak login page:

TOKEN_AUTH_URL=https://sso.meet.darkstar.lan/{room}
The values for ‘JWT_APP_SECRET‘ and ‘JITSI_SECRET‘ must be identical, and the value of ‘JWT_APP_ID‘ must be equal to “jitsi“.
Firing up the bbq
With all the prep work completed and the containers are running, we can enjoy the new online video conferencing platform we now operate for friends and family.
So, how does this actually look in practice? I’ll share a couple of screenshots from a Jitsi Meet session that I setup. Look at how cool it looks (and not just because of the screenshot of my den and the Slackware hoodie I am wearing…)
The Jitsi Meet welcome screen:

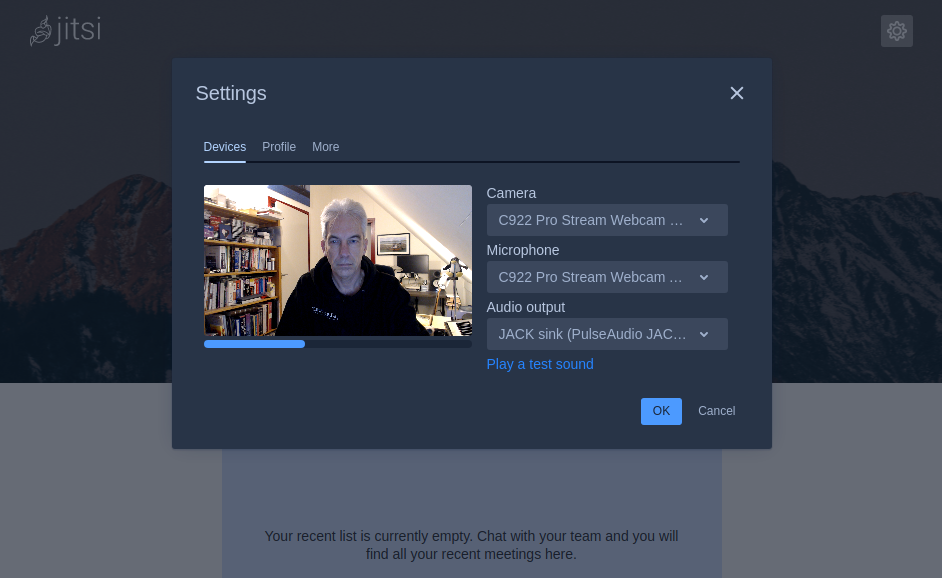
Device settings:
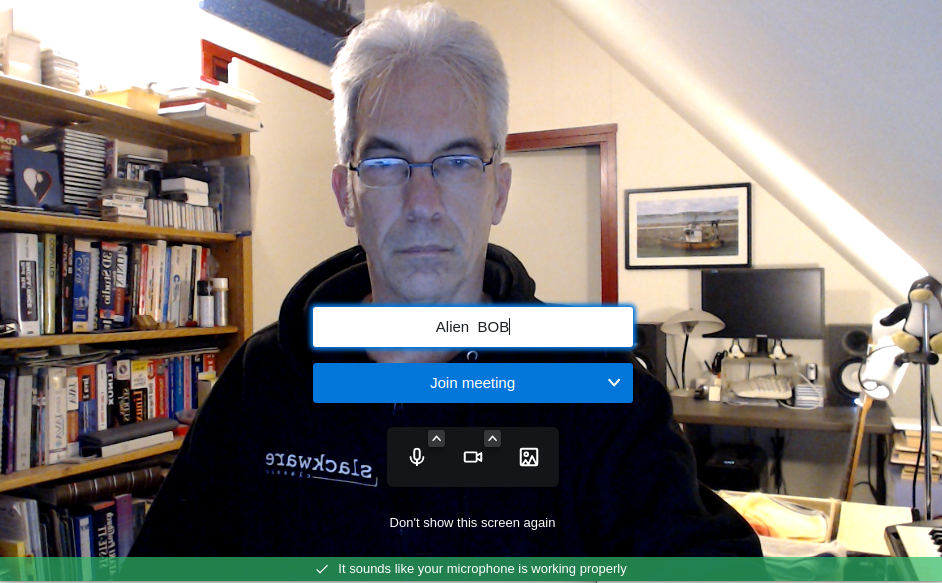
Joining a meeting:
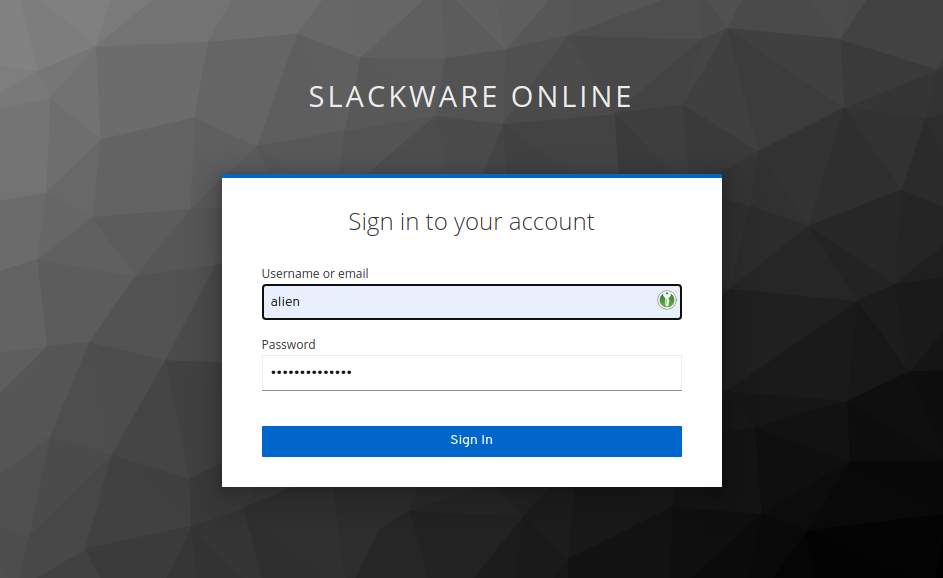
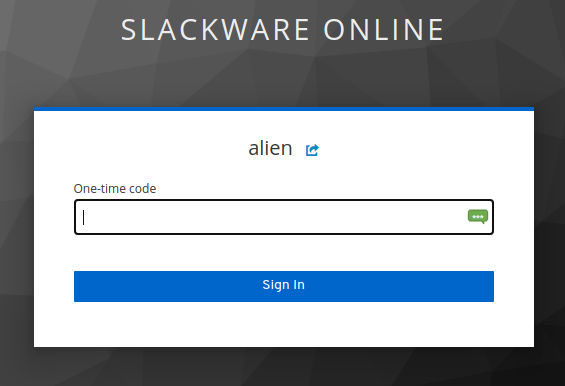
Logging in via Keycloak SSO, you’ll notice that I have configured 2-Factor Authentication for my account:
After having logged in, I am back at the “join meeting screen” but now with my name written as Keycloak knows it (“Eric Hameleers” instead of “Alien BOB“) and I need to click one more time on the “Join” button.
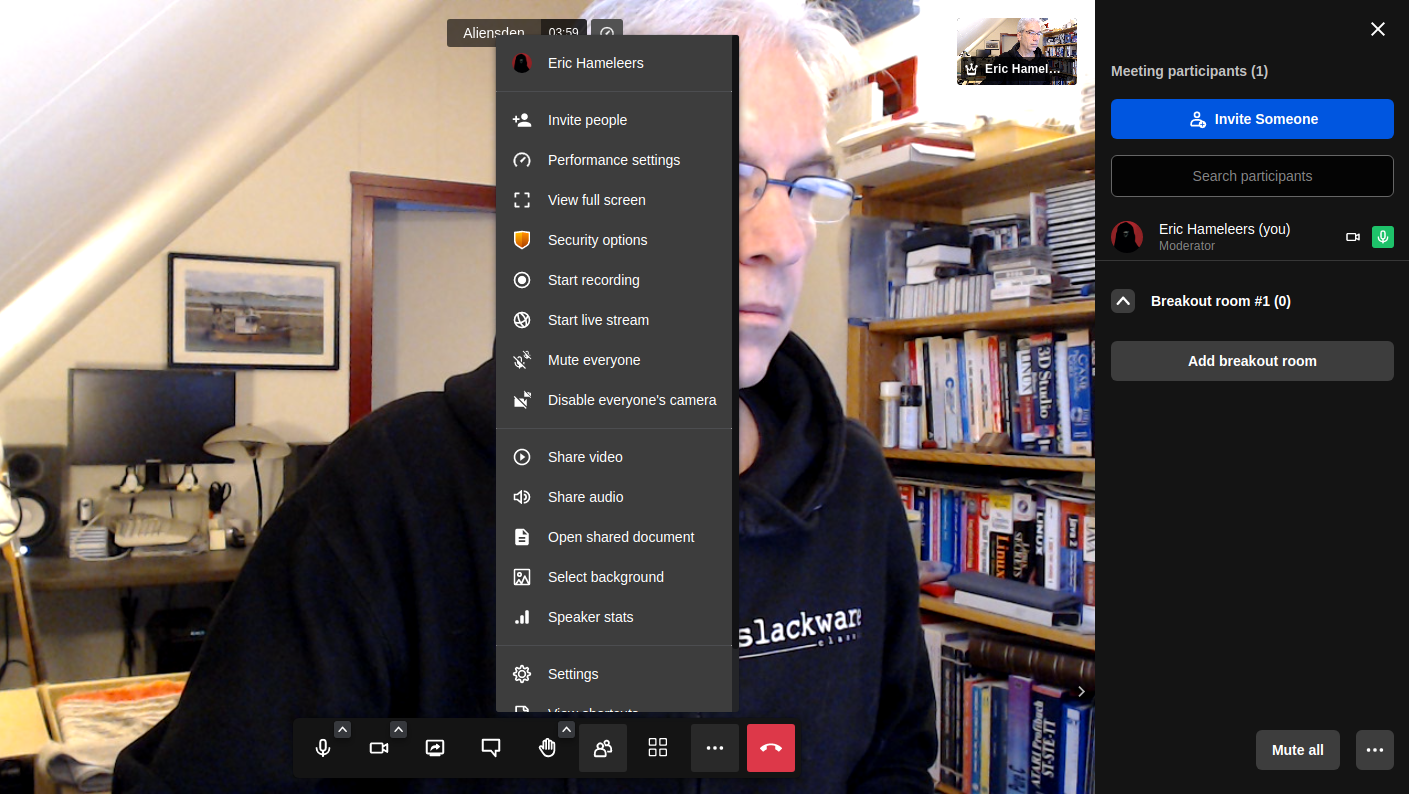
Then I am participating in the meeting as the moderator.
You’ve probably noticed that I flipped my camera view here. I also added one ‘break-out room‘ to allow for separate discussions to take place outside of the main room:
And if you are not the moderator but a guest who received the link to this meeting, this is what you’ll see at first:

Cool, eh?
Thanks
… again for taking the time to read through another lengthy article. Share your feedback in the comments section below, if you actually implemented Jitsi Meet on your own server.
Attribution
The Docker-Jitsi-Meet architecture image was taken from Jitsi’s github site.
Recent comments