My thoughts on Slackware, life and everything

Tag: windows

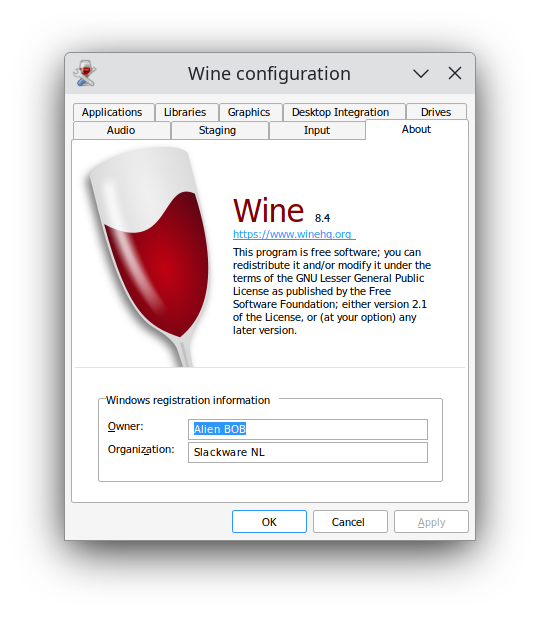
Wine 8.4 packages for Slackware

The Wine developers released version 8.4 last week. There’s lots of bugfixes of course, but the announcement also mentions that the work has started on a Wayland graphics driver. Note that in the previous 8.3 release for which I did not create packages, Smart Card support was added, using PCSC-Lite for which I also have a package.

I have created and uploaded fresh Slackware packages (targeting 15.0 and -current) for pure 32bit Wine as well as a 64bit Wine which also contains the 32bit WoW64 (Wine on Wine64) binaries. Both packages have the ‘staging‘ patches applied and contain Gecko (the Wine implementation of Internet Explorer) and Mono (the open-source and cross-platform implementation of the .NET Framework).

The external dependencies for this package remain the same: FAudio and vkd3d are required.
On 64bit Slackware you need to have multilib installed (read the docs). In addition to a standard multilib package set, in addition you need to convert the 32bit versions of the FAudio and vkd3d packages to ‘compat32’ packages and install those.

Note: the MinGW-w64 compiler suite is used to generate the native Windows DLLs in my wine package. This compiler is not needed when you just want to run wine. If you want to compile your own wine, you can install MinGW-w64 from my repository.

Have a good weekend!
Eric

(Wine-) Pipelight update – careful upgrade

pipelight-logo After a long time of silence (but ongoing development as shown in their git repository) the Pipelight developers released a new stable pipelight a few weeks ago. I created Slackware packages for this (Slackware 14.0 and newer) but before you upgrade, please read the words of caution at the end of this post, they will save you some frustration.

The new pipelight is a bugfix release: after Google deprecated NPAPI plugins, the focus for Pipelight team has been better support for Firefox. As stated in the release notes, most of the remaining bugs should now be in Wine, not in pipelight. That has also lead to more focus on what used to be called “wine-compholio”. the team’s patch-set for wine that implements the Windows browser plugin support. The name “wine-compholio” has changed to “Wine Staging” which is now even used as the default wine version on Fedora. I am not willing to go that far, so there is still a separate wine-pipelight package that you have to install on Slackware in order to use my pipelight package.

Remember that you can always get the latest Windows plugin releases (an important feature in case of security fixes) without having to wait for me creating a new package. Just run the command “pipelight-plugin –update” as root. After doing that, the next time your browser loads the pipelight plugin, it will automatically download the newest version of your installed Windows plugin(s).

I know that some people are grumbling whenever someone develops a program for Linux that enables the use of Windows software (emulated or otherwise), such as wine or pipelight. The fact is, if you want to watch Netflix on your Slackware computer, and you do not want to install Google Chrome, then Mozilla Firefox combined with pipelight and MS SilverLight is still the only way to achieve this. Chromium does not support NPAPI either and the Widevine CDM can not be made to work as it does in Chrome. Also, software using Silverlight is still widespread in school systems. I will welcome the future implementation of EME in Firefox that will allow separate download and use of Content Decryption Modules (CDM) like Widevine which is used by Chrome for streaming Netflix. Then, Google Chrome nor pipelight/silverlight will be necessary any longer. Accepting that DRM is here to stay and can still be made compatible to Open Source and Free Choice is the start and I am glad that Mozilla thought hard and long about the apparent clash and came up with a sane solution.

Anyway, enough of the ranting.

In my original post about pipelight, you will find full installation and configuration instructions, as well as a troubleshooting section. That blog article is also referred to on the pipelight.net support page. Let me remind you that you need to go multilib if you want to use pipelight on 64-bit Slackware.

Package location (uploads expected later today, I thought it was more important to have this blog page up first):

A note of caution when upgrading to my pipelight-0.2.8 package:

This only applies to 64-bit Slackware!!!

I have made one important change to the file locations of the 64-bit pipelight package. The file “libpipelight.so” is a 64-bit shared library, but the previous 64-bit pipelight packages would install this file into “/usr/lib/pipelight/libpipelight.so”. That is not the correct location for 64-bit libraries, so the new package installs this file as “/usr/lib64/pipelight/libpipelight.so”.

This has the side effect that your pipelight stops working. The error message(if you start firefox in a terminal) will be something like “pluginInitOkay(): incompatible version of pluginloader.exe“. Don’t worry, you can remedy this.

These are the steps you have to take in order to fix this (it’s a one-time action):

As root user: remove all old copies of the library created by earlier pipelight versions:

# rm -r /usr/lib/pipelight

As your own user account, list all plugins you have currently enabled (copy that command’s output because you have to re-enable them in a later step):

$ pipelight-plugin --list-enabled

That command basically checks your “~/.mozilla/plugins/” directory for symlinks named “libpipelight*.so”. If you look inside that directory, you will notice that all these symlinks are pointing to the no longer existing location “/usr/lib/pipelight”. So, you first remove those symlinks:

$ pipelight-plugin --disable-all

And re-create them properly (still as your own user account):

pipelight-plugin --enable <your previously enabled plugin(s)>

That’s all. Have fun! Eric


Welcome Windows user!

… I am going to show you how to create a Slackware USB installer when all you have is a Windows computer.

As a Linux user, this would not cause you any problems since there is a shell script that does the work for you – all you need is the Slackware DVD and a re-usable USB stick of sufficient size.

If you run Windows, it is still possible to create a bootable USB stick that can start Slackware’s installer. If the stick is big enough (2 GB in size) you can even add Slackware’s packages to it and avoid the use of a Slackware DVD as the package source entirely.

The requirements:

What tools will you need for the job at hand?

  • A version of dd for Windows. This is needed to copy a USB image file to the USB stick. You can obtain it here at chrysocome.net., the same site that also hosts RAWRITE.EXE which ships with Slackware in the isolinux/sbootmgr directory.
  • The syslinux tool from syslinux.zytor.com. This will be used to make your stick bootable. Download it directly from kernel.org – the .zip file contains a Windows executable.
  • A program like Winimage (a shareware program, free 30-day trial), or IZarc (might be a good free alternative to Winimage) that is able to open the usbboot.img disk image file and extract its content to your hard drive.
  • Of course you need a Slackware DVD. Either buy it at the Slackware Store (which helps keeing the distro alive) or download a DVD ISO image from any Slackware mirror. It is also possible to use a local copy of a Slackware package tree (either downloaded from a Slackware mirror or copied off a DVD). In the examples below I am using “slackware-13.0” which is the 32-bit Slackware version 13.0. The instructions are not limited to this particular version of Slackware – you can do this for every recent version of Slackware, including the 64-bit release.
  • And finally, a USB stick with a (single) FAT32 partition. If it has 40 MB of  free space, you can use this stick as a bootable Slackware installer but still need the DVD or a set of CDROMs for the actual packages. If the stick has 2 GB of available free space, you will be able to copy all Slackware packages to the stick as well. The resulting bootable USB stick will be all you need in order to install Slackware. Ideal for netbooks that do not have a DVD drive!

Preparations:

First things first:

  1. Insert the Slackware DVD or make sure you have a copy of a Slackware tree somewhere on your local drive (more specifically: everything on the Slackware DVD with the exception of the source and slackbook directories will be required). In the examples below I will assume that the top of the Slackware tree is “D:\slackware-13.0\“. For other releases of Slackware or for the 64-bit version of Slackware the pathnames will be a bit different of course, but the same procedure applies.
  2. Insert the USB stick, make sure it gets assigned a drive letter. In the examples below I assume that the drive letter for the USB stick is “U:
  3. Now, you have to decide what to do with your stick. This depends on how much data it can contain (less than 2GB, or more than 2GB). See below, there is a set of instructions for both cases.

If you have (much) less than 2 GB available on the stick, we can transform the stick into a bootable Slackware setup disk.

NOTE: the following procedure will erase all existing data on the USB stick, so be careful and check what’s on it before you proceed.

  1. Install the Windows version of dd (see above) onto your Windows computer.
  2. Open a DOS box (i.e. get a command prompt) by running
    cmd.exe
  3. Run the following command at the prompt:
    dd if=d:\usb-and-pxe-installers\usbboot.img of=\\.\u:
  4. That’s it! You have created a bootable Slackware setup USB stick

If you have 2 GB or more available on the stick, we will be creating a full “USB equivalent” to a Slackware DVD:

NOTE: The following procedure is non-destructive; meaning that no files on the stick will have to be deleted.

  1. Install Winimage and the Windows version of syslinux (see above) onto your Windows computer.
  2. Create a directory “U:\boot\syslinux\” on the USB stick
  3. Use Winimage to extract the content of the image file “D:\usb-and-pxe-installers\usbboot.img” to the newly created directory “U:\boot\syslinux\” on the stick
  4. Remove the file “U:\boot\syslinux\ldlinux.sys
  5. Open a DOS box (i.e. get a command prompt) by running
    cmd.exe
    On Vista at least, you have to run cmd.exe as Administrator to avoid the “Accessing physical drive: access denied” message when running the syslinux command in the next step.
  6. Run the following command at the prompt to make the stick bootable (you will notice the directory /boot/syslinux in that command which is the directory we just populated):
    syslinux.exe -m -a -d /boot/syslinux u:
  7. Using Windows Explorer, give the U: drive the label “USBSLACKINS
  8. Copy the whole Slackware tree “D:\slackware-13.0” to the root of the USB stick, “U:\“. Exclude the slackbook, source and usb-and-pxe-installers directories while copying if you have just about 2 GB free. If you have a 4 GB stick you will find that everything will fit nicely. Using a Windows Explorer for this is probably easiest. As the end result you should have a “U:\slackware-13.0” directory on the stick with (among others) a file “PACKAGES.TXT” and a directory “slackware” below that.

Booting the USB stick and installing Slackware:

When booting this USB installer (the version containing the Slackware packages), you have to mount the USB partition before starting “setup” because you can access your packages only after mounting it. You cannot use the directory “/mnt” to mount this partition because the Slackware installer uses “/mnt” already. After the booting has finished and it delivers you to a command-prompt, you create a new directory in the installer, for instance “/usbinstall“:

mkdir /usbinstall

After you have created this mount point, you have to find out the name of your partition (you can run “fdisk -l” or “blkid” to find out) and then use the following mount command to preserve upper case filenames:

mount -t vfat -o ro,shortname=mixed $(/sbin/blkid -t LABEL=USBSLACKINS | cut -f1 -d:) /usbinstall

The “shortname” option used in that mount command is required, and Slackware installation will fail if you forget it.

If you labeled the stick’s partition “USBSLACKINS” in step 7 above, then you can use the following command instead of the previous mount command. It will find the correct partition automatically (note that what follows is a single command line !):

mount -t vfat -o ro,shortname=mixed $(/sbin/blkid -t LABEL=USBSLACKINS | cut -f1 -d:) /usbinstall

Then afterwards, when it is time to specify the package SOURCE directory, you type:

/usbinstall/slackware-13.0/slackware

The rest of the installation will proceed as usual. Give me feedback in the comment section below if you encounter any problems.

Good luck! I hope this small tutorial will be able to snatch you away from the Dark Side 😉

Eric

Running X Window on MS Windows

I am less than mobile at the moment. Recovery from surgery takes longer than I expected (one week has passed and I still can wear normal trousers only for short periods of time).

It takes me some effort to go up two stairs and work at my Slackware desktop system, so that left me less than happy yesterday when I was facing the living room PC which is running Vista. I still wanted to work with my trusted Slackware display, and of course there is a solution for that.

Ever heard of XDMCP or “X Display Manager Control Protocol“? A Linux (or as it stands, any UNIX) computer running a graphical login manager like KDM can be configured to listen for remote login requests made by computers on the LAN. The protocol used for this, is XDMCP.

What I needed to do was twofold:

  1. enable XDMCP on my Slackware box, two floors up
  2. install an X server for MS Windows

A Slackware computer does not enable XDMCP by default. The reason should be obvious – security reasons. Unlike remote logins using ssh, the XDMCP network packets travel across your wires unencrypted.

If you are not too concerned about security (for instance, nobody else uses your local network) these simple steps enable XDMCP – if security is an issue you may want to have a look at NoMachine’s NX technology instead.

  • In the file “/etc/X11/xdm/xdm-config” comment out this line (by placing a ! in front):
    DisplayManager.requestPort: 0
    which prevents XDM from listening to XDMCP requests
  • In the file “/etc//X11/xdm/Xaccess” uncomment this line (remove the #):
    #* #any host can get a login window
    so that any host is allowed to see the login window
  • If you are going to use KDM as the graphical login manager, then edit the file “/etc/kde/kdm/kdmrc” and comment out this line in the section “[X-:*-Core]“:
    ServerArgsLocal=-nolisten tcp
    which inhibits KDM from listening on a network socket
    Also, look in section “[Xdmcp]” and change
    Enable=false
    to
    Enable=true
  • Finally, make sure that your machine starts in the graphical runlevel ( for Slackware that is runlevel 4) by editing the file “/etc/inittab” and changing
    id:3:initdefault:
    to
    id:4:initdefault:

Simple enough isn’t it?

When you have rebooted your Slackware computer, it will be listening on your local network for incoming login requests. When you have KDE installed, then Slackware will use KDM as the login manager. Otherwise,  XDM will be used. If you decide to install one of the 3rd-party Gnome add-ons that exist for Slackware (GnomeSlackBuild, gware, dropline, gnomeslacky) then by default GDM will be running to manage your logins.

Next step is to install a X-Server for the MS Windows machine. There is one that I really like a lot. It is called Xming and you can find it at http://www.straightrunning.com/XmingNotes . It is a cross-compiled X.Org using the mingw compiler. Xming comes in two flavours – a version that is non-free (you have to pay to get access to the binaries) and a version that is in the “public domain” (you are free to use and distribute it). The author has written a page with an overview of the component licenses and has all his patches to the original X.Org/freetype/Mesa sourcecode available for download. The free version lags a bit behind with regards to version number but it does all the things I need. The installer comes with a handy tool called “Xlaunch” which is a wizard-like application to configure access to the remote server.

After installation of Xming, and running Xlaunch, it took only a few mouseclicks and entering my Slackware hostname to be greeted by my familiar KDM login screen 🙂

Note: if you have two Linux computers, the story is even simpler if you want to perform a remote graphical login. After enabling XDMCP on one computer, you run the following command on the other (assuming you are already running X locally and want a second parallel X session to the remote machine on IP address 192.168.0.11):

  • X -query 192.168.0.11 :1

To switch between your local and remote X sessions, use the <Ctrl><Alt>F8 and <Ctrl><Alt>F7 key combinations.

Enjoy! Eric

© 2025 Alien Pastures

Theme by Anders NorenUp ↑