My thoughts on Slackware, life and everything

Tag: slackwarecloudserver (Page 1 of 2)

Slackware Cloud Server Series, Episode 9: Cloudsync for 2FA Authenticator

As promised in an earlier blog article, I am going to talk about setting up a ‘cloud sync’ backend server for the Ente Authenticator app.
This specific article will be deviating slightly from one of the goals of the series. So far, I have shown you how to run a variety of services on your own private cloud server for family, friends and your local community,  and using Single Sign-On (SSO) so that your users only have one account and password to worry about.
The difference here is that the Ente Auth backend server does not offer SSO (yet… although there’s a feature request to add OIDC functionality).

You will learn how to setup Ente Auth backend server in a Docker Compose stack. Administration of the server is done via ‘ente-cli‘ which is contained in that Docker stack.

Check out the list below which shows past, present and future episodes in the series, if the article has already been written you’ll be able to click on the subject.
The first episode also contains an introduction with some more detail about what you can expect.

  • Episode 1: Managing your Docker Infrastructure
  • Episode 2: Identity and Access management (IAM)
  • Episode 3 : Video Conferencing
  • Episode 4: Productivity Platform
  • Episode 5: Collaborative document editing
  • Episode 6: Etherpad with Whiteboard
  • Episode 7: Decentralized Social Media
  • Episode 8: Media Streaming Platform
  • Episode 9 (this article): Cloudsync for 2FA Authenticator
    Setting up an Ente backend server as a cloud sync location for the Ente Auth 2FA application (Android, iOS, web).
    Stop worrying that you’ll lose access to secure web sites when you lose your smartphone and with it, the two-factor authentication codes that it supplies. You’ll be up and running with a new 2FA authenticator in no time when all your tokens are stored securely and end-to-end encrypted on a backend server that is fully under your own control.

    • Introduction
    • Preamble
      • Web Hosts
      • Secrets
    • Apache reverse proxy configuration
    • Ente server setup
      • Preparations
      • Cloning the git repository and preparing the web app image
      • Considerations for the .env file
      • Creating the Docker Compose files
    • Running the server
    • Connecting a client
    • Administering the server
      • User registration
      • Ente CLI
      • Logging into and using the CLI
      • Enabling email (optional)
    • Account self-registration or not?
      • (1) pre-defining the OTT (one-time token) for your users
      • (2) configuring mail transport in Ente
      • Make the host accept mails from Ente container
    • Considerations
      • Using Ente server to store your photos
      • CORS
    • Conclusion
  • Episode X: Docker Registry

Introduction

In the blog post that I recently wrote about Ente Auth, the open source 2FA authenticator, I mentioned that this application can save its token secrets to the cloud. This is an optional feature and requires that you create an account at ente.io. This cloud backend service is where Ente (the company) runs a commercial Photo hosting service with end-to-end encryption for which the authenticator is a bolt-on.
Even when you decline to sign up for an account, the authenticator app offers its full functionality. Also it is able to import tokens from multiple other 2FA tools, and export your 2FA seeds to an encrypted file. In other words, there is no vendor lock-in. You do not really have a need for cloud sync, as long as you remember from time to time to make that manual backup of your 2FA secrets. These backups can later be restored even if you lose your phone and need to re-install the Ente authenticator app on a new phone.
The cloud sync is no more than a convenience, and it is completely secure, but I understand why some people would avoid creating an account and hand over their (encrypted) data to a 3rd party. That’s the premise behind writing this very article.

Ente has open-sourced all its products: the authenticator and photo apps, but also the back-end server which stores not just your 2FA secrets but also your photo collections.
This article focuses on getting the Ente ‘Museum‘ server running as a self-hosted backend for the 2FA authenticator app – a server fully under your control. Your secret data will never leave your house and you can rest assured that your 2FA seeds are always synced to your server and stored with solid encryption. You can even create local Ente accounts for your friends and family.

This article concludes with some considerations about expanding the server’s capabilities and turn it into a full-blown picture library a la Google Photos.


Preamble

This section describes the technical details of our setup, as well as the things which you should have prepared before trying to implement the instructions in this article.

Web Hosts

For the sake of this instruction, I will use the hostname “https://ente.darkstar.lan” as the URL where the authenticator will connect to the Ente API endpoint, and “https://enteauth.darkstar.lan” as the URL where users will point their browser when they want to access the web app.

Setting up your domain (which will hopefully be something else than “darkstar.lan”…) with new hostnames and then setting up web servers for the hostnames in that domain is an exercise left to the reader. Before continuing, please ensure that your equivalent for the following host has a web server running. It doesn’t have to serve any content yet but we will add some blocks of configuration to the VirtualHost definition during the steps outlined in the remainder of this article:

  • ente.darkstar.lan
  • enteauth.darkstar.lan

Using a  Let’s Encrypt SSL certificate to provide encrypted connections (HTTPS) to your webserver is documented in an earlier blog article.

Note that I am talking about webserver “hosts” but in fact, all of these are just virtual webservers running on the same machine, at the same IP address, served by the same Apache httpd program, but with different DNS entries. There is no need at all for multiple computers when setting up your Slackware Cloud server.

Secrets

All data is encrypted before Ente server stores it in its database or storage. The Docker stack uses several secrets to provide that encryption, next to your own password that only you know.

In this article, we will use example values for these secrets – be sure to generate and use your own strings here!

# Key used for encrypting customer emails before storing them in DB:
ENTE_KEY_ENCRYPTION=yvmG/RnzKrbCb9L3mgsmoxXr9H7i2Z4qlbT0mL3ln4w=
ENTE_KEY_HASH=JDYkOVlqSi9rLzBEaDNGRTFqRyQuQTJjNGF0cXoyajA3MklWTjc1cDBSaWxaTmh0VUViemlGRURFUFZqOUlNCg==
ENTE_JWT_SECRET=wRUs9H5IXCKda9gwcLkQ99g73NVUT9pkE719ZW/eMZw=

# Credentials for the Postgres database account:
ENTE_DB_USER=entedbuser
ENTE_DB_PASSWORD=9E8z2nG3wURGC0R51V5LN7/pVapwsSvJJ2fASUUPqG8=

# Credentials for the three hard-coded S3 buckets provided by MinIO:
ENTE_MINIO_KEY=AeGnCRWTrEZVk8VjroxVqp7IoHQ/fNn4wPL7PilZ+Hg=
ENTE_MINIO_SECRET=wdZPtr0rEJbFxr4GsGMB6mYojKahA3nNejIryeawloc=

Here are some nice convoluted ways to generate Base64-encoded strings you can use as secrets:

A 45-character string ending on ‘=’:
$ cat /dev/urandom | tr -dc 'a-zA-Z0-9' | fold -w 32 | head -n 1 | openssl dgst -binary -sha256 | openssl base64

A 89-character string ending on ‘==’
$ cat /dev/urandom | tr -dc 'a-zA-Z0-9' | fold -w 256 | head -n 1 | openssl passwd -stdin -6 | fold -w 48 | head -n 1 | openssl base64 |tr -d '\n'

The ente.io documentation recommends this to generate the key and jwt hashes:
 $ cd ente-git/server/
$ go run tools/gen-random-keys/main.go


Apache reverse proxy configuration

We are going to run Ente in a Docker container stack. The configuration will be such that the server will only listen for clients at a number of TCP ports at the localhost address (127.0.0.1).

To make our Ente API backend available to the authenticator at the address https://ente.darkstar.lan/ we are using a reverse-proxy setup. The flow is as follows: an authenticator (the client) connects to the reverse proxy and the reverse proxy connects to the Ente backend on the  client’s behalf. The reverse proxy (Apache httpd in our case) knows how to handle many simultaneous connections and can be configured to offer SSL-encrypted connections even when the backend can only communicate over clear-text un-encrypted connections.

Add the following reverse proxy lines to your VirtualHost definition of the “ente.darkstar.lan” web site configuration and restart httpd:

# ---
# Required modules:
# mod_proxy, mod_ssl, proxy_wstunnel, http2, headers, remoteip

ProxyRequests Off
ProxyVia on
ProxyAddHeaders On
ProxyPreserveHost On

<Proxy *>
  Require all granted
</Proxy>

# Letsencrypt places a file in this folder when updating/verifying certs.
# This line will tell apache to not to use the proxy for this folder:
ProxyPass "/.well-known/" "!"

<IfModule mod_ssl.c>
  RequestHeader set X-Forwarded-Proto "https"
  RequestHeader set X-Forwarded-Port "443"
</IfModule>

# Ente API endpoint is hosted on https://ente.darkstar.lan/
<Location />
  ProxyPass "http://127.0.0.1:8180/"
  ProxyPassReverse "http://127.0.0.1:8180/"
</Location>
# ---

To make our Ente WeB App frontend available for the users who need read-only access to their 2FA codes, at the address https://enteauth.darkstar.lan/ , we are using a slightly different reverse-proxy setup.
Add the following reverse proxy lines to your VirtualHost definition of the “enteauth.darkstar.lan” web site configuration and restart httpd:

# ---
# Required modules:
# mod_proxy, mod_ssl, proxy_wstunnel, http2, headers, remoteip

ProxyRequests Off
ProxyVia on
ProxyAddHeaders On
ProxyPreserveHost On

<Proxy *>
  Require all granted
</Proxy>

# Letsencrypt places a file in this folder when updating/verifying certs.
# This line will tell apache to not to use the proxy for this folder:
ProxyPass "/.well-known/" "!"

<IfModule mod_ssl.c>
  RequestHeader set X-Forwarded-Proto "https"
  RequestHeader set X-Forwarded-Port "443"
</IfModule>

# Ente Auth Web App is hosted on https://enteauth.darkstar.lan/
<Location />
  ProxyPass "http://127.0.0.1:3322/"
  ProxyPassReverse "http://127.0.0.1:3322/"
</Location>
# ---

The hostname and TCP port numbers shown in bold green are defined elsewhere in this article, they should stay matching when you decide to use a different hostname and port numbers.


Ente Server setup

Preparations

We will give the Ente server its own internal Docker network. That way, the inter-container communication stays behind its gateway and prevents snooping the network traffic.

Docker network

Create the network using the following command:

docker network create \
  --driver=bridge \
  --subnet=172.21.0.0/16 --ip-range=172.21.0.0/25 --gateway=172.21.0.1 \
  ente.lan

Select a yet un-used network range for this subnet. You can find out about the subnets which are already defined for Docker by running this command:

ip route |grep -E '(docker|br-)'

The ‘ente.lan‘ network you created will be represented in the Ente docker-compose.yml file with the following code block:

networks:
  ente.lan:
    external: true
Create directories

Create the directory for the docker-compose.yml and other startup files:

# mkdir -p /usr/local/docker-ente

Create the directories to store data:

# mkdir -p /opt/dockerfiles/ente/{cli-data,cli-export,museum-data,museum-logs,postgres-data,minio-data,webauth-data}

Cloning the git repository and preparing the web app image

Ente offers a Docker image of their Museum server (the core of their product) via the public Docker image repositories, but there is no official Docker image for the Web Apps (Auth and Photos). Using the Auth Web App you will have read-only access to your 2FA tokens in a web browser, in case you don’t have your phone with you. That makes it a must-have in our container stack. The Auth Web App also allows you to create an account on the server if you don’t want to use the Mobile or Desktop App for that.

We need to build this Docker image locally. Building a Docker image involves cloning Ente’s git repository, writing a Dockerfile and then building the image via Docker Compose. Let’s go through these steps one by one.

Clone the repository in order to build the Auth Web App:

# cd /usr/local/docker-ente
# git clone https://github.com/ente-io/ente ente-git
# cd ente-git
# git submodule update --init --recursive
# cd -

Create the file ‘Dockerfile.auth‘ in the directory ‘/usr/local/docker-ente‘ and copy the following content into it:

FROM node:20-alpine AS builder
WORKDIR /app
COPY . .
ARG NEXT_PUBLIC_ENTE_ENDPOINT=https://ente.darkstar.lan
ENV NEXT_PUBLIC_ENTE_ENDPOINT=${NEXT_PUBLIC_ENTE_ENDPOINT}
RUN yarn install && yarn build:auth
FROM node:20-alpine
WORKDIR /app
COPY --from=builder /app/apps/auth/out .
RUN npm install -g serve
ENV PORT=3322
EXPOSE ${PORT}
CMD serve -s . -l tcp://0.0.0.0:${PORT}

NOTE: I chose to let the web-app use another port than the default ‘3000’ because in the Slackware Cloud Server that port is already occupied by the jitsi-keycloak adapter. I picked another port: 3322.
I also already anticipate that the Auth Web App should accessible outside of my home, so I point the App to the public API endpoint ente.darkstar.lan instead of a localhost address.

Considerations for the .env file

Docker Compose is able to read environment variables from an external file. By default, this file is called ‘.env‘ and must be located in the same directory as the ‘docker-compose.yml‘ file (in fact ‘.env‘ will be searched in the current working directory, but I always execute ‘docker-compose‘ in the directory containing its YAML file anyway).

In this environment file we are going to specify things like accounts, passwords, TCP ports and the like, so that they do not have to be referenced in the ‘docker-compose.yml‘ file or even in the process environment space. You can shield ‘.env‘ from prying eyes, thus making the setup more secure. Remember, we are going to store two-factor authentication secrets in the Ente database. You want those to be safe.

Apart from feeding Docker a set of values, we need to make several of these values find their way into the containers. The usual way for Ente server (not using Docker) is to write the configuration values into one or more configuration files. These parameters are all documented in the ‘local.yaml‘ file in the git repository of the project.
Basically we should leave the defaults in ‘local.yaml‘ alone and specify our own custom configuration in ‘museum.yaml‘ and/or ‘credentials.yaml‘.
These two files will be parsed in that order, and parameters defined later will override the values for those parameters that were defined before. Both files will be looked for in the current working directory, again that should be the directory where the ‘docker-compose.yml‘ file is located.

Now the good thing is that all of Ente’s configuration parameters can be overridden by environment variables. You can derive the relevant variable name from its corresponding config parameter, by simple string substitution. Taken verbatim from that file:

The environment variable should have the prefix “ENTE_“, and any nesting should be replaced by underscores.
For example, the nested string “db.user” in the config file can alternatively be specified (or be overridden) by setting an  environment variable named “ENTE_DB_USER“.

We are going to make good use of this.

This is the content of the ‘/usr/local/docker-ente/.env‘ file:

# ---
# Provide an initial OTT if you decide not to setup an email server:.
# Change 'me@home.lan' to the email you will use to register your initial account.
# The string '123456' can be any 6-number string:
ENTE_HARDCODED_OTT_EMAIL="me@home.lan,123456"

# Various secret hashes used for encrypting data before storing to disk: 
ENTE_KEY_ENCRYPTION=yvmG/RnzKrbCb9L3mgsmoxXr9H7i2Z4qlbT0mL3ln4w=
ENTE_KEY_HASH=JDYkOVlqSi9rLzBEaDNGRTFqRyQuQTJjNGF0cXoyajA3MklWTjc1cDBSaWxaTmh0VUViemlGRURFUFZqOUlNCg==
ENTE_JWT_SECRET=wRUs9H5IXCKda9gwcLkQ99g73NVUT9pkE719ZW/eMZw=

# The Postgres database:
ENTE_DB_PORT=5432
ENTE_DB_NAME=ente_db
ENTE_DB_USER=entedbuser
ENTE_DB_PASSWORD=9E8z2nG3wURGC0R51V5LN7/pVapwsSvJJ2fASUUPqG8=

# MinIO credentials:
ENTE_MINIO_KEY=AeGnCRWTrEZVk8VjroxVqp7IoHQ/fNn4wPL7PilZ+Hg=
ENTE_MINIO_SECRET=wdZPtr0rEJbFxr4GsGMB6mYojKahA3nNejIryeawloc=

# We hard-code the IP address for Museum server,
# so that we can make it send emails:
MUSEUM_IPV4_ADDRESS=172.21.0.5
# ---

Note that the bold purple information in the ‘.env‘ file defines the initial user account, which you need to create immediately after first startup of the Ente Docker stack. You will be asked to assign a (strong) password. It’s this account which we are going to make the admin for the service.

Note that I kept having issues with some environment variables not getting filled with values inside the containers. I found out that a variable in the ‘.env‘ file that had a dash ‘-‘ as part of the name would not be recognized inside a container, that is why now I only use capital letters and the underscore,

Creating the Docker Compose files

The  ‘Dockerfile.auth‘ and ‘.env‘ files from the previous chapters are already some of the Docker Compose files that we need.
In addition, we create a script ‘minio-provision.sh‘; two configuration files ‘museum.yaml‘ and ‘cli-config.yaml‘; and finally the ‘docker-compose.yml‘ file which defines the container stack.
You will find the contents of these files in this very section. All of them go into directory /usr/local/docker-ente/ .

museum.yaml

Create a file ‘museum.yaml‘ in the directory /usr/local/docker-ente/ . We won’t have a need for a ‘credentials.yaml‘ file.
Copy the following content into the file, which then provides a basic configuration to the Ente Museum server.
Note that some of the values remain empty – they are provided via the ‘.env‘ file:

# ---
# This defines the admin user(s):
internal:
  admins:
    - # Account ID (a string of digits - see 'Administering the server')

# This defines the Postgres database:
db:
  host: ente-postgres
  port:
  name:
  user:
  password:

# Definition of the MinIO object storage.
# Even though this will all run locally, the three S3 datacenter names must
# remain the hard-coded values used by Ente in their commercial offering
# even though the names of endpoints/regions/buckets are not fixed.
s3:
  are_local_buckets: true
  b2-eu-cen:
    key:
    secret:
    endpoint: ente-minio:3200
    region: eu-central-2
    bucket: b2-eu-cen
  wasabi-eu-central-2-v3:
    key:
    secret:
    endpoint: ente-minio:3200
    region: eu-central-2
    bucket: wasabi-eu-central-2-v3
    compliance: false
  scw-eu-fr-v3:
    key:
    secret:
    endpoint: ente-minio:3200
    region: eu-central-2
    bucket: scw-eu-fr-v3

# Key used for encrypting customer emails before storing them in DB
# We will give them a value in the '.env' file of Docker Compose
# Note: to override a value that is specified in local.yaml in a
# subsequently loaded config file, you should specify the key
# as an empty string (`key: ""`) instead of leaving it unset.
key:
    encryption: ""
    hash: ""

# JWT secrets
jwt:
    secret: ""
# ---
cli-config.yaml

The ente CLI (command-line interface tool) to administer our Ente server needs to know where to connect to the Museum server API endpoint.
Add the following block into a new file called ‘/usr/local/docker-ente/cli-config.yaml‘. We will map this file into the CLI container using the docker-compose file.

# ---
# You can put this configuration file in the following locations:
# - $HOME/.ente/config.yaml
# - config.yaml in the current working directory
# - $ENTE_CLI_CONFIG_PATH/config.yaml

endpoint:
  # Since we run everything in a Docker stack,
  # the hostname equals the service name.
  # And since the CLI inside one container is going to connect
  # to the Museum container via the internal Docker network,
  # we need to access the internal port (8080),
  # instead of the published port (8180):
  api: "http://ente-museum:8080"

log:
  http: false # log status code & time taken by requests
# ---
minio-provision.sh

The script which we create as ‘/usr/local/docker-ente/minio-provision.sh‘ is used to provision the S3 buckets when this container stack first initializes. It is slightly modified from the original script which is found in the ente repository. because I do not want to have credentials in that script. So this is what it should look like when you create it:

#!/bin/sh
# Script used to prepare the minio instance that runs as part of the Docker compose cluster.
# Wait for the server to be up & running (script arguments 1 and 2 are the user/password):
while ! mc config host add h0 http://ente-minio:3200 $1 $2
do
  echo "waiting for minio..."
  sleep 0.5
done
cd /data
# Create the S3 buckets:
mc mb -p b2-eu-cen
mc mb -p wasabi-eu-central-2-v3
mc mb -p scw-eu-fr-v3
# ---
docker-compose.yml

Create a file ‘/usr/local/docker-ente/docker-compose.yml‘ with these contents:

# ---
name: ente
services:
  ente-museum:
    container_name: ente-museum
    image: ghcr.io/ente-io/server
    ports:
      - 127.0.0.1:8180:8080 # API endpoint
    depends_on:
      ente-postgres:
        condition: service_healthy
    # Wait for museum to ping pong before starting the webapp.
    healthcheck:
      test: [ "CMD", "echo", "1" ]
    environment:
      # All of the credentials needed to create the first user,
      # connect to the DB and MinIO and to encrypt data:
      ENTE_INTERNAL_HARDCODED-OTT_EMAILS: ${ENTE_HARDCODED_OTT_EMAIL}
      ENTE_KEY_ENCRYPTION: ${ENTE_KEY_ENCRYPTION}
      ENTE_KEY_HASH: ${ENTE_KEY_HASH}
      ENTE_JWT_SECRET: ${ENTE_JWT_SECRET}
      ENTE_DB_PORT: ${ENTE_DB_PORT}
      ENTE_DB_NAME: ${ENTE_DB_NAME}
      ENTE_DB_USER: ${ENTE_DB_USER}
      ENTE_DB_PASSWORD: ${ENTE_DB_PASSWORD}
      ENTE_S3_B2-EU-CEN_KEY: ${ENTE_MINIO_KEY}
      ENTE_S3_B2-EU-CEN_SECRET: ${ENTE_MINIO_SECRET}
      ENTE_S3_WASABI-EU-CENTRAL-2-V3_KEY: ${ENTE_MINIO_KEY}
      ENTE_S3_WASABI-EU-CENTRAL-2-V3_SECRET: ${ENTE_MINIO_SECRET}
      ENTE_S3_SCW-EU-FR-V3_KEY: ${ENTE_MINIO_KEY}
      ENTE_S3_SCW-EU-FR-V3_SECRET: ${ENTE_MINIO_SECRET}
    volumes:
      - ./museum.yaml:/museum.yaml:ro 
      - /opt/dockerfiles/ente/museum-logs:/var/logs
      - /opt/dockerfiles/ente/museum-data:/data
    networks:
      ente.lan:
        ipv4_address: ${MUSEUM_IPV4_ADDRESS}
        aliases:
          - ente-museum.ente.lan
    restart: always

  # Resolve "localhost:3200" in the museum container to the minio container.
  ente-socat:
    container_name: ente-socat
    image: alpine/socat
    network_mode: service:ente-museum
    depends_on:
      - ente-museum
    command: "TCP-LISTEN:3200,fork,reuseaddr TCP:ente-minio:3200"

  ente-postgres:
    container_name: ente-postgres
    image: postgres:12
    ports:
      - 127.0.0.1:${ENTE_DB_PORT}:${ENTE_DB_PORT}
    environment:
      POSTGRES_DB: ${ENTE_DB_NAME} 
      POSTGRES_USER: ${ENTE_DB_USER}
      POSTGRES_PASSWORD: ${ENTE_DB_PASSWORD}
    # Wait for postgres to be accept connections before starting museum.
    healthcheck:
      test:
        [
          "CMD",
          "pg_isready",
          "-q",
          "-d",
          "${ENTE_DB_NAME}",
          "-U",
          "${ENTE_DB_USER}"
        ]
      start_period: 40s
      start_interval: 1s
    volumes:
      - /opt/dockerfiles/ente/postgres-data:/var/lib/postgresql/data
    networks:
      - ente.lan
    restart: always
  ente-minio:
    container_name: ente-minio
    image: minio/minio
    # Use different ports than the minio defaults to avoid conflicting
    # with the ports used by Prometheus.
    ports:
      - 127.0.0.1:3200:3200 # API
      - 127.0.0.1:3201:3201 # Console
    environment:
      MINIO_ROOT_USER: ${ENTE_MINIO_KEY}
      MINIO_ROOT_PASSWORD: ${ENTE_MINIO_SECRET}
    command: server /data --address ":3200" --console-address ":3201"
    volumes:
      - /opt/dockerfiles/ente/minio-data:/data
    networks:
      - ente.lan
    restart: always

  ente-minio-provision:
    container_name: ente-minio-provision
    image: minio/mc
    depends_on:
      - ente-minio
    volumes:
      - ./minio-provision.sh:/provision.sh:ro
      - /opt/dockerfiles/ente/minio-data:/data
    networks:
      - ente.lan
    entrypoint: ["sh", "/provision.sh", "${ENTE_MINIO_KEY}", ${ENTE_MINIO_SECRET}"]
    restart: always
  ente-auth-web:
    container_name: ente-auth-web
    image: ente-auth-web:latest
    build:
      context: ./ente-git/web
      # The path for dockerfile is relative to the context directory:
      dockerfile: ../../Dockerfile.auth
      tags:
        - "ente-auth-web:latest"
    environment:
      NEXT_PUBLIC_ENTE_ENDPOINT: "https://ente.darkstar.lan"
    volumes:
      - /opt/dockerfiles/ente/webauth-data:/data
    ports:
      - 127.0.0.1:3322:3322
    depends_on:
      ente-museum:
        condition: service_healthy
    restart: always

  ente-cli:
    container_name: ente-cli
    image: ente-cli:latest
    build:
      context: ./ente-git/cli
      tags:
        - "ente-cli:latest"
    command: /bin/sh
    environment:
      ENTE_CLI_CONFIG_PATH: /config.yaml
    volumes:
      - ./cli-config.yaml:/config.yaml:ro
      # This is mandatory to mount the local directory to the container at /cli-data
      # CLI will use this directory to store the data required for syncing export
      - /opt/dockerfiles/ente/cli-data:/cli-data:rw
      # You can add additional volumes to mount the export directory to the container
      # While adding account for export, you can use /data as the export directory.
      - /opt/dockerfiles/ente/cli-export:/data:rw
    stdin_open: true
    tty: true
    restart: always

networks:
  ente.lan:
    external: true
# ---

In the service definition for ‘ente-cli‘ we build the local image ‘ente-auth-web‘ if it does not yet exist (i.e. in case we had not built it before) and we also tag the image as ‘ente-auth-web:latest‘ so that it is more easily found in a ‘docker image ls‘ command.


Running the server

Now that we have created the docker-compose.yml (defining the container stack), the .env file (containing credentials and secrets), museum.yaml (outlining the basic configuration of Ente and defining the initial user and its one-time token), cli-config.yaml (telling the CLI where to find the server), a Dockerfile.auth to build the ente-auth-web app and a minio-provision.sh script with which we initialize the MinIO S3-compatible storage…. we are ready to fire up the barbeque.

If you hadn’t created the Docker network yet, do it now! See the “Docker network” section higher up.
Start the Docker container stack (seven containers in total) as follows:

# cd /usr/local/docker-ente
# docker-compose up -d

And monitor the logs if you think the startup is troublesome. For instance, check the logs for the Museum service (Ente’s backend) using the name we gave its container (ente-museum):

# docker-compose logs ente-museum

When the server is up and running, use a webbrowser to access  the Ente Auth web app athttps://enteauth.darkstar.lan/

You can test the server backend (the API endpoint) by ‘pinging‘ it.  Just point curl (or a web browser) at the URL https://ente.darkstar.lan/ping – it should return ‘pong‘ in the form of a YAML string which looks a lot like this:

{"id":"qxpxd7j59pvejjzpz7lco0zroi2cq8l13gq9c2yy8pbh6b6lg","message":"pong"}


Connecting a client

Download and install the Ente Auth mobile or desktop app, then start it.
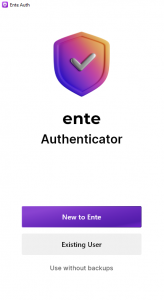
When the start screen appears, you would normally click “New to Ente” and then get connected to Ente’s own server at api.ente.io. We want to connect to our self-hosted instance instead but how to enter the server URL?
Ente developers implemented this as follows, and it works for the mobile as well as the desktop clients:

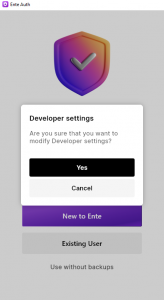
Tap the opening screen seven (7) times to access “Developer settings” (on the desktop you’d perform 7 mouse clicks):

When you click “Yes“,  a new prompt for “Server Endpoint” will appear.
Here you enter “https://ente.darkstar.lan” which is our API endpoint:

The client will then proceed connecting to your server and then take you back to the opening screen .

Click “New to Ente“. You can now sign in using the initial email address we configured in museum.yaml . Be sure to define a strong password! The security of your 2FA secrets is as strong as that password.
The app will then ask you for an One-Time Token (OTT). This is the 6-digit string which we configured along with the email of the initial user account, again in museum.yaml . Enter this code and the registration process is complete.

Now logoff and login again to the authenticator and then open the Museum log file:

# docker-compose logs ente-museum |less

Search for ‘user_id‘ to find your user’s 16-digit ID code. We will need that ID later on when we promote your account to admin.
The relevant line will look like this:

ente-museum | INFO[1071]request_logger.go:100 func3 outgoing
client_ip=<your_ip> client_pkg=io.ente.auth.web client_version= h_latency=2.59929ms latency_time=2.59929ms query= req_body=null req_id=35f11344-c7ab-48a6-b2c4-25cd82df3a23 req_method=POST req_uri=/users/logout status_code=200 ua=<your_browser_useragent> user_id=5551234567654321

NOTE: That ‘user_id‘ will initially reflect with a value of ‘0’ but it will show the correct value after you logged off and logged back in again to the authenticator app.


Administering the server

User registration

On your self-hosted server you may want to disable self-registration of user accounts. See the section ‘”Account self-registration or not?” for considerations regarding this choice. If you decide to keep email capabilities disabled, you’ll have to assist your family and friends when they register their account: you need to fetch their One-Time Token (OTT) from the Museum server log.
You access the Museum server logs via the following command (‘ente-museum‘ being the name of the container):

# docker-compose logs ente-museum |less

And then grep the output for the keyword “SendEmailOTT

To give an example of that, when registering the initial user account for whom we hard-coded the email address and OTT code, you would find the following lines in your server log:

ente-museum | WARN[0082]userauth.go:102 SendEmailOTT returning hardcoded ott for me@home.lan
ente-museum | INFO[0082]userauth.go:131 SendEmailOTT Added hard coded ott for me@home.lan : 123456

When subsequent new users go through the registration process, the log entry will be different, but “SendEmailOTT” will be present in the line that contains the OTT code (519032) whereas the next line will mention the new user’s registration email (friend@foo.bar):

ente-museum | INFO[2626]userauth.go:125 SendEmailOTT Added ott for navQ5xarR9du1zw3QmmnwW4F48dAm7f52okwSkWFFS4=: 519032
ente-museum | INFO[2626]email.go:109 sendViaTransmail Skipping sending email to friend@foo.bar: ente Verification Code

That way, you can share the OTT with your user during the account registration so that they can complete the process and start using the authenticator.

Don’t worry if you can not share the OTT code with a new user immediately. The user can close their browser after creating the account and before entering the OTT.
When they re-visit https://enteauth.darkstar.lan/ in future and login again, the Web App will simply keep asking for the OTT code, until the user enters it, thereby completing the registration process.

Ente CLI

You can administer the  accounts on your Museum server via the CLI (Ente’s Command Line Interface) tool which is part of the Docker stack and runs in its own container. Therefore we actually execute the ‘ente-cli‘ tool via Docker Compose. Like this example (the container name is ‘ente-cli‘ but also the program in the container is renamed to ‘ente-cli‘)

# docker-compose exec ente-cli /bin/sh -c "./ente-cli admin list-users"

NOTE: to use the CLI for any administrative tasks, you need to have whitelisted the server’s admin user(s) beforehand.

So let’s copy our own account ‘s ID 5551234567654321 to the server configuration in order to make it a server administrator. Ensure that the ‘internal‘ section in'museum.yaml‘ in the root directory for our Docker configuration (/usr/local/docker-ente/) looks like this:

# ---
 internal:
  admins:
    - 5551234567654321
# ---

That 16-digit number is your own initial account ID which you retrieved by peeking into the server logs – see the previous section ‘Connecting a client‘.

After adding your account ID to the 'museum.yaml‘  file, you need to bring your Docker stack down and back up again:

# cd /usr/local/docker-ente
# docker-compose down
# docker-compose up -d

Now your account has been promoted to admin status.

Logging in to and using the CLI

Before you can administer any user account, you have to login to the CLI. Otherwise the CLI admin actions will show a message like this:

# docker-compose exec ente-cli /bin/sh -c "./ente-cli admin list-users"
Assuming me@home.lan as the Admin 
------------
Error: old admin token, please re-authenticate using `ente account add`

All CLI commands and options are documented in the repository.

# docker-compose exec ente-cli /bin/sh -c "./ente-cli account add"
Enter app type (default: photos): auth
Enter export directory: /data
Enter email address: me@home.lan
Enter password: 
Please wait authenticating...
Account added successfully
run `ente export` to initiate export of your account data

The ‘app type‘  must be ‘auth‘. The ‘/data‘ directory is internal to the container, we mapped it to ‘/opt/dockerfiles/ente/cli-export‘ in the ‘docker-compose.yml‘ file. You don’t have to run the proposed “ente export” command, since for now there is nothing to export.

The email address and password that are prompted for, are your own admin email ‘me@home.lan‘ and the password you configured for that account.

Now that we have ‘added’ our account to the CLI (aka we logged into the tool with our admin credentials), let’s see what it can tell us about ourselves:

# docker-compose exec ente-cli /bin/sh -c "./ente-cli account list"
Configured accounts: 1
====================================
Email: me@home.lan
ID: 5551234567654321
App: auth
ExportDir: /data
====================================

As a follow-up, let’s use our new admin powers to generate a listing of existing user accounts:

# docker-compose exec ente-cli /bin/sh -c "./ente-cli admin list-users"
Assuming me@home.lan as the Admin 
------------
Email: me@home.lan, ID: 5551234567654321, Created: 2024-07-15
Email: friend@foo.bar, ID: 5555820399142322, Created: 2024-07-15

Account self-registration or not?

Since Ente’s self-hosted instance is not yet able to use Single Sign-On, the question becomes: should you disable self-registration on your Ente Auth server?

Out of the box, the Ente Auth server accepts everyone with a valid email address and creates an account for them. The account won’t however be activated until after the new user enters a One-Time Token (OTT) which the Ente server sends to the user’s email address.

You could simply not configure mail transport on the Ente server, so that nobody will receive their one-time password which they need to be able to login. If you do want to allow people to register accounts themselves without your involvement, then you need to setup email transport capability. Here follow those two scenarios – apply only one of them.

(1) pre-defining the OTT (one-time token) for your users

Let’s look at the case where you don’t configure email transport. For your users to create an account and activate that, they still have to enter a six-digit One-Time Token (OTT) after registering their email address and setting a password.

Earlier in this article, I pointed you to the server logs where you’ll find the OTT codes for your new users.

But as the server owner you can also choose to pre-define as many hard-coded OTT’s as needed – as long as you know in advance which email address your user is going to use for the registration. You then share their pre-defined 6-digit code with that person so that they can complete the registration process and can start using the app.

To pre-define one or more OTT, you add the following to the file ‘museum.yaml‘:

internal:
  hardcoded-ott:
    emails:
      - "example@example.org,123456"
      - "friend@foo.org,987654"

After changing ‘museum.yaml’ you need to restart/rebuild the container stack (‘docker-compose down‘ followed by ‘docker-compose up -d‘) because this file must be included inside the container.

I myself did not want to pre-fill the server with a plethora of hard-coded OTT strings. I want to be in control over who registers, and when. So whenever someone asks me for an account on the Ente server, I ask them which email address they will be using and then scan the Ente Museum log for the OTT which will be generated but not sent out. I will communicate the OTT to my new user – via text message or by just telling them. It’s up to you to pick what works best for you.

(2) configuring mail transport in Ente

Next is the case where you don’t want to be involved getting new accounts activated. In that case, the Ente server needs to be able to send One-Time Tokens to the email address of a new user during the registration process.
Configure SMTP capability as follows, by adding  the following to the file ‘museum.yaml‘:

smtp:
  host: <your_smtp_server_address>
  port: <usually 587>
  username: <required>
  password: <required>
  # The email address from which to send the email.
  # Set this to an email address
  # whose credentials you're providing. If left empty,
  # the reply-to address will be verification@ente.io
  email: <your_own_replyto_address>

Provide the hostname or IP  address and the TCP port for your own SMTP server. Ente Museum requires a TLS encrypted connection as well as SMTP AUTH, see further below on how to configure your mailserver accordingly.
The ’email:’ field should be set to a return email address which allows people to reply to you in case of issues during the verification stage. For instance, Ente themselves use ‘verification@ente.io‘ here but that’s not very useful for us.

Make the host accept mail from Ente container

When the Museum server starts sending emails from its Docker container, we want Sendmail or Postfix to accept and process these. What commonly happens if a SMTP server receives emails from an unknown IP address is to reject those emails with “Relaying denied: ip name lookup failed“. We don’t want that to happen, so I had already added some glue in the Docker configuration to create a level of trust and understanding.

On the host side we have some remaining steps to complete:

  • Announce the Docker IP/hostname mapping
  • Setup a local DNS server
  • Configure SASL authentication mechanisms to be used by the MTA (mail transport agent, eg. Postfix)
  • Create a system user account to be used by Ente Museum when authenticating to the MTA
  • Add SASL AUTH and also TLS encryption capabilities to the MTA
Assign IP address to the Museum server

This section contains the part which is already done. The next sections document what still needs to be done.

To the ‘.env‘ file I had already added some lines to assign the value of an IP address to variable ‘$MUSEUM_IPV4_ADDRESS‘ in the ‘ente.lan‘ network range:

# We hard-code the IP address for Museum server,
# so that we can allow it to send emails:
MUSEUM_IPV4_ADDRESS=172.21.0.5

In ‘docker-compose.yml‘ I had already added the following lines, using the above variable to assign the hard-coded IP to the ‘ente-museum‘ container:

networks:
  ente.lan:
    ipv4_address: ${MUSEUM_IPV4_ADDRESS}
    aliases:
      - ente-museum.ente.lan
Add IP / name mapping to the host

In ‘/etc/hosts‘ you still need to add the following:

172.21.0.5    ente-museum ente-museum.ente.lan

And to ‘/etc/networks‘ add this line:

ente.lan   172.21

DNS serving local IPs

Under the assumption that your Cloud Server does not act as a LAN’s DNS server, we will use dnsmasq as the local nameserver. Dnsmasq is able to use the content of /etc/hosts and /etc/networks when responding to DNS queries. We can use the default, unchanged ‘/etc/dnsmasq.conf‘ configuration file.

But first, add this single line at the top of the host server’s ‘/etc/resolv.conf‘ (it may already be there as a result of setting up Keycloak), so that all local DNS queries will will be handled by our local dnsmasq service:

nameserver 127.0.0.1

If you have not yet done so, (as root) make the startup script ‘/etc/rc.d/rc.dnsmasq‘ executable and start dnsmasq manually (Slackware will take care of starting it on every subsequent reboot):

# chmod +x /etc/rc.d/rc.dnsmasq
# /etc/rc.d/rc.dnsmasq start

If dnsmasq is already running (eg. when you have Keycloak running and sending emails) then send SIGHUP to the program as follows:

# killall -HUP dnsmasq
Done! Check that it’s working and continue to the next step:

# nslookup ente-museum.ente.lan
Server: 127.0.0.1
Address: 127.0.0.1#53
Name: ente-museum.ente.lan
Address: 172.21.0.5
Configuring SASL

The mailserver aka MTA (Sendmail or Postfix) requires that remote clients authenticate themselves. The Simple Authentication and Security Layer (SASL) protocol is used for that, but typically, these MTA’s do not implement SASL themselves. There are two usable SASL implementations available on Slackware: Cyrus SASL and Dovecot; I picked Cyrus SASL just because I know that better.
We need to configure the method of SASL authentication for the SMTP daemon, which is via the saslauthd daemon. That one is not started by default on Slackware.

If the file ‘/etc/sasl2/smtpd.conf‘ does not yet exist, create it and add the following content:

pwcheck_method: saslauthd
mech_list: PLAIN LOGIN

Don’t add any further mechanisms to that list, except for PLAIN LOGIN. The resulting transfer of cleartext credentials is the reason that we also wrap the communication between mail client and server in a TLS encryption layer.

If the startup script ‘/etc/rc.d/rc.saslauthd‘ is not yet executable, make it so and start it manually this time (Slackware will take care of starting it on every subsequent reboot):

# chmod +x /etc/rc.d/rc.saslauthd
# /etc/rc.d/rc.saslauthd start

Create the mail user

We need a system account to allow Ente to authenticate to the SMTP server. Let’s go with userid ‘verification‘.
The following two commands will create the user and set a password:

# /usr/sbin/useradd -c "Ente Verification" -m -g users -s /bin/false verification
# passwd verification

Write down the password you assigned to the user ‘verification‘. Both this userid and its password need to be added to the  ‘username:‘ and ‘password:‘ definitions in the ‘smtpd:‘ section of our ‘museum.yaml‘ file.

When that’s done, you can test whether you configured SASL authentication correctly by running:

# testsaslauthd -u verifification -p thepassword

… which should reply with:

0: OK "Success."

Configuring Sendmail

Since Postfix has replaced Sendmail as the MTA in Slackware a couple of years ago already, I am going to be concise here:
Make Sendmail aware that the Ente Museum container is a known local host by adding the following line to “/etc/mail/local-host-names” and restarting the sendmail daemon:

ente-museum.ente.lan

The Sendmail package for Slackware provides a ‘.mc’ file to help you configure SASL-AUTH-TLS in case you had not yet implemented that: ‘/usr/share/sendmail/cf/cf/sendmail-slackware-tls-sasl.mc‘.

Configuring Postfix

If you use Postfix instead of Sendmail, this is what you have to change in the default configuration:

In ‘/etc/postfix/master.cf‘, uncomment this line to make the Postfix server listen on port 587 as well as 25 (port 25 is often firewalled or otherwise blocked):

submission inet n - n - - smtpd

In ‘/etc/postfix/main.cf‘, add these lines at the bottom:

# ---
# Allow Docker containers to send mail through the host:
mynetworks_style = class
# ---

Assuming you have not configured SASL AUTH before you also need to add:

# ---
# The assumption is that you have created your server's SSL certificates
# using Let's Encrypt and 'dehydrated':
smtpd_tls_cert_file = /etc/dehydrated/certs/darkstar.lan/fullchain.pem
smtpd_tls_key_file = /etc/dehydrated/certs/darkstar.lan/privkey.pem
smtpd_tls_security_level = encrypt

# Enable SASL AUTH:
smtpd_sasl_auth_enable = yes
syslog_name = postfix/submission
smtpd_recipient_restrictions = permit_sasl_authenticated,permit_mynetworks,reject_unauth_destination
# ---

After making modifications to the Postfix configuration, always run a check for correctness of the syntax, and do a reload if you don’t see issues:

# postfix check
# postfix reload

More details about SASL AUTH to be found in ‘/usr/doc/postfix/readme/SASL_README‘ on your own host machine.

Note: if you provide Postfix with SSL certificates through Let’s Encrypt (using the dehydrated tool) be sure to reload the Postfix configuration every time ‘dehydrated’ refreshes its certificates.

  1. In ‘/etc/dehydrated/hook.sh’ look for the ‘deploy_cert()‘ function and add these lines at the end of that function (perhaps the ‘apachectl‘ call is already there):

    # After successfully renewing our Apache certs, the non-root user 'dehydrated_user'
    # uses 'sudo' to reload the Apache configuration:
    sudo /usr/sbin/apachectl -k graceful
    # ... and uses 'sudo' to reload the Postfix configuration:
    sudo /usr/sbin/postfix reload
  2. Assuming you are not running dehydrated as root but instead as ‘dehydrated_user‘, you need to add a file in ‘/etc/sudoers.d/‘ – let’s name it ‘postfix_reload‘ – and copy this line into the file:

    dehydrated_user ALL=NOPASSWD: /usr/sbin/postfix reload
Success or failure

You can query your mail server to see if you were successful in adding SASL AUTH and TLS capabilities:

$ telnet smtp.darkstar.lan 587
Trying XXX.XXX.XXX.XXX...
Connected to smtp.darkstar.lan.
Escape character is '^]'.
220 smtp.darkstar.lan ESMTP Postfix
EHLO foo.org
250-PIPELINING
250-SIZE 10240000
250-VRFY
250-ETRN
250-STARTTLS
250-ENHANCEDSTATUSCODES
250-8BITMIME
250-DSN
250-SMTPUTF8
250 CHUNKING
AUTH LOGIN
530 5.7.0 Must issue a STARTTLS command first
QUIT
221 2.0.0 Bye
Connection closed by foreign host.

In case you succeeded in setting up your mailserver you will find lines like this in the ente-museum log whenever a new user registers their Ente account:

ente-museum | INFO[0083]request_logger.go:83 func3 incoming client_ip=<your_ip> client_pkg=io.ente.auth.web client_version= query= req_body={"email":"friend@foo.org","client":"totp"} req_id=dda6b689-8e96-4e66-bade-68b53fe2d910 req_method=POST req_uri=/users/ott ua=<your_browser_useragent>
ente-museum | INFO[0083]userauth.go:125 SendEmailOTT Added ott for JLhW32XlNU8GchWneMPajdKW+UEDpYzh8+6Yjf6VhK4=: 654321
ente-museum | INFO[0084]request_logger.go:100 func3 outgoing client_ip=<your_ip> client_pkg=io.ente.auth.web client_version= h_latency=130.00083ms latency_time=130.00083ms query= req_body={"email":"friend@foo.org","client":"totp"} req_id=dda6b689-8e96-4e66-bade-68b53fe2d910 req_method=POST req_uri=/users/ott status_code=200 ua=<your-browser_useragent> user_id=0

Considerations

Using Ente server to store your photos

Ente uses a S3 (Amazon’s Simple Storage Service) compatible object storage. The Docker Compose stack contains a MinIO container which effectively hides your local hard drive behind its S3-compatible API. The company Ente itself uses commercial S3 storage facilities in multiple datacenters to provide redundancy and reliability in storing your data. That may be too much (financially) for your self-hosted server though.
In the scope of this article, all you’ll store anyway is your encrypted 2FA token collection. However, Ente’s main business model is to act as an alternative to Google Photos or Apple iCloud. I.e. all your photos can also be stored in a S3 bucket. You just need a different app but your server is already waiting for your picture uploads. Your Ente Auth user account is the same to be used for Ente Photos.

The self-hosted Ente server is just as feature-rich as the commercial offering! You can instruct the mobile Photos client to automatically upload the pictures you take with your phone for instance. Documenting how to setup the Photos Web app is currently beyond the scope of this article, because similar functionality is already provided by Nextcloud Sync and documented in this same Cloud Server series.

If you want to have a public Photos Web application (similar to how we have built an Auth Web app) that’s relatively straightforward: just look at how the Auth Web app is built in the ‘docker-compose.yml’ and copy that block to add an extra container definiton (substituting ‘auth’ with ‘photos’). More info to be found in this Ente Discussion topic.

Now, the issue with acting as a picture library is that you need to grant Ente Photo clients direct access to your S3-compatible storage. The Ente Photos server only acts as the broker between your client app and the remote storage. The photo upload happens through direct connection to the S3 bucket.
When you host your own Ente server, that direct access means you’ll have to open a separate hole in your NAT router (if your server is behind NAT) and/or in your firewall. Your Ente (mobile) client wants to connect to TCP port 3200 of your server to reach the MinIO container. Perhaps this can be solved by configuring another reverse proxy, but I have not actually tried and tested this.

Note that you should not open the MinIO console port (3201) to the general public!

Another thing to be aware of is that users of the Photo app, when they create an account on your server, will effectively be given a “trial period” of one year in which they can store up to 1 GB of photos. The first thing you would do after a new account gets created on your server, is to remove those limitations by running:

docker-compose exec ente-cli /bin/sh -c "./ente-cli account admin update-subscription --no-limit true"

which increases the storage lifetime to a 100 years from now, and the maximum storage capacity to 100 TB. If you need custom values for lifetime and storage capacity, then you’ll have to edit the database directly using a SQL query.


CORS

When testing the Ente Web Auth app against my new Ente backend server, I ran into “Network Error” when submitting my new email address and password, thus preventing my account registration process to complete.

I could debug the connection issue by using Chromium browser and opening a Developer Tools sidebar (Shift-Ctrl-I) and keeping the ‘Network‘ tab open while making the connection. It turned out that the “Network Error” issue was caused by CORS (Cross-Origin Resource Sharing) headers that I had configured my Apache server to send along with every server response to client requests. I was able to verify by inspecting the logs of the ‘ente-museum’ container that my browser input never reached that container.

What I had configured on my server were the following lines which I took from this discussion on Stack Overflow – I think I wanted to address a similar CORS issue in the past – but now it was really not helping me with Ente:

Header always set Access-Control-Allow-Origin "*"
Header always set Access-Control-Allow-Headers "Authorization"
Header always set Access-Control-Allow-Methods "GET"
Header always set Access-Control-Expose-Headers "Content-Security-Policy, Location"
Header always set Access-Control-Max-Age "600"

I fixed this by simply removing this section from my Apache httpd configuration, but I suppose sometimes you cannot just remove a bothersome piece of configuration. In that case, you could prevent Apache from sending these headers, but only for the Ente virtual hosts, by adding these lines inside the ‘VirtualHost‘ declaration for ente.darkstar.lan:

Header unset Access-Control-Allow-Origin
Header unset Access-Control-Allow-Headers
Header unset Access-Control-Allow-Methods
Header unset Access-Control-Expose-Headers

After removing these CORS Header definitions, the Web Auth app could successfully register my new account on the Ente server.

Conclusion

When I sort-of promised to write up the documentation on how to self-host an Ente backend server, I did not know what I was getting into. There’s a lot of scattered documentation about how to setup a Dockerized Ente server. That documentation also seems to have been written with developers in mind, rather than to aid a security-minded spirit who wants complete control over their secret data.
I managed to get all of this working flawlessly and I hope that this Cloud Server episode will benefit more than just my fellow Slackware users!

Leave your constructive comments below where I can hopefully answer them to your satisfaction.

Have fun!


Slackware Cloud Server Series, Episode 8: Media Streaming Platform

Here is a new installment in the series which teaches how you can run a variety of services on your own private cloud server for family, friends and your local community, remaining independent of any of the commercial providers out there.

Today we will look into setting up a media streaming platform. You probably have a subscription – or multiple! – for Netflix, Prime, Disney+, AppleTV, HBO Max, Hulu, Peacock or any of the other streaming media providers. But if you already are in possession of your own local media files (movies, pictures, e-books or music) you will be excited to hear that you can make those media available in really similar fashion to those big platforms. I.e. you can stream – and enable others to stream! – these media files from just about anywhere on the globe.
Once we have this streaming server up and running I will show you how to setup our Identity Provider (Keycloak) just like we did for the other services I wrote about in the scope of this article series. The accounts that you already have created for the people that matter to you will then also have access to your streaming content via Single Sign-On (SSO).

Check out the list below which shows past, present and future episodes in the series, if the article has already been written you’ll be able to click on the subject.
The first episode also contains an introduction with some more detail about what you can expect.

Introduction

Before we had on-demand video streaming services, linear television was basically the only option to consume movies, documentaries and shows in your home. The broadcasting company decides on the daily programming and you do not have any choice in what you would like to view at any time of any day. Your viewing will be interrupted by advertisements that you cannot skip. Of course, if there’s nothing of interest on television, you could rent a video-tape or DVD to watch a movie in your own time, instead of going to the theater.
Actually, Netflix started as an innovative DVD rental company, sending their customers DVD’s by regular postal mail. They switched that DVD rental service to a subscription model but eventually realized the potential of subscription-based on-demand video streaming. The Netflix as we know it was born.

Nowadays we cannot imagine a world without the ability to fully personalize the way you consume movies and tv-shows. But that creates a dependency on a commercial provider. In this article I want to show you how to setup your own private streaming platform which you fully control. The engine of that platform will be Jellyfin, This is a fully open source program, descended from the final open source version of Emby before that became a closed-source product. Jellyfin has a client-server model where the server is under your control. You will learn how to set it up and run it as a Docker container. Jellyfin offers a variety of clients which can connect to this server and stream its content: there’s a client program for Android phones and Android TV, WebOS, iOS and there’s always the web client which is offered to browsers that connect to the server’s address.

The Jellyfin interface for clients is clean and informative, on par with commercial alternatives. The server collects information about your local content from online sources – as scheduled tasks or whenever you add a new movie, piece of music or e-book.

The good and bad of subscription-based streaming services

The Netflix business model has proven so successful that many content providers followed its lead, and present-day we are spoiled with an abundance of viewing options. If there’s anything you would like to watch, chances are high that the video is available for streaming already. The same is true for music – a Spotify subscription opens up a huge catalog of popular music negating the need to buy physical audio CD media.
The flipside of the coin is of course the fact that we are confronted with a fundamentally fragmented landscape of video streaming offerings. There’s a lot of choice but is that good for the consumer?

Streaming video platforms strategically focus on exclusive content to entice consumers into subscribing to their service offering. Exclusive content can be the pre-existing movie catalog of a film studio (see MGM+, Paramount+, Disney+ and more) or else entirely new content – movies/series that are commissioned by a streaming platform. Netflix, Apple TV, Amazon Prime are pouring billions of euros into the creation of new content since they do not have a library of existing content that they own. Social media are used as the battle field where these content providers try to win you over and subscribe. News outlets review  the content which premieres on all these platforms and you read about that and want to take part in the excitement.

The result is that you, the consumer, are very much aware of all those terrific new movies and series that are released on streaming platforms, but the only way to view them all is to pay for them all. The various platforms will not usually license their own cool stuff to other providers. So what happens? You subscribe to multiple platforms and ultimately you are paying mostly for content you’ll never watch.
Worse, there seems to be a trend where these subscription fees are increasing faster than your salary is growing, and on top of that, the cheaper subscriptions not just reduce the viewing quality but also force you to watch advertisements. At that point you are basically back at where you were trying to get away from: linear television riddled with ads from which you cannot escape.
The big companies make big bucks and have created an over-priced product which sucks. The consumer loses.

Bottom-line, any subscription based service model gives you access to content for as long as you pay. And sometimes you even need to pay extra – simply to have a comfortable viewing experience. You do and will not own any of that content. When you cancel your subscription you lose access to the content permanently.

In order to gain control over what you want to view, where and when, there is quite the choice when it comes to setting up the required infrastructure. Look at Kodi, Plex, Emby or Jellyfin for instance. All of those programs implement private streaming servers, with slightly different goals. The catch is that they can only stream the content which you already own and store on local disks. Did you already back up your DVD’s and music CD’s to hard-disk? Then you are in luck.

Preamble

This section describes the technical details of our setup, as well as the things which you should have prepared before trying to implement the instructions in this article.

For the sake of this instruction, I will use the hostname “https://jellyfin.darkstar.lan” as the URL where users will connect to the Jellyfin server.
Furthermore, “https://sso.darkstar.lan/auth” is the Keycloak base URL (see Episode 2 to read how we setup Keycloak as our identity provider).

Setting up your domain (which will hopefully be something else than “darkstar.lan”…) with new hostnames and then setting up web servers for the hostnames in that domain is an exercise left to the reader. Before continuing, please ensure that your equivalent for the following host has a web server running. It doesn’t have to serve any content yet but we will add some blocks of configuration to the VirtualHost definition during the steps outlined in the remainder of this article:

  • jellyfin.darkstar.lan

I expect that your Keycloak application is already running at your own real-life equivalent of https://sso.darkstar.lan/auth .

Using a  Let’s Encrypt SSL certificate to provide encrypted connections (HTTPS) to your webserver is documented in an earlier blog article.

Note that I am talking about webserver “hosts” but in fact, all of these are just virtual webservers running on the same machine, at the same IP address, served by the same Apache httpd program, but with different DNS entries. There is no need at all for multiple computers when setting up your Slackware Cloud server.

Apache reverse proxy configuration

We are going to run Jellyfin in a Docker container. The configuration will be such that the server will only listen for clients at a single TCP port at the localhost address (127.0.0.1).
To make our Jellyfin available for everyone at the address https://jellyfin.darkstar.lan/ we are using a reverse-proxy setup. This step can be done after the container is up and running, but I prefer to configure Apache in advance of the Jellyfin server start. It is a matter of preference.
Add the following reverse proxy lines to your VirtualHost definition of the “jellyfin.darkstar.lan” web site configuration and restart httpd:

# ---
# Required modules:
# mod_proxy, mod_ssl, proxy_wstunnel, http2, headers, remoteip

ProxyRequests Off
ProxyVia on
ProxyAddHeaders On
ProxyPreserveHost On

<Proxy *>
  Require all granted
</Proxy>

# Letsencrypt places a file in this folder when updating/verifying certs.
# This line will tell apache to not to use the proxy for this folder:
ProxyPass "/.well-known/" "!"

<IfModule mod_ssl.c>
  # Tell Jellyfin to forward that requests came from TLS connections:
  RequestHeader set X-Forwarded-Proto "https"
  RequestHeader set X-Forwarded-Port "443"
</IfModule>

# To work on WebOS TV, which runs the Jellyfin client in an I-Frame,
# you need to mitigate the SAMEORIGIN setting for X-Frame-Options
# if you configured this in your Apache httpd,
# or else you will just see a black screen after login:
Header always unset X-Frame-Options env=HTTPS

# Jellyfin hosted on https://jellyfin.darkstar.lan/
<Location /socket>
  ProxyPreserveHost On
  ProxyPass "ws://127.0.0.1:8096/socket"
  ProxyPassReverse "ws://127.0.0.1:8096/socket"
</Location>

<Location />
  ProxyPass "http://127.0.0.1:8096/"
  ProxyPassReverse "http://127.0.0.1:8096/"
</Location>
# ---

Jellyfin server setup

Prepare the Docker side

The Jellyfin Docker container runs with a specific internal user account. In order to recognize it on the host and to apply proper access control to the data which will be generated by Jellyfin on your host, we start with creating the user account on the host:

# /usr/sbin/groupadd -g 990 jellyfin
# /usr/sbin/useradd -c "Jellyfin" -d /opt/dockerfiles/jellyfin -M -g jellyfin -s /bin/false -u 990 jellyfin

Create the directories where our Jellyfin server will save its configuration and media caches, and let the user jellyfin own these directories:

# mkdir -p /opt/dockerfiles/jellyfin/{cache,config}
# chown -R jellyfin:jellyfin /opt/dockerfiles/jellyfin

If you want to enable GPU hardware-assisted video transcoding in the container, you have to add the jellyfin user as a member of the video group:

# gpasswd -a jellyfin video

Additionally you’ll require a dedicated Nvidia graphics card in your host computer and also install the Nvidia driver on the host, as well as the Nvidia Container Toolkit in Docker. This is an advanced setup which is outside of the scope of this article.

With the preliminaries taken care of, we now create the ‘docker-compose.yml‘ file for the streaming server. Store this one in its own directory:

# mkdir /usr/local/docker-jellyfin
# vi /usr/local/docker-jellyfin/docker-compose.yml

… and copy this content into the file:

version: '3.5'
services:
  jellyfin:
    image: jellyfin/jellyfin
    container_name: jellyfin
    user: '990:990'
    network_mode: 'host'
    ports:
    - 8096:8096
    volumes:
    - /etc/localtime:/etc/localtime:ro
    - /opt/dockerfiles/jellyfin/config:/config
    - /opt/dockerfiles/jellyfin/cache:/cache
    - /data/mp3:/music:ro     # Use the location of your actual mp3 collection here
    - /data/video:/video:ro   # Use the location of your actual video collection here
    - /data/books/:/ebooks:ro # Use the location of your actual e-book collection here
    restart: 'unless-stopped'
    deploy:
      resources:
        limits:
          cpus: '2'
          memory: 1024M
    # Optional - alternative address used for autodiscovery:
    environment:
      - JELLYFIN_PublishedServerUrl="https://jellyfin.darkstar.lan"
    # Optional - may be necessary for docker healthcheck to pass,
    # if running in host network mode
    extra_hosts:
      - "host.docker.internal:host-gateway"

Some remarks about this docker-compose file.

  • In green, I have higlighted the userIdNumber, the exposed TCP port and the URL by which you want to access the Jellyfin server once it is up and running. You will find these being referenced in other sections of this article.
  • I show a few examples of how you can bind your own media library storage into the container so that Jellyfin can be configured to serve them. You would of course replace my example locations with your own local paths to media you want to make available. Following my example, these media directories would be available inside the container as “/music“, “/video” and “/ebooks“. When configuring the media libraries on your Jellyfin server,  you are going to point it to these directories.
  • From experience I can inform you that in its default configuration, the Jellyfin server would often get starved of memory and the OOM-killer would kick in. Therefore I give the server 2 CPU cores and 1 GB of RAM to operate reliably. Tune these numbers to your own specific needs.
  • The ‘host‘ network mode of Docker is required only if you want to make your Jellyfin streaming server discoverable on your local network using DLNA. If you do not care about DLNA auto-discovery then you can add a comment in front of the network_mode: 'host' line out or simply delete the whole line.
    FYI: DLNA will send a broadcast signal from Jellyfin. This broadcast is limited to Jellyfin’s current subnet. When using Docker, the network should use ‘Host Mode’, otherwise the broadcast signal will only be sent to the bridged network inside of docker.
    Note: in the case of ‘Host Mode’, the Docker published port (8096) will not be used.
  • You may have noticed that there’s no database configuration. Jellyfin uses SQLite for its databases.

Start your new server

Starting the server is as simple as:

# cd /usr/local/docker-jellyfin/
# docker-compose up -d

For now, we limit the availability of Jellyfin to only localhost connections (unless you have already setup the Apache reverse configuration). That’s because we have not configured an admin account yet and do not want some random person to hi-jack the server. The Apache httpd reverse proxy makes the server accessible more universally.

Note that the Jellyfin logfiles can be found in /opt/dockerfiles/jellyfin/config/log/. Check these logs for clues if the server misbehaves or won’t even start.

Initial runtime configuration

Once our Jellyfin container is up and running, you can access it via http://127.0.0.1:8096/

The first step to take is connect a browser to this URL and create an admin user account. Jellyfin will provide an initial setup wizard to configure the interface language,  and create that first user account who will have admin rights over the server. You can add more users later via the Dashboard, and if you are going to configure Jellyfin to use Single Sign-On (SSO, see below) then you do not need to create any further users at all.

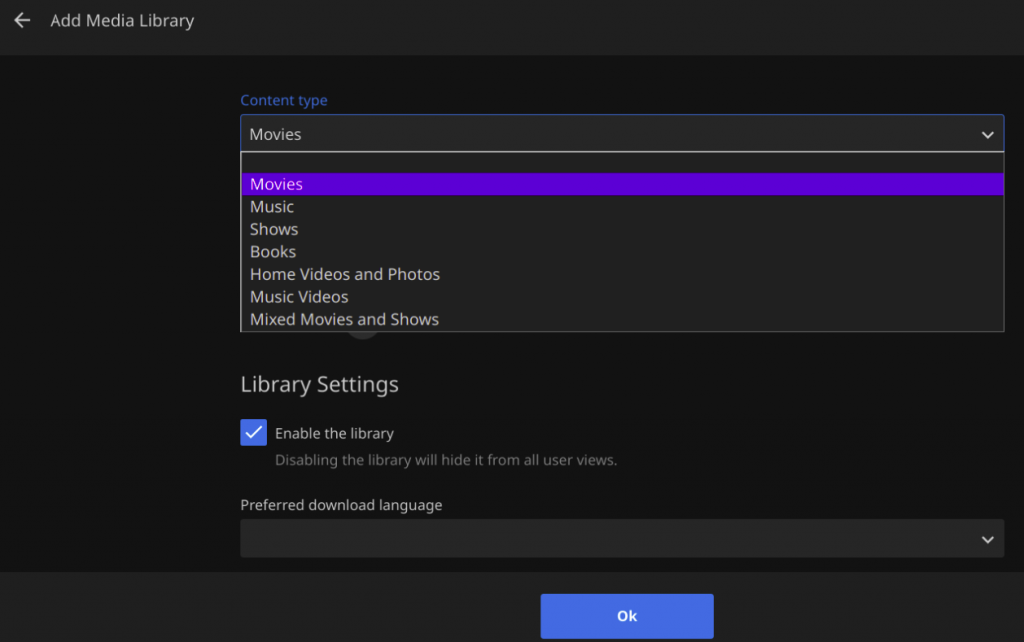
When the admin user has been created, you can start adding your media libraries:

Depending on the content type which you select for your libraries, Jellyfin will handle these libraries differently when presenting them to users. Movies will be presented along with metadata about the movie, its actors, director etc while E-books will show a synopsis of the story, its author and will offer the option to open and read them in the browser. Picture libraries can be played as a slide-show. And so on.

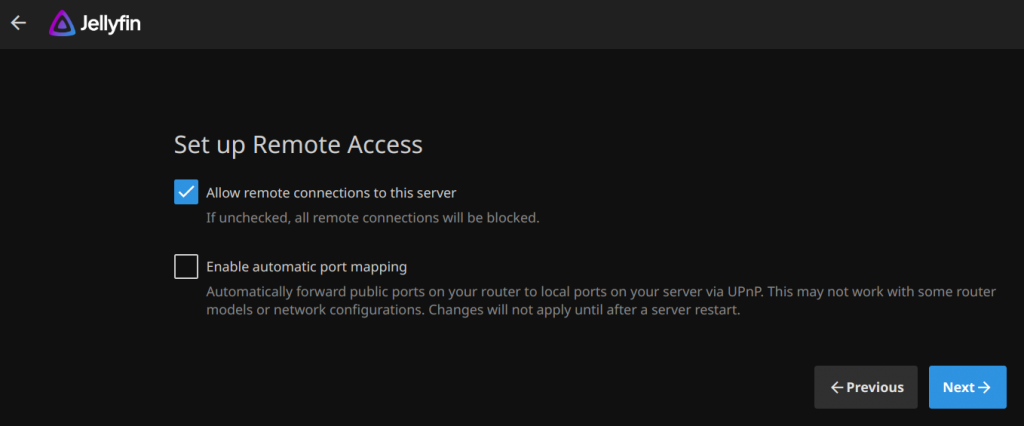
The next question will be to allow remote access and optionally an automatic port mapping via UPnP:

Leave the first checkbox enabled, since we want people to be able to access the streaming server remotely. Leave the UPnP option un-checked as it is not needed and may affect your internet router’s functioning.

This concludes the initial setup. Jellyfin will immediately start indexing the media libraries you have added during the setup. You can always add more libraries later on, by visiting the Admin Dashboard.

Jellyfin Single Sign On using Keycloak

Jellyfin does not support  OpenID Connect by itself. However, a plugin exists which can add OIDC support. This will allow our server to offer Single Sign On (SSO) to users using our Keycloak identity provider.
Only the admin user will have their own local account. Any Slackware Cloud Server user will have their account already setup in your Keycloak database. The first time they login to your Jellyfin server using SSO, the account will be activated automatically.

We will now define a new Client in Keycloak that we can use with Jellyfin, add the OIDC plugin to Jellyfin, configure that plugin using the newly created Keycloak Client ID details, add a trigger in the login page that calls Keycloak for Single Sign-On, and then finally enable the plugin.

Adding Jellyfin Client ID in Keycloak

Point your browser to the Keycloak Admin console https://sso.darkstar.lan/auth/admin/ to start the configuration process.

Add a ‘confidential’ openid-connect client in the ‘foundation‘ Keycloak realm (the realm where you created your users in the previous Episodes of this article series):

  • Select ‘foundation‘ realm; click on ‘Clients‘ and then click ‘Create‘ button.
    • Client ID‘ = “jellyfin
    • Client Type‘ = “OpenID Connect” (the default)
      Note that in Keycloak < 20.x this field was called ‘Client Protocol‘ and its value “openid-connect”.
    • Toggle ‘Client authentication‘ to “On”. This will set the client access type to “confidential”
      Note that in Keycloak < 20.x this was equivalent to setting ‘Access type‘ to “confidential”.
    • Check that ‘Standard Flow‘ is enabled.
    • Save.
  • Also in ‘Settings‘, allow this app from Keycloak.
    Our Jellyfin container is running on https://jellyfin.darkstar.lan . We add

    • Valid Redirect URIs‘ = https://jellyfin.slackware.nl/sso/OID/redirect/keycloak/*
    • Root URL‘ = https://jellyfin.darkstar.lan/
    • Web Origins‘ = https://jellyfin.darkstar.lan/+
    • Admin URL‘ = https://jellyfin.darkstar.lan
    • Save.

To obtain the secret for the “jellyfin” Client ID:

  • Go to “Credentials > Client authenticator > Client ID and Secret
    • Copy the Secret (MazskzUw7ZTanZUf9ljYsEts4ky7Uo0N)

This secret is an example string of course, yours will be different. I will be re-using this value below. You will use your own generated value.

Finally, configure the protocol mapping. Protocol mappers map items (such as a group name or an email address, for example) to a specific claim in the ‘identity and access token‘ – i.e. the information which is going to be passed between Keycloak Identity Provider and the Jellyfin server.
This mapping will allow Jellyfin to determine whether a user is allowed in, and/or whether the user will have administrator access.

  • For Keycloak versions < 20.x:
    • Open the ‘Mappers‘ tab to add a protocol mapper.
    • Click ‘Add Builtin
    • Select either “Groups”, “Realm Roles”, or “Client Roles”, depending on the role system you are planning on using.
      In our case, the choice is “Realm Roles”.
  • For Keycloak versions >= 20.x:
    • Click ‘Clients‘ in the left sidebar of the realm
    • Click on our “jellyfin” client and switch to the ‘Client Scopes‘ tab
    • In ‘Assigned client scope‘ click on “jellyfin-dedicated” scope
    • In the ‘Mappers‘ tab, click on ‘Add Predefined Mapper
    • You can select either “Groups”, “Realm Roles”, or “Client Roles”, depending on the role system you are planning on using.
      In our case, use “Realm Roles” and click ‘Create‘. The mapping will be created.
  • Once the mapper is added, click on the mapper to edit it
    • Note down the ‘Token Claim Name‘.
      In our case, that name is “realm_access.roles“.
    • Enable all four toggles: “Multivalued”, “Add to ID token”, “Add to access token”, and “Add to userinfo”.

Creating roles and groups in Keycloak

Jellyfin supports more than one admin user. Our initial local user account is an admin user by default. You may want to allow another user to act as an administrator as well. Since all other users will be defined in the Keycloak identity provider, we need to be able to differentiate between regular and admin users in Jellyfin. To achieve this, we use Keycloak groups, and we will use role-mapping to map OIDC roles to these groups.

Our Jellyfin administrators group will be : “jellyfin-admins”. Members of this group will be able to administer the Jellyfin server. The Jellyfin users group will be called: “jellyfin-users”. Only those user accounts who are members of this group will be able to access and use your Jellyfin server.
The Keycloak roles we create will have the same name. Once they have been created, you can forget about them. You will only have to manage the groups to add/remove users.
Let’s create those roles and groups in the Keycloak admin interface:

  • Select the ‘foundation‘ realm; click on ‘Roles‘ and then click ‘Create role‘ button.
    • ‘Role name‘ = “jellyfin-users
    • Click ‘Save‘.
    • Click ‘Create role‘ again: ‘Role name‘ = “jellyfin-admins
    • Click ‘Save‘.
  • Select the ‘foundation‘ realm; click on ‘Groups‘ and then click ‘Create group‘ button.
    • Group name‘ = “jellyfin-users
    • Click ‘Create
    • In the ‘Members‘ tab, add the users you want to become part of this group.
    • Go to the ‘Role mapping‘ tab, click ‘Assign role‘. Select “jellyfin-users” and click ‘Assign
    • Click ‘Save‘.
    • Click ‘Create group‘ again, ‘Group name‘ = “jellyfin-admins
    • Click ‘Create
    • In the ‘Members‘ tab, add the users you want to be the server administrators.
    • Go to the ‘Role mapping‘ tab, click ‘Assign role‘. Select “jellyfin-admins” and click ‘Assign
    • Click ‘Save‘.

Add OIDC plugin to Jellyfin

Install the 9p4/jellyfin-plugin-sso github repository into Jellyfin:

  • Go to your Jellyfin Administrator’s Dashboard:
    • Click your profile icon in top-right and click ‘Dashboard
  • Click ‘Plugins‘ in the left sidebar to open that section.
  • Click ‘Repositories‘:
    • Click ‘+‘ to add the following repository details:
      Repository Name: “Jellyfin SSO
      Repository URL:
      https://raw.githubusercontent.com/9p4/jellyfin-plugin-sso/manifest-release/manifest.json
  • Click ‘Save‘.
  • Click ‘Ok‘ to acknowledge that you know what you are doing – this completes the repository installation.
  • Now, click ‘Catalog‘ in the left sidebar.
    • Select ‘SSO Authentication‘ from the ‘Authentication‘ section.
    • Click ‘Install‘ to install the most recent version (pre-selected).
    • Click ‘Ok‘ to acknowledge that you know what you are doing – this completes the plugin installation.

After installing this plugin but before configuring it, restart the Jellyfin container, for instance via the commands:

# cd /usr/local/docker-jellyfin/
# docker-compose restart

Configure the SSO plugin

  • Go to your Jellyfin Administrator’s Dashboard:
    • Click your profile icon in top-right and click ‘Dashboard
  • Click ‘Plugins‘ in the left sidebar to open that section.
  • Click the ‘SSO-Auth‘ plugin.
  • Add a provider with the following settings:
    • Name of the OIDC Provider: keycloak
    • OID Endpoint: https://sso.darkstar.lan/auth/realms/foundation
    • OpenID Client ID: jellyfin
    • OID Secret: MazskzUw7ZTanZUf9ljYsEts4ky7Uo0N
    • Enabled: Checked
    • Enable Authorization by Plugin: Checked
    • Enable All Folders: Checked
    • Roles: jellyfin-users
    • Admin Roles: jellyfin-admins
    • Role Claim: realm_access.roles
    • Set default username claim: preferred_username
  • All other options may remain unchecked or un-configured.
  • Click ‘Save‘.
  • Enable the plugin.

Note that for Keycloak the default role claim is ‘realm_access.roles’. I tried to use Groups instead of Realm Roles but ‘groups’ are not part of Default Scope. My attempt to configure ‘Request Additional Scopes’ and entering ‘groups’ resulted in ‘illegal scope’ error.
By default the scope is limited in Jellyfin SSO to “openid profile”.

Add a SSO button to the login page

Finally, we need to create the trigger which makes Jellyfin actually connect to the Keycloak identity provider. For this, we make smart use of Jellyfin’s ‘branding’ capability which allows to customize the login page.

  • Go to your Jellyfin Administrator’s Dashboard:
    • Click your profile icon in top-right and click ‘Dashboard
  • Click ‘General‘ in the left sidebar
  • Under ‘Quick Connect‘, make sure that ‘Enable Quick Connect on this server‘ is checked
  • Under ‘Branding‘, add these lines in the ‘Login disclaimer‘ field:
    <form action="https://jellyfin.darkstar.lan/sso/OID/start/keycloak">
    <button class="raised block emby-button button-submit">
    Single Sign-On
    </button>
    </form>
  • Also under ‘Branding‘, add these lines to ‘Custom CSS Code‘:
    a.raised.emby-button {
    padding: 0.9em 1em;
    color: inherit !important;
    }
    .disclaimerContainer {
    display: block !important;
    width: auto !important;
    height: auto !important;
    }

Start Jellyfin with SSO

The jellyfin server needs to be restarted after configuring and enabling the SSO plugin. Once that is done, we have an additional button in our login page, allowing you to login with “Single Sign-On“.

Only the local admin user would still use the User/Password fields, but all other users will click the “Single Sign-On” button to be taken to the Keycloak login page;  and return to the Jellyfin content once they are properly authenticated.

Jellyfin usage

Initial media libraries for first-time users

When you have your server running and are preparing for your first users to get onboarded, you need to consider what level of initial access you want to give to a user who logs in for the first time.

In the SSO Plugin Configuration section, the default access was set to “All folders” meaning all your libraries will be instantaneously visible. If you do not want that, you can alternatively enable only the folder/folders that you want your first-time users to see (which may be ‘None‘). Then, once  a user logs into Jellyfin for the first time and the server adds the user, you can go to that user’s profile and manually enable additional folders aka media libraries for them.

Note that after re-configuring any plugin, you need to restart Jellyfin.

Scheduled tasks

In the Admin Dashboard you’ll find a section ‘Scheduled tasks‘. One of these tasks is scanning for new media that get added to your libraries. The frequency with which this task is triggered may be to low if you add new media regularly. This is definitely not as fancy as how PLEX discovers new media as soon as it is added to a library, but hey! You get what you pay for 🙂

You can always trigger a scan manually if you do not want to wait for the scheduled task to run.

Further considerations

Running Jellyfin at a URL with subfolder

Suppose you want to run Jellyfin at https://darkstar.lan/jellyfin/ – i.e. in a subfolder of your host’s domainname.
To use a subfolder you will have to do some trivial tweaks to the reverse proxy configuration:

# Jellyfin hosted on https://darkstar.lan/jellyfin
<Location /jellyfin/socket>
  ProxyPreserveHost On
  ProxyPass "ws://127.0.0.1:8096/jellyfin/socket"
  ProxyPassReverse "ws://127.0.0.1:8096/jellyfin/socket"
</Location>
<Location />
  ProxyPass "http://127.0.0.1:8096/jellyfin"
  ProxyPassReverse "http://127.0.0.1:8096/jellyfin"
</Location>

More importantly, you also need to set the “Base URL” field in the Jellyfin server. This can be done by navigating to the “Admin Dashboard -> Networking -> Base URL” in the web client. Fill this field with the subfolder name “/jellyfin” and click Save.
The Jellyfin container will need to be restarted before this change takes effect and you may have to force-refresh your browser view.

Custom background for the login page

You saw in the screenshot above that you can customize the backdrop for your login screen. To achieve that, add these lines to ‘Custom CSS Code’ and supply the correct path to your own background image:
/*turn background container transparent*/
.backgroundContainer{
background-color: transparent;
}
/*add image to loginPage only*/
#loginPage{
background-image: url("/graphics/mybg.jpg");
background-size: cover;
/*background-size: cover; scales image to fit bg*/
/*background-size: contain; repeat to fit bg*/
}

Note that the location "/graphics/mybg.jpg" translates to https://jellyfin.darkstar.lan/graphics/mybg.jpg for any web client, so that is where you will have to make it available via Apache on your host.

Conclusion

This concludes the instructions for setting up your private streaming server. I hope I was clear enough, but if I have omitted steps or made mistakes, please let me know in the comments section.
I hope you like this article and when you do implement a Jellyfin server, may it bring you lots of fun.

Cheers, Eric

Slackware Cloud Server Series, Episode 7: Decentralized Social Media

Hi all!
It has been a while since I wrote an episode for my series about using Slackware as your private/personal ‘cloud server’. Time for something new!

Since a lot of people these days are looking for alternatives to Twitter and Mastodon is a popular choice, I thought it would be worthwhile to document the process of setting up your own Mastodon server. It can be a platform just for you, or you can invite friends and family, or open it up to the world. Your choice. The server you’ll learn to setup by reading this article uses the same Identity Provider (Keycloak) which is also used by all the other services I wrote about in the scope of this series. I.e. a private server using single sign-on for your own family/friends/community.

Check out the list below which shows past, present and future episodes in the series, if the article has already been written you’ll be able to click on the subject.
The first episode also contains an introduction with some more detail about what you can expect.

  • Episode 1: Managing your Docker Infrastructure
  • Episode 2: Identity and Access management (IAM)
  • Episode 3 : Video Conferencing
  • Episode 4: Productivity Platform
  • Episode 5: Collaborative document editing
  • Episode 6: Etherpad with Whiteboard
  • Episode 7 (this article): Decentralized Social Media
    Setting up Mastodon as an open source alternative to the Twitter social media platform.

    • Introduction
    • What is decentralized social media
    • Preamble
    • Mastodon server setup
      • Prepare the Docker side
      • Define your unique setup
      • Configure your host for email delivery
      • Download required Docker images
      • Create a mastodon role in Postgres
      • Mastodon initial setup
    • Tuning and tweaking your new server
      • Run-time configuration
      • Command-line server management
      • Data retention
      • Full-text search
      • Reconfiguration
      • Growth
    • Connect your Mastodon instance to the Fediverse
    • Mastodon Single Sign On using Keycloak
      • Adding Mastodon client to Keycloak
      • Adding OIDC configuration to Mastodon’s Docker definition
      • Food for thought
      • Start Mastodon with SSO
    • Apache reverse proxy configuration
    • Attribution
    • Appendix
  • Episode 8: Media streaming platform
  • Episode 9: Cloudsync for 2FA Authenticator
  • Episode X: Docker Registry

Introduction

Twitter alternatives seem to be in high demand these days. It’s time to provide the users of your Slackware Cloud services with an fully Open Source social media platform that allows for better local control and integrates with other servers around the globe. It’s time for Mastodon.
This article is not meant to educate you on how to migrate away from Twitter as a user. I wrote a separate blog about that. Here we are going to look at setting up a Mastodon server instance, connecting this server to the rest of the Mastodon federated network, and then invite the users of your server to hop on and start following and interacting with the people they may already know from Twitter.

Setting up Mastodon is not trivial. The server consists of several services that work together, sharing data safely using secrets. This is an ideal case for Docker Compose and in fact, Mastodon’s github already contains a “docker-compose.yml” file which is pretty usable as a starting point.
Our Mastodon server will run as a set of microservices: a Postgres database, a Redis cache, and three separate instances of Tootsuite (the Mastodon code) acting as the web front-end for serving the user interface, a streaming server to deliver updates to users in real-time, and a background processing service to which the web service offloads a lot of its requests in order to deliver a snappy user interface.
These services can be scaled up in case the number of users grows, but for the sake of this article, we are going to assume that your audience is several tens or hundreds of users max.

Mastodon documentation is high-quality and includes instructions on how to setup your own server. Those pages discuss the security measures you would have to take, such as disabling password login, activating a firewall, using fail2ban to monitor for break-ins and act timely on those attempts.
The hardware requirements for setting up your own Mastodon server from scratch are well-documented. Assume that your Mastodon instance will consume 2 to 4 GB of RAM and several 10’s of GB disk space to cache the media that is shown in your users’ news feed. You can configure the expiry time of cached data to keep the local storage need manageable. You can opt for S3 cloud storage if you have the money and don’t want to run the risk of running out of disk space.

What is decentralized social media

Let’s first have a look at its opposite: Twitter. The Twitter microblogging platform presents itself as a easy-to-use website where you can write short texts and with the press of a key, share your thoughts with all the other users of Twitter. Your posts (tweets) will be seen by people who follow you, and if those persons reply to you or like your post, their followers will see your post in their timeline.

I highlighted several bits of social media terminology in italics. It’s the glue that connects all users of the platform. But there is more. Twitter runs algorithms that analyze your tweeting and liking behavior. Based on on the behavioral profile they compile of you these algorithms will slowly start feeding other people’s posts into your timeline that have relevance to the subjects you showed your interest in. Historically this has been the cause of “social media bubbles” where you are unwittingly sucked into a downward spiral with increasingly narrow focus. People become less willing to accept other people’s views and eventually radicalize. Facebook is another social media platform with similar traps.

All this is not describing a place where I feel comfortable. So what are the alternatives?
You could of course just decide to quit social media completely, but you would miss out on a good amount of serious conversation. There’s a variety of open source implementations of distributed or federated networks. For instance Diaspora is a distributed social media platform that exists since 2010 and GNU Social since 2008 even. Pleroma is similar to Mastodon in that both use the ActivityPub W3C protocol and therefore are easily connected. But I’ll focus on Mastodon. The Mastodon network is federated, meaning that it consists of many independently hosted server instances that are all interconnected and share data with each other in real-time. Compare this to a distributed network which does not have any identifiable center (Bittorrent for instance).

The Mastodon project was created back in 2016 by a German developer because he was fed up with Twitter and thought he could do better. Mastodon started gaining real traction in April 2022 when Musk announced he wanted to buy Twitter. Since completing this deal, here has been a steady exodus of frustrated Twitter users. This resulted in a tremendous increase of new Mastodon users, its user base increasing with 50,000 per day on average.

As a Twitter migrant, the first thing you need to decide on is: on which Mastodon server should I create my account? See, that is perhaps the biggest conceptual difference with Twitter where you just have an account, period. On Mastodon, you have an account on a server. On Twitter I am @erichameleers. But on Mastodon I am @alien@fosstodon.org but I can just as well be @alien@mastodon.slackware.nl ! Same person, different accounts. Now this is not efficient of course, but it shows that you can move from one server to another server, and your ‘handle’ will change accordingly since the servername is part of it.

As a Mastodon user you essentially subscribe to three separate news feeds: your home timeline, showing posts of people you follow as well as other people’s posts that were boosted by people you follow.  Then there’s the local timeline: public posts from people that have an account on the same Mastodon server instance where you created your account. And finally the federated timeline, showing all posts that your server knows about, which is mainly the posts from people being followed by all the other users of your server. Which means, if you run a small server in terms of users, your local and federated timelines will be relatively clean. But on bigger instances with thousands of users, you can easily get intimidated by the flood of messages. That’s why as a user you should subscribe to hashtags as well as follow users that you are interested in. Curating the home timeline like that will keep you sane. See my previous blog for more details.

As a Mastodon server administrator, you will have to think about the environment you want to provide to its future users.  Will you define a set of house rules? Will you allow anyone to sign up or do you want to control who ‘lives’ in your server? Ideally you want people to pick your server, create an account, feel fine, and never move on to another server instance. But the strength of open source is also a weakness: when you become the server administrator, you assume responsibility for an unhampered user experience. You need to monitor your server health and monitor/moderate the content that is shared by its users. You need to keep it connected to the network of federated servers. You might have to pay for hosting, data traffic and storage. Are you prepared to do this for a long time? If so, will you be asking your users for monetary support (donations or otherwise)?
Think before you do.

And this is how you do it.

Preamble

This section describes the technical details of our setup, as well as the things which you should have prepared before trying to implement the instructions in this article.

For the sake of this instruction, I will use the hostname “https://mastodon.darkstar.lan” as the URL where users will connect to the Mastodon server.
Furthermore, “https://sso.darkstar.lan/auth” is the Keycloak base URL (see Episode 2 for how we did the Keycloak setup).

The Mastodon container stack (it uses multiple containers) uses a specific internal IP subnet and we will assign static IP addresses to one or more containers. That internal subnet will be “172.22.0.0/16“.
Note that Docker by default will use a single IP range for all its containers if you do not specify a range to be used. The default range is “172.17.0.0/16

Setting up your domain (which will hopefully be something else than “darkstar.lan”…) with new hostnames and then setting up web servers for the hostnames in that domain is an exercise left to the reader. Before continuing, please ensure that your equivalent for the following host has a web server running. It doesn’t have to serve any content yet but we will add some blocks of configuration to the VirtualHost definition during the steps outlined in the remainder of this article:

  • mastodon.darkstar.lan

I expect that your Keycloak application is already running at your own real-life equivalent of https://sso.darkstar.lan/auth .

Using a  Let’s Encrypt SSL certificate to provide encrypted connections (HTTPS) to your webserver is documented in an earlier blog article.

Note that I am talking about webserver “hosts” but in fact, all of these are just virtual webservers running on the same machine, at the same IP address, served by the same Apache httpd program, but with different DNS entries. There is no need at all for multiple computers when setting up your Slackware Cloud server.

Mastodon server setup

Prepare the Docker side

Let’s start with creating the directories where our Mastodon server will save its user data and media caches:

# mkdir -p /opt/dockerfiles/mastodon/{postgresdata,redis,public/system,elasticsearch}

Then we only need two files from the Mastodon git repository. The ‘docker-compose.yml‘ file being the most important, so download that one first:

# mkdir /usr/local/docker-mastodon
# cd /usr/local/docker-mastodon
# wget https://github.com/mastodon/mastodon/raw/main/docker-compose.yml

Ownership for the “public” directory structure needs to be set to
user:group “991:991” because that’s the mastodon userID inside the container:

# chown -R 991:991 /opt/dockerfiles/mastodon/public/

This provides a good base for our container stack setup. Mastodon’s own ‘docker-compose.yml‘ implementation expects a file in the same directory called ‘.env.production‘ which contains all the variable/value pairs required to run the server. We will download a sample version of that .env file from the same Mastodon git repository in a moment.
We need a bit of prep-work on both these files before running our first “docker-compose” command. First the YAML file:

  • Remove all the ‘build: .’ lines from the ‘docker-compose.yml‘ file. We will not build local images from scratch; we will use the official Docker images found on Docker Hub.
  • Pin the downloaded Docker images to specific versions; look them up on Docker Hub. Using ‘latest’ is not recommended for production.
    For instance: change all “tootsuite/mastodon” to “tootsuite/mastodon:v4.0.2” where “v4.0.2” is the most recent stable version. If you omit the version in this statement,
    by default “latest” will be assumed and then you won’t be certain of the actual version of Mastodon you are running.
  • Give all containers a name using “container_name” statement, so that they are more easily recognizeable in “docker ps” output instead of just a container ID:
    • container_name: mstdn_postgres
    • container_name: mstdn_redis
    • container_name: mstdn_es
    • container_name: mstdn_web
    • container_name: mstdn_streaming
    • container_name: mstdn_sidekiq
  • Modify the ‘volumes’ directives in ‘docker-compose.yml‘ and define storage locations outside of the local directory.
    By default, Docker  Compose will create data directories in the current directory.

    • ./postgres14:/var/lib/postgresql/data‘ should become:
      /opt/dockerfiles/mastodon/postgres:/var/lib/postgresql/data
    • ./redis:/data‘ should become:
      /opt/dockerfiles/mastodon/redis:/data
    • ./elasticsearch:/data‘ should become:
      /opt/dockerfiles/mastodon/elasticsearch:/data
    • ./public/system:/mastodon/public/system‘ should become:
      /opt/dockerfiles/mastodon/public/system:/mastodon/public/system
  • Change the default TCP ports (3000 for the ‘web’ service and 4000 for ‘streaming’ service) to respectively 3333 and 4444 (ports 3000 and 4000 may already be in use); note that there are multiple occurrences of these port numbers in the YML file, but only the ‘ports‘ value needs to be changed:
    • '127.0.0.1:3000:3000' needs to become: '127.0.0.1:3333:3000'
    • '127.0.0.1:4000:4000' needs to become: '127.0.0.1:4444:4000'
  • The Redis exposed port needs to be changed from the default “6379” to e.g. “6380” to prevent a clash with another already running Redis server on your host. Again, this only needs a modification in the ‘redis:’ section of ‘docker-compose.yml‘ because internally, the container services can talk freely to the default port.
    We add two lines in the ‘redis:’ section of ‘docker-compose.yml‘:
    ports:
    - '127.0.0.1:6380:6379'
  • Give Mastodon its own internal IP range, because we need to assign the ‘web’ container its own fixed IP address. Then we can tell Sendmail that it is OK to relay emails from the web server (if you use Postfix instead of Sendmail, you can tell me what you needed to do instead and I will update this article… I only use Sendmail).
    Make sure to pick a yet un-used subnet range. Check the output of “route -n” or “ip  route show” to find which IP subnets are currently in use.
    At the bottom of your ‘docker-compose.yml‘ file change the entire ‘networks:’ section so that it looks like this:

    # ---
    networks:
      external_network:
        ipam:
          config:
            - subnet: 172.22.0.0/16
      internal_network:
        internal: true
    # --

    For the ‘web’ container we change the ‘networks:’ definition to:

    networks:
      internal_network:
      external_network:
        ipv4_address: 172.22.0.3
        aliases:
        - mstdn_web.external_network
    

Download the sample environment file from Mastodon’s git repository and use it to create a bootstrap ‘.env.production‘ file. It will contain variables with empty values, but without the existence of this file the initial setup of Mastodon’s docker stack will fail:

# cd /usr/local/docker-mastodon
# wget https://raw.githubusercontent.com/mastodon/mastodon/main/.env.production.sample
# cp .env.production.sample .env.production

This file is full of empty variables and some explanation about their purpose. The Mastodon setup process will eventually dump the full content for ‘.env.production‘ to standard output. You will copy this output into ‘.env.production‘ replacing the whatever was in there at first.

Define your unique setup

Your Mastodon server uses a Postgres database, Postgres will also need an admin password, you’ll need a database user/password combo, et cetera. All these parameters correspond with a variable value in ‘.env.production‘.
Here is the bare minimum configuration you should prepare in advance of starting the Mastodon setup process. With ‘prepare’ I mean, write down the values that you want to use for your server setup. Values in green are going to be unique for your own setup, this article uses example values of course.

# Our server hostname:
LOCAL_DOMAIN=mastodon.darkstar.lan
# Postgress bootstrap:
DB_NAME=mastodon
DB_USER=mastodon
DB_PASS=XBrhvXcm840p8w60L9xe2dnjzbiutmP6
# Optionally the server can send notification emails:
SMTP_SERVER=darkstar.lan
SMTP_PORT=587
SMTP_LOGIN=
SMTP_PASSWORD=
SMTP_AUTH_METHOD=plain
SMTP_OPENSSL_VERIFY_MODE=none
SMTP_ENABLE_STARTTLS=auto
SMTP_FROM_ADDRESS=notifications@mastodon.darkstar.lan

You will additionally need a password for the Postgres admin user when you initialize the database in one of the next sections. Just like for the ‘DB_PASS‘ variable above (which is the password for the database user account), you can generate a random password using this command:

# cat /dev/urandom | tr -dc 'a-zA-Z0-9' | fold -w 32 | head -n 1
ZsAMBvLi9JvowrSUYSC60muWAgIPwIoz

When you have written down everything, we can continue.

Configure your host for email delivery

Part of the Mastodon server setup is to allow it to send notification emails. Note that this is an optional choice. You can skip that part of the setup if you want.
If you want your server to be able to send email notifications, your host needs to relay those emails, and particularly Sendmail requires some information to allow this. The IP address of the Mastodon webserver needs to be trusted by Sendmail as an email origin.

First the DNS part: if you use dnsmasq to provide DNS to your host machine, add the following line to “/etc/hosts”:

172.22.0.3    mstdn_web mstdn_web.external_network

followed by a “killall -HUP dnsmasq” to let your DNS server pick up the update in the hosts file. If you use bind, you’ll know how to add an IP to hostname mapping.
Sendmail needs to be able to resolve the IP when Mastodon requests an email to be sent.

For the Sendmail part of the configuration, add the following to “/etc/mail/access” if it is not already there:

127.0.0  RELAY
172.17   RELAY
172.19   RELAY
172.22   RELAY

It tells Sendmail to recognize our Docker IP ranges as trustworthy.
Run “makemap hash /etc/mail/access.db < /etc/mail/access” to compile the “access” file into a Sendmail database and reload Sendmail:

# /etc/rc.d/rc.sendmail restart

Download required Docker images

To download (pull) the required images from Docker Hub, you run:

# cd /usr/local/docker-mastodon
# docker-compose build

This does not yet start the containers.

Create a mastodon role in Postgres

We need to create the Postgres role “mastodon” prior to starting the Mastodon server setup, because the setup will fail otherwise with “Database connection could not be established with this configuration, try again. FATAL: role “mastodon” does not exist“.
To accomplish this, we spin up a temporary Postgres container using the same Docker image and configuration as we will use for the Mastodon container stack, i.e. we copy most of the parameters out of our ‘docker-compose.yml‘ file:

# docker run --rm --name postgres-bootstrap \
    -v /opt/dockerfiles/mastodon/postgresdata:/var/lib/postgresql/data \
    -e POSTGRES_PASSWORD="ZsAMBvLi9JvowrSUYSC60muWAgIPwIoz" \
    -d postgres:14-alpine

The “run --rm” triggers the removal of the temporary containers after the configuration is complete.

When this container is running , we ‘exec’ into a psql shell:

# docker exec -it postgres-bootstrap psql -U postgres

The following SQL commands will initialize the database and create the “mastodon” role for us, and all of that will be stored in “/opt/dockerfiles/mastodon/postgresdata” which is the location we will also be using for our Mastodon container stack. The removal of the container afterwards will not affect our new database since that will be created outside of the container.

postgres-# CREATE USER mastodon WITH PASSWORD 'XBrhvXcm840p8w60L9xe2dnjzbiutmP6' CREATEDB; exit
postgres-# \q

We can then stop the Postgres container, and continue with the Mastodon setup:

# docker stop postgres-bootstrap

Mastodon server initial setup

Note below the use of “bundle exec rake” instead of just “rake” as used in the official documentation; this avoids the error: “Gem::LoadError: You have already activated rake 13.0.3, but your Gemfile requires rake 13.0.6. Prepending `bundle exec` to your command may solve this.

Everything is in place to start the setup. We spin up a temporary web server using docker-compose. Using docker-compose ensures that the web server’s dependent containers are started in advance:

# docker-compose run --rm web bundle exec rake mastodon:setup

This command starts an interactive dialog allowing you to configure basic and mandatory options. It will also pre-compile JavaScript and CSS assets, and generate a new set of application secrets used for communication between the various containers.
The configurator will output a full server configuration to standard output at the end. You need to copy and paste that configuration into the ‘.env.production‘ file.
Use the information you compiled in the previous section “determine your unique setup” when answering these questions. After successful completion, this is what you should see:

Below is your configuration, save it to an .env.production file outside Docker:
# Generated with mastodon:setup on 2022-12-12 12:12:12 UTC
# Some variables in this file will be interpreted differently whether you are
# using docker-compose or not.
LOCAL_DOMAIN=mastodon.darkstar.lan
SINGLE_USER_MODE=false
SECRET_KEY_BASE=cf709f9ef70555d82dfb236e5010fff69af2c6d5528a0a0dfc423eba324c87116b031c6fa25b71176ec961018aa80e1f8f2c8c619783972805e698bd9b36cb39
OTP_SECRET=9e27360c39d87e0101c5b1bd24e2c8c306d6ee09da1cbac5f43e5587b223d4d5f240ec565aba92d91435a7bce49e83da2821269a47b0f8077781d73213ef1216
VAPID_PRIVATE_KEY=WvVnHQlzJEQXDuJqR8q1m7CHRGnWI1EiIdO75Di0oDA=
VAPID_PUBLIC_KEY=BLOn5R3ILCIgzQ0VY3cjXFe-IyHSBVtscIG-SaL3pcAOcEqRN4sZAkyAf0iRg6hZuFUVHuFhn1Dm7pZZbNoTF2g=
DB_HOST=db
DB_PORT=5432
DB_NAME=mastodon
DB_USER=mastodon
DB_PASS=XBrhvXcm840p8w60L9xe2dnjzbiutmP6
REDIS_HOST=redis
REDIS_PORT=6379
REDIS_PASSWORD=
SMTP_SERVER=darkstar.lan
SMTP_PORT=587
SMTP_LOGIN=
SMTP_PASSWORD=
SMTP_AUTH_METHOD=plain
SMTP_OPENSSL_VERIFY_MODE=none
SMTP_ENABLE_STARTTLS=auto
SMTP_FROM_ADDRESS=Mastodon <notifications@mastodon.darkstar.lan>

It is also saved within this container so you can proceed with this wizard.

The next step in the configuration initializes the Mastodon database. It is followed by a prompt to create the server’s admin user. The setup program will output an initial password for this admin user, which you can use to logon to the Mastodon Web interface. Be sure to change that password after logging in!

Now launch the Mastodon server using:

# docker-compose up -d

Note that if you run “docker-compose up” without the “-d” so that the process remains in the foreground, you’ll see the following warnings coming from the Redis server:

mstdn_redis | 1:M 12 Dec 2022 13:55:16.140 # You requested maxclients of 10000 requiring at least 10032 max file descriptors.
mstdn_redis | 1:M 12 Dec 2022 13:55:16.140 # Server can't set maximum open files to 10032 because of OS error: Operation not permitted.
mstdn_redis | 1:M 12 Dec 2022 13:55:16.140 # Current maximum open files is 4096. maxclients has been reduced to 4064 to compensate for low ulimit. If you need higher maxclients increase 'ulimit -n'.

I leave it up to you to look into increasing the max-open-files default of 4096.

Tuning and tweaking your new server

Run-time configuration

Now that your server is up and running, it is time to use the admin account for which you received an initial password during setup, to personalize it.
Mastodon has a documentation page on this process. The server admin has access to a set of menu items under “Settings > Administration“.

One menu item is “Relays“. This is where you would add one or more relays to speed up the process of Federation between your small instance and the rest of the Fediverse. See the section further down called “Connect your Mastodon instance to the Fediverse” for the details.

Spend some time in the “Server Settings” and “Server Rules” submenus and their tabs (such as “Branding“) to add information about your server that identifies it to visitors and users, and shows the “house rules” that clarify what you expect of people that want an account on your server.
Here is an example of how branding is used to present my site to visitors:

Command-line server management

The admin user has access to the “Admin CLI” which is the fancy name for the “tootctl” command in the mstdn_web container. You can find its man-page at https://docs.joinmastodon.org/admin/tootctl/ .
If you need to run the “tootctl” command, use “docker exec” to execute your command inside of the already running Web container which we gave the name ‘mstdn_web‘ in ‘docker-compose.yml‘:

# docker exec -it mstdn_web bin/tootctl <some_command_option>

Data retention

The tab “Content Retention” under “Server Settings” will be of importance to you, depending on the limitations of your storage capacity. It allows you to specify a max age of downloaded media after which those files get purged from the local  cache. The amount of GB in use can increase rapidly as the number of local users grows. Alternatively you can run the following Docker commands on the host’s commandline to delete parts of the cache immediately instead of waiting for the container’s own scheduled maintenance. In my case, you’ll see that the server is quite inactive (single-user instance) and there’s nothing to be removed:

# docker exec -it mstdn_web bin/tootctl preview_cards remove
0/0 |===========================================================| Time: 00:00:00
Removed 0 preview cards (approx. 0 Bytes)
# docker exec -it mstdn_web bin/tootctl media remove
0/0 |===========================================================| Time: 00:00:00
Removed 0 media attachments (approx. 0 Bytes) 
# docker exec -it mstdn_web bin/tootctl cache clear
OK

Full-text search

If you want to support full-text search of posts on your Mastodon server, you should un-comment the container definition for elasticsearch (the ‘es‘ service) in your ‘docker-compose.yml‘ file and run “docker-compose down ; docker-compose build ; docker-compose up -d” to pull the elasticsearch container from Docker Hub. Note that this will tax your host with additional RAM, CPU and storage demand.

Reconfiguration

In case of future re-configuration you may want to skip the full configuration if you only want to setup or migrate the database, in which case you can invoke the database setup directly:

# docker compose run --rm -v $(pwd)/.env.production:/opt/mastodon/.env.production web bundle exec rake db:setup

Growth

As your instance welcomes more users, you may have to scale up the service. The official Mastodon documentation has a page with considerations: https://docs.joinmastodon.org/admin/scaling/

Adding more concurrency is relatively easy. But when it comes to caching the data and media pulled in by your users’ activities, you may eventually run into the limits of your local server storage. If your server is that successful, consider setting up a support model using Patreon, PayPal or other means that will provide you with the funds to connect your Mastodon instance to Cloud-based storage. That way, storage needs won’t be limited by the dimensions of your local hardware but rather by the funds you collect from your users.

Remember, Mastodon is a federated network with a lot of server instances, but the Mastodon users will expect that their account is going to be available at all times. You will have to work out a model where you can give your users that kind of reassurance. Grow a team of server moderators and admins, promote your server, secure a means of funding which allows to operate your server for at least the next 3 to 6 months even when the flow of money stops. Create room for contingencies.
Mastodon does not show ads, and instead relies a lot on its users to keep the network afloat.

Connect your Mastodon instance to the Fediverse

A Mastodon server depends on its users to determine what information to pull from other servers in the Fediverse. If your users start following people on remote instances or subscribe to hashtags, your server instance will start federating, i.e. it will start retrieving this information, at the same time introducing your instance to remote instances.

If you are going to be running a small Mastodon instance with only a few users, getting connected to the wider Fediverse may be challenging. The start of your server’s federation may not be guaranteed. To accommodate this, the Mastodon network contains relay servers.
Adding one or more of these relays to your server configuration makes the relay push federated data to your server. A list of relay servers is available for instance here: https://techbriefly.com/2022/11/11/active-mastodon-relays/ and I am sure you can find more relays mentioned in other locations. Some relays require that their admin acknowledges and approves your request before the data push is activated.

Mastodon Single Sign On using Keycloak

Like with the other cloud services we have been deploying, our Mastodon server will be using our Keycloak-based Single Sign On solution using OpenID Connect. Only the admin user will have their own local account. Any Slackware Cloud Server user will have their account already setup in your Keycloak database. The first time they login to your Mastodon server, the account will be activated automatically.
It means that your server should disable the account registration page. You can configure that in “Server Settings > Registrations“.

Adding Mastodon Client ID in Keycloak

Point your browser to the Keycloak Admin console https://sso.darkstar.lan/auth/admin/ to start the configuration process.

Add a ‘confidential’ openid-connect client in the ‘foundation‘ Keycloak realm (the realm where you created your users in the previous Episodes of this article series):

  • Select ‘foundation‘ realm; click on ‘Clients‘ and then click ‘Create‘ button.
    • Client ID‘ = “mastodon
    • Client Protocol‘ = “openid-connect” (the default)
    • Access type‘ = “confidential”
    • Save.
  • Also in ‘Settings‘, allow this app from Keycloak.
    Our Mastodon container is running on https://mastodon.darkstar.lan . We add

    • Valid Redirect URIs‘ = https://mastodon.slackware.nl/auth/auth/openid_connect/callback
    • Base URL‘ = https://mastodon.darkstar.lan/
    • Web Origins‘ = https://mastodon.darkstar.lan
    • Save.
  • To obtain the secret for the “mastodon” Client ID, go to “Credentials > Client authenticator > Client ID and Secret
    • Copy the Secret (Q5PZA2xQcpDcdvGpxqViQIVgI6slm7xO)
  • Alternatively to retrieve the secret, go to ‘Installation‘ tab to download the ‘keycloak.json‘ file for this new client:
    • Format Option‘ = “Keycloak OIDC JSON”
    • Click ‘Download‘ which downloads a file “keycloak.json” with the following content:
# ---
{
    "realm": "foundation",
    "auth-server-url": "https://sso.darkstar.lan/auth",
    "ssl-required": "external",
    "resource": "mastodon",
    "credentials": {
     "secret": "Q5PZA2xQcpDcdvGpxqViQIVgI6slm7xO"
    },
    "confidential-port": 0
}
# ---

This secret is an example string of course, yours will be different. I will be re-using this value below. You will use your own generated value.

Add OIDC configuration to Mastodon’s Docker definition

Bring the mastodon container stack down if it is currently running:
# cd /usr/share/docker/data/mastodon
# docker-compose down

Add the following set of definitions to the ‘.env.production‘ file:

# Enable OIDC:
OIDC_ENABLED=true
# Text to appear on the login button:
OIDC_DISPLAY_NAME=Keycloak SSO
# Where to find your Keycloak OIDC server:
OIDC_ISSUER=https://sso.darkstar.lan/auth/realms/foundation
# Use discovery to determine all OIDC endpoints:
OIDC_DISCOVERY=true
# Scope you want to obtain from OIDC server:
OIDC_SCOPE=openid,profile,email
# Field to be used for populating user's @alias:
OIDC_UID_FIELD=preferred_username
# Client ID you configured for Mastodon in Keycloak:
OIDC_CLIENT_ID=mastodon
# Secret of the Client ID you configured for Mastodon in Keycloak:
OIDC_CLIENT_SECRET=Q5PZA2xQcpDcdvGpxqViQIVgI6slm7xO
# Where OIDC server should come back after authentication:
OIDC_REDIRECT_URI=https://mastodon.darkstar.lan/auth/auth/openid_connect/callback
# Assume emails are verified by the OIDC server:
OIDC_SECURITY_ASSUME_EMAIL_IS_VERIFIED=true

Food for thought

Let’s dive into the meaning of this line which you just added:
>  OIDC_UID_FIELD=preferred_username
This “preferred_username” field translates to the Username property of a Keycloak account. The translation is made in the OpenID ‘Client Scope‘.
The Docker Compose definition which we added to ‘.env.production‘ contains the line below, allowing any attribute in the scopes ‘openid‘, ‘profile‘ and ‘email‘ to be added to the ‘token claim‘ – which is the packet of data which is exchanged between Keycloak and its client, the Mastodon server.
> OIDC_SCOPE=openid,profile,email

To learn more about the available attributes, login to Keycloak as the admin user and select our “foundation” realm.
Via ‘Configure‘ > ‘Client Scopes‘ click on ‘profile‘ > ‘Mappers‘ > ‘username’  where you will see that the ‘username‘ property has a token claim name of ‘preferred_username‘. We use ‘preferred_username’ in the OIDC_UID_ID variable which means that the actual user will see his familiar account name being used in Mastodon just like in all the other Cloud services.

However, what if you don’t want to use regular user account names for your Mastodon? After all, Twitter usernames are your own choice, as a Mastodon server admin you may want to offer the same freedom to your users.
In that case, consider using one of the other available attributes. There is for instance ‘nickname‘ which is also a User Attribute and therefore acceptable. It will not be a trivial exercise however: in Keycloak you must create a customized user page which allows the user to change not just their email or password, but also their nickname. For this, you will have to add ‘nickname’ as a mapped attribute to your realm’s user accounts first. And you have to ensure somehow that the nickname values are going to be unique. I have not researched how this should (or even could) be achieved. If any of you readers actually succeeds in doing this, I would be interested to know, leave a comment below please!

Start Mastodon with SSO

Start the mastodon container stack in the directory where we have our tailored ‘docker-compose.yml‘ file:

# cd /usr/share/docker/data/mastodon
# docker-compose up -d

And voila! We have an additional button in our login page, allowing you to login with “Keycloak SSO“.

Apache reverse proxy configuration

To make Mastodon available at https://mastodon.darkstar.lan/ we are using a reverse-proxy setup. This step can be done after the container stack is already up and running, but I prefer to configure Apache in advance of the Mastodon server start. You choose.

Add the following reverse proxy lines to your VirtualHost definition of the “mastodon.darkstar.lan” web site configuration and restart httpd:

# ---
# Set some headers:
Header always set Referrer-Policy "strict-origin-when-cross-origin"
Header always set Strict-Transport-Security "max-age=31536000"
RequestHeader set X-Forwarded-Proto "https"

# Reverse proxy to Mastodon Docker container stack:
SSLProxyEngine on
ProxyTimeout 900
ProxyVia On
ProxyRequests Off
ProxyPreserveHost On

<Proxy *>
    Options FollowSymLinks MultiViews
    AllowOverride All
    Order allow,deny
    allow from all
</Proxy>

<Location />
    ProxyPass        http://127.0.0.1:3333/ retry=0 timeout=30
    ProxyPassReverse http://127.0.0.1:3333/
</Location>
<Location /api/v1/streaming>
    ProxyPass        ws://127.0.0.1:4444/ retry=0 timeout=30
    ProxyPassReverse ws://127.0.0.1:4444/
</Location>
# ---

Attribution

When setting up my own server, I was helped by reading these pages:

Continue reading

Slackware Cloud Server Series Episode 6: Etherpad with Whiteboard

Hi all!
This is the 6th episode in a series I am writing about using Slackware as your private/personal ‘cloud server’. It is an unscheduled break-out topic to discuss an Etherpad server specifically.
Check out the list below which shows past, present and future episodes in the series, if the article has already been written you’ll be able to click on the subject.
The first episode also contains an introduction with some more detail about what you can expect.
These articles are living documents, i.e. based on readers’ feedback I may add, update or modify their content.

Etherpad with Whiteboard

In Episode 3 (Video Conferencing) we setup a Jitsi Meet server in a Docker container stack which includes an Etherpad server for real-time document collaboration during a video meeting.
That Etherpad instance as configured by the Docker-Jitsi-Meet project is really only a demo setup. It uses a “dirtydb” JSON backend wich is not meant for anything else but testing. It really needs a proper SQL database like MariaDB to power it. And you can’t export your documents from this demo Etherpad in any meaningful format.
Furthermore, this Etherpad container is not using our Keycloak IAM for authentication; everyone who knows the public URL can create a document, invite others and start writing. Even shared documents created in Jitsi meetings are not secure and anyone who guesses the room name has access to the Etherpad document.

This article means to set things right and configure Etherpad correctly, adding Whiteboard functionality as we go. I will also discuss the differences between our Jitsi integrated Etherpad and a running a standalone Etherpad server in case you are not interested in Video meetings and only want the text collaboration.

Preamble

This article assumes you have already setup an Etherpad in a Docker container as part of a Dockerized Jitsi Meet server (see Episode 3 in this series), and this Etherpad is running at a publicly accessible URL:

  • https://meet.darkstar.lan/pad/

We want to make it delegate user authentication to our OpenID Provider: Keycloak. That Keycloak service is available at:

  • https://sso.darkstar.lan/auth

If you are not interested in Jitsi Meet and only want to know how to run an Etherpad server, this article still contains everything you need but keep in mind that my examples are all assuming the above URL for the Etherpad. Adapt that URL to your own real-life situation. You may still have to setup an Apache webserver first, which serves an empty page at “https://meet.darkstar.lan/” but I will leave that to you.

Configuring MariaDB

By default, Etherpad will use a ‘DirtyDB’ JSON file-based backend. It is straight-forward to make it switch to for instance a MariaDB database server backend, we only need to provide the connection details for a pre-existing database.
Like with the previous articles we are using the Slackware MariaDB database server which is running on the host. First, we will create a database (etherpad_db), a database user (etherpad) and grant this user sufficient access to the database. Then we will use these database configuration values when editing the Docker-Jitsi-Meet files in order to change the Etherpad container properties.
This is how we create the database and the user (using a secure password string for ‘EPPPASSWD‘ of course):

$ mysql -uroot -p
> CREATE DATABASE IF NOT EXISTS `etherpad_db` CHARACTER SET utf8 COLLATE utf8_unicode_ci;
> CREATE USER 'etherpad'@'localhost' identified by 'EPPASSWD';
> CREATE USER 'etherpad'@'%' identified by 'EPPPASSWD';
> GRANT CREATE,ALTER,SELECT,INSERT,UPDATE,DELETE on `etherpad_db`.* to 'etherpad'@'localhost';
> GRANT CREATE,ALTER,SELECT,INSERT,UPDATE,DELETE on `etherpad_db`.* to 'etherpad'@'%';
> FLUSH PRIVILEGES;
> exit;

Note from the above SQL statements that we are allowing the ‘etherpad‘ user remote access to the database. This is needed because Etherpad in the Docker container contacts MariaDB via the network, using the IP address of the Docker network bridge in the Jitsi Meet container stack.

Reconfiguring Docker-Jitsi-Meet

My advise is to start with briefly re-visiting Episode 3 of the series and read back how we customized the ‘docker-compose.yml‘ and ‘.env‘ files in order to startup the Docker-Jitsi-Meet stack properly. Because we are going to update these two files again.
This is what we need to change to make Etherpad connect to the external MariaDB database:

Relevant .env additions:

# MariaDB parameters for mysql DB instead of dirtydb
ETHERPAD_DB_TYPE=mysql
ETHERPAD_DB_HOST=172.20.0.1
ETHERPAD_DB_PORT=3306
ETHERPAD_DB_NAME=etherpad_db
ETHERPAD_DB_USER=etherpad
ETHERPAD_DB_PASS=EPPASSWD
ETHERPAD_DB_CHARSET=utf8

Relevant docker-compose additions:

In the ‘.env‘ file we defined the IP address for the database server (172.20.0.1). Etherpad is running inside a container, and its way out is through the default gateway of its Docker network. In order to have 172.20.0.1 as the gateway address, we need to configure the internal ‘meet.jitsi‘ network a deterministic IP range so that we always know its gateway address. if we are going to give that network the IP range “172.20.0.0/16“, the “networks” statement all the way at the bottom needs to be changed from:

# Custom network so all services can communicate using a FQDN
networks:
  meet.jitsi:

to:

# Custom network so all services can communicate using a FQDN 
networks: 
  meet.jitsi: 
    ipam: 
      config: 
        - subnet: 172.20.0.0/16

Use the variables we added to ‘.env’ to create an updated Etherpad container definition. Right underneath this line:

            - SKIN_VARIANTS=${ETHERPAD_SKIN_VARIANTS}

Add the following lines:

            - DB_TYPE=${ETHERPAD_DB_TYPE} 
            - DB_HOST=${ETHERPAD_DB_HOST} 
            - DB_PORT=${ETHERPAD_DB_PORT} 
            - DB_NAME=${ETHERPAD_DB_NAME} 
            - DB_USER=${ETHERPAD_DB_USER} 
            - DB_PASS=${ETHERPAD_DB_PASS} 
            - DB_CHARSET=${ETHERPAD_DB_CHARSET} 

Accessing the admin console

Etherpad has an admin console where you can manage its plugin configuration and other things too. It will only be enabled if you configure an admin password. So let’s do that too.
This is what we need to change to enable the admin console for Etherpad:

Relevant .env additions:

# The password for Etherpad admin page
ETHERPAD_ADMIN_PASSWORD="my_secret_admin_pass"

Relevant docker-compose additions:

Right underneath this line:

            - SKIN_VARIANTS=${ETHERPAD_SKIN_VARIANTS}

Add the following lines:

            - ADMIN_PASSWORD=${ETHERPAD_ADMIN_PASSWORD}

Relevant Apache httpd additions:

If you would now access the URL for the admin console, https://meet.darkstar.lan/pad/admin/ you would only see the message “Unauthorized“. The Etherpad expects you to provide the Basic Authentication hook in front of that page which passes the admin credentials on to the backend. So, we will add a ‘AuthType Basic‘ block to our Apache httpd configuration to add Basic Authentication which will pop up a login dialog, and then add the admin user and its password “my_secret_admin_pass” to a htaccess file.

Remember, in Episode 4 we configured the Etherpad to be available at “https://meet.darkstar.lan/pad/” which means the admin console URL is “https://meet.darkstar.lan/pad/admin/
This is the block to add to your VirtualHost configuration for the Etherpad:

<Location /pad/admin>
    AuthType Basic
    AuthBasicAuthoritative off
    AuthName "Welcome to the Etherpad"
    AuthUserFile /etc/httpd/passwords/htaccess.epl
    Require valid-user
    Order Deny,Allow
    Deny from all
    Satisfy Any
</Location>

And then we still need to create that htaccess file using the ‘htpasswd‘ tool, like this:

# mkdir /etc/httpd/passwords
# htpasswd -B -c /etc/httpd/passwords/htaccess.epl admin

The “-B” parameter enforces the use of bcrypt encryption for passwords. This is currently considered to be very secure.
The above command will prompt for the password, and there you enter that “my_secret_admin_pass” string. The content of that file will look like this:

# cat /etc/httpd/passwords/htaccess.epl
admin:$2y$05$JpvucTlKIQEJViCynem.JelENHpv/maJStsPM4iU9d/sg4cMU.UfW

The Docker Jitsi Meet container stack needs to be refreshed and restarted since we edited ‘.env’. I don’t want to repeat the detailed instructions here, so refer you to the section “Considerations about the “.env” file” in Episode 3 of this article series. Do that now, and when the updated container stack is up and running again, continue here.

And after also restarting the Apache httpd and refreshing the URL “https://meet.darkstar.lan/pad/admin/” you will be asked to enter your admin credentials and you will end up in the Etherpad admin console.
The screenshot below does not reflect the status of the barebones Etherpad by the way; you see a lot of installed plugins mentioned on the admin page. We will be installing those into the Etherpad image in one of the next sections:

At this stage, we have accomplished a well-performing Etherpad installation with a SQL database back-end and an administrative web-interface. The next step is to add authentication through an OpenID provider like our Keycloak IAM server.

Integrating with Keycloak IAM

The out-of-the-box Etherpad Docker container is not very functional. The above sections already showed how to replace the “DirtyDB” with a proper SQL database server like MariaDB. But the default image misses a few useful plugins and a real desktop editor program which allows Etherpad users to export their collaborative work to a proper document format instead of pure HTML.

Whatever plugins we add, at the very least we need to add a plugin which allows us to let the Etherpad authenticate against our Keycloak IAM server. This plugin needs to be inside the Docker image, we cannot use it outside the running container. There’s no other option than to create a custom Docker image for Etherpad. We use this as an opportunity to add some more plugins, as well as Abiword (to enable document export in Etherpad).

I’ll show how to announce Etherpad to Keycloak (we create a Client profile in Keycloak); then I’ll share the required configuration to be added to the Etherpad Docker files; and then I’ll show how to create a custom Docker image enriched with additional plugins which we will use instead of the basic image from Docker Hub.

Keycloak

First of all, let’s create a Client profile for Etherpad in Keycloak.

  • Login to the Keycloak Admin Console (https://sso.darkstar.lan/auth/admin/)
    • Select our ‘Foundation‘ realm from the dropdown at the left.
    • Under ‘Clients‘, create a new client:
      ‘Client ID’ = “etherpad
      ‘Root URL’ = “https://meet.darkstar.lan/pad/ep_openid_connect/callback
      Note that for the Etherpad OIDC plugin ‘ep_openid_connect’  – see below – to work, the ‘Valid Redirect URIs’  (a.k.a. callback URL) must be the concatenation of the Etherpad base URL (https://meet.darkstar.lan/pad/) plus “/ep_openid_connect/callback“. When setting the ‘Root URL‘ to the above value, the ‘Redirect URIs‘ will automatically also be set correctly to “https://meet.darkstar.lan/pad/ep_openid_connect/callback/*
    • Save.
    • In the ‘Settings‘ tab, change:
      ‘Access Type’ = “confidential” (default is “public”)
    • Save.
    • Go to the ‘Credentials‘ tab
    • Make sure that ‘Client Authenticator‘ is set to “Client Id and Secret
    • Copy the value of the ‘Secret‘, which we will use later in the Etherpad connector; the Secret will look somewhat like this:
      2jnc8H6RH9jIYMXExUHA7XF7uD8YKIRs“.

Keycloak configuration being completed, we can turn our attention to the connector between Etherpad and Keycloak.

EP_openid_connect

We will use the Etherpad plugin ep_openid_connect which I already briefly mentioned earlier. This plugin provides the needed OpenID client functionality to Etherpad.
When we add this plugin to the Etherpad Docker image we need to be able to configure it via the ‘docker-compose.yml‘ and ‘.env‘ files of Docker-Jitsi-Meet. The existing configuration files in the repository for the docker-jitsi-meet stack are just meant to make the basic Etherpad work, so we need to add more parameters to configure our custom Etherpad properly.
I will show you what you need to add, and where.

The ‘ep_openid_connect’ plugin expects an ‘ep_openid_connect’ block in the ‘settings.json’ file (we will get to that file in the next section). Since that file is JSON-formatted, we arrive at the following structure:

"ep_openid_connect": {
"issuer": "https://sso.darkstar.lan/auth/realms/foundation",
"client_id": "etherpad",
"client_secret": "2jnc8H6RH9jIYMXExUHA7XF7uD8YKIRs",
"base_url": "https://meet.darkstar.lan/pad"
},

The text string values in green highlight are of course the relevant ones. What is the meaning of the parameters:

  • issuer: this is the string you obtain through Keycloak’s OpenID Discovery URL. Make sure you have ‘jq‘ installed and then run this command to obtain the value for ‘issuer‘:
    $ curl https://sso.darkstar.lan/auth/realms/foundation/.well-known/openid-configuration | jq .issuer
      % Total    % Received % Xferd  Average Speed   Time    Time     Time  Current
                                     Dload  Upload   Total   Spent    Left  Speed
    100  5749  100  5749    0     0   6594      0 --:--:-- --:--:-- --:--:--  6600
    "https://sso.darkstar.lan/auth/realms/foundation"

    In this case, you could easily have guessed the ‘issuer’ value, but using the above ‘well-known’ query URL will always get you the correct value.

  • client_id, client_secret: those are the same OAuth2 values obtained from Keycloak when creating the Etherpad Client profile as seen above.
  • base_url: this is the URL where Etherpad is externally accessible (https://meet.darkstar.lan/pad/ – see Episode 3).

Additionally, since we are now enforcing login, Etherpad’s ‘requireAuthentication‘ setting must be set to “true”. Note that the default setting is “false”; this is how that setting is defined in the Etherpad configuration:

"requireAuthentication": "${REQUIRE_AUTHENTICATION:false}",

We’ll just have to define a “true” value for that variable later on.

Note: Each configuration parameter can also be set via an environment variable, using the syntax "${ENV_VAR}" or "${ENV_VAR:default_value}". This ability is what we will use when updating the Docker Compose file for Jitsi Meet. We will not use the literal JSON block above, instead we will fill it with variable names and use our Docker Compose files to provide values for these variables. That way I am able to create a generic Docker image that I can upload to the Docker Hub and share with other people.
The file ‘settings.json.template‘ in the Etherpad repository has lots of examples.

Hold on to that thought for a minute while we proceed with creating our custom Etherpad Docker image, since we have all the data available to do this now. Once we have that image, we will once again return to the re-configuration of Docker Jitsi Meet and integrate our Etherpad with the Jitsi container stack.

Custom Etherpad Docker image

How to create a custom Docker image?

  • First we clone the “etherpad-lite” git repository. That contains a Dockerfile plus all the context that is needed by ‘docker build‘ to generate an image.
    $ mkdir ~/docker-etherpad-slack
    $ cd ~/docker-etherpad-slack
    $ git clone https://github.com/ether/etherpad-lite .
  • There is one relevant configuration file in the root directory of the checked-out repository:  ‘settings.json.docker‘. This file will be copied into the Etherpad Docker image and renamed to ‘settings.json‘ when we run ‘docker build‘ command. Any plugin configuration we want to enable via environment variables needs to be present in this file.
    Now the standard configurable parameters for the Etherpad are contained in that file, but our custom settings for the “ep_openid_connect” plugin are not. I already showed you how that block of configurable parameters looks in the previous section, and I promised to parametrize it. This is how the parameters look, and we will give them values in the next section where we update the Docker Jitsi Meet configuration.
  • Relevant ‘settings.json.docker’ additions:
    • Support for OpenID Connect in Etherpad – add this JSON code:
      "ep_openid_connect": {
      "issuer": "${OIDC_ISSUER:undefined}",
      "client_id": "${OIDC_CLIENT_ID:undefined}",
      "client_secret": "${OIDC_CLIENT_SECRET:undefined}",
      "base_url": "${OIDC_BASE_URL:undefined}"
      },
    • We also add a connector for the WBO Whiteboard server (its setup is described in the next section below) to the Docker image: the plugin is called ‘ep_whiteboard‘ and needs the following JSON configuration block to be added:
      "ep_draw": {
      "host": "${WBO_HOST:undefined}"
      },
    • Enable AbiWord in the configuration, since we are going to add it to the image. The full path to the ‘abiword‘ binary needs to be configured in ‘settings.json.docker‘.
      Look up this line in the file:
      "abiword": "${ABIWORD:null}",
      and change it to:
      "abiword": "${ABIWORD:/usr/bin/abiword}",
  • Then we build a new image, adding several useful (according to the developers) plugins, as well as the Abiword word processor.
    I tag the resulting image as “liveslak/etherpad” so that I can upload (push) it to the Docker Hub later on:

    $ docker build \
    --build-arg ETHERPAD_PLUGINS="ep_openid_connect ep_whiteboard ep_author_neat ep_headings2 ep_markdown ep_comments_page ep_align ep_font_color ep_webrtc ep_embedded_hyperlinks2" \
    --build-arg INSTALL_ABIWORD="yes" \
    --tag liveslak/etherpad .

This leads to the following output and results in an image which is quite a bit larger (786 MB uncompressed) as the standard Etherpad image (474 MB uncompressed) because of the added functionality:

Step 24/26 : HEALTHCHECK --interval=20s --timeout=3s CMD ["etherpad-healthcheck"]
---> Running in 2c241a795e46
Removing intermediate container 2c241a795e46
---> 5ca0246c1e61
Step 25/26 : EXPOSE 9001
---> Running in 21fcdf511d46
Removing intermediate container 21fcdf511d46
---> 1c288502f632
Step 26/26 : CMD ["etherpad"]
---> Running in 08a25b585280
Removing intermediate container 08a25b585280
---> 912c54fb6c0a
Successfully built 912c54fb6c0a
Successfully tagged liveslak/etherpad:latest

If you create the image on another computer and need to transfer it to your Slackware Cloud Server in order to use it there, you can save the image to a compressed tarball on the build machine, using docker commands:
$ docker save liveslak/etherpad | xz > etherpad-slack.tar.xz

You can use ‘rsync’ or ‘scp’ to transfer that tarball to your Cloud Server and then load it into the Docker environment there, also using docker commands so that you don’t need to know the intimate details on how Docker works with images:
$ cat etherpad-slack.tar.xz | docker load

I pushed this image to my own Docker repository https://hub.docker.com/repository/docker/liveslak/etherpad but I first added a tag to reflect the latest Etherpad release (1.8.16 at the moment):

$ docker login
$ docker tag liveslak/etherpad liveslak/etherpad:1.8.16
$ docker push liveslak/etherpad:1.8.16
$ docker push liveslak/etherpad:latest

This means that you can use the Hub version of ‘liveslak/etherpad’. But you can just as well use your own locally generated etherpad image in the ‘docker run‘ commands that launch your Etherpad container.
When you have a local image called “liveslak/etherpad”, then Docker will not check for an online image called “liveslak/etherpad”. If you did not generate your own image, Docker will look for (and find) my image at the Hub (or at the private Registry you may have configured), so it will download and use that.

Setting up WBO Whiteboard

Etherpad will be even more attractive if it offers users a collaborative Whiteboard and not just a collaborative text editor.
Enter WBO, which is an actual drawing board with infinite canvas and real-time refresh for all users.
Its boards are persistent; if you re-visit a board later on, all your content will still be there. Look at the WBO demo site… amazing.

We will run WBO in its own Docker container and re-configure our Etherpad webserver with a reverse proxy so that WBO can be integrated into Etherpad through the ‘ep_whiteboard’ connector.
It’s not so complex actually.

Docker container

First, launch a Docker container running WBO. We ensure that the data of the whiteboards you will be creating are going to be stored persistently outside of the container, so let’s create that data directory first and ensure that the internal WBO user is able to write there (you may have a different preference for directory location):

# mkdir -p /opt/dockerfiles/wbo-boards
# chown 1000:10 /opt/dockerfiles/wbo-boards

Then launch the container as a background process, and make it listen at port “5001” of your host’s loopback address:

$  docker run -d -p localhost:5001:80 -v "/opt/dockerfiles/wbo-boards:/opt/app/server-data" --restart unless-stopped --name whiteboard lovasoa/wbo:latest

Reverse proxy

We make WBO available behind an apache httpd reverse proxy which takes care of the encryption (https) using a Let’s Encrypt certificate.

Add the following block to your <VirtualHost></VirtualHost> definition of the server which also defines the reverse proxy for your Etherpad (which is https://meet.darkstar.lan/pad/ remember?):

# Reverse proxy for the WBO whiteboard Docker container:
<Location /whitepad/>
    ProxyPass http://127.0.0.1:5001/
    ProxyPassReverse http://127.0.0.1:5001/
</Location>

After restarting Apache httpd, your WBO whiteboard will be accessible via https://meet.darkstar.lan/whitepad/ . We will use that green highlighted text down below as the value for the ETHERPAD_WBO_HOST variable. Etherpad will prefix that text with “https://” and that prefix cannot be changed… hence the requirement for a reverse proxy that can handle the data encryption.

One caveat when you do this on your real-life internet-facing cloud server…
The Whiteboard server is accessible without authentication. It may be advisable to just come up with a different path component than “/whitepad/“, you can think of something like a UUID-like string: “/8cd77cbe-a694-4390-800a-638c7cc05f49/” as long as you use the same string in both places (reverse proxy and ETHERPAD_WBO_HOST definitions). Also, your board names are not visible anywhere unless you share their URLS with other people. So, a relatively safe environment.

Using the custom Etherpad with Jitsi Meet

If you followed Episode 3, you will have a directory “/usr/local/docker-jitsi-meet-stable-6826“, your version number may differ from my “6826“. Inside you will have your modified ‘docker-compose.yml‘ file.

We are going to edit two files: ‘.env‘ and ‘docker-compose.yml‘.

  • Relevant ‘.env’ additions:
    In the ‘.env‘ file we define correct values for the variables we introduced earlier. You can add the following lines basically anywhere, but it is of course most readable if you copy them immediately after the other ETHERPAD_* variables you added earlier on for the MySQL database backend:
    ETHERPAD_OIDC_ISSUER="https://sso.darkstar.lan/auth/realms/foundation"
    ETHERPAD_OIDC_BASE_URL="https://meet.darkstar.lan/pad/"
    ETHERPAD_OIDC_CLIENT_ID="etherpad"
    ETHERPAD_OIDC_CLIENT_SECRET="2jnc8H6RH9jIYMXExUHA7XF7uD8YKIRs"
    ETHERPAD_REQUIRE_AUTHENTICATION="true"
    ETHERPAD_WBO_HOST="meet.darkstar.lan/whitepad"
  • Relevant ‘docker-compose.yml’ additions:
    Add the following lines to the “etherpad:” section immediately below the MySQL database variable definitions you added earlier on in this Episode. You notice the variable names we defined in the previous section when dealing with ‘ep_openid_connect‘:
    - OIDC_ISSUER=${ETHERPAD_OIDC_ISSUER}
    - OIDC_CLIENT_ID=${ETHERPAD_OIDC_CLIENT_ID}
    - OIDC_CLIENT_SECRET=${ETHERPAD_OIDC_CLIENT_SECRET}
    - OIDC_BASE_URL=${ETHERPAD_OIDC_BASE_URL}
    - REQUIRE_AUTHENTICATION=${ETHERPAD_REQUIRE_AUTHENTICATION}
    - WBO_HOST=${ETHERPAD_WBO_HOST}
  • More ‘docker-compose.yml’ updates:
    The “etherpad:” service definition in that YAML file contains the following reference to the Etherpad Docker image:

image: etherpad/etherpad:1.8.16

You need to change that line to:

image: liveslak/etherpad:1.8.16

…in order to use our custom Etherpad image instead of the default one.

The re-configuration is complete and since we modified the ‘.env‘ file again, we  need to refresh and restart our Docker Jitsi Meet container stack again.
Note however, that at this point we have to perform this restart differently than mentioned earlier in this article. Since we are switching to a new Etherpad image, the container based on the old image needs to be removed also. For this scenario, please consult the detailed instructions in both sections “Considerations about the “.env” file” and “Upgrading Docker-Jitsi-Meet” in Episode 3 of this article series.
The complete set of steps to follow is a mix of both sections, and I share it with you for completeness’ sake:

# cd /usr/local/docker-jitsi-meet-stable-*
# docker-compose down
# rm -rf /usr/share/docker/data/jitsi-meet-cfg/
# mkdir -p /usr/share/docker/data/jitsi-meet-cfg/{web/letsencrypt,transcripts,prosody/config,prosody/prosody-plugins-custom,jicofo,jvb,jigasi,jibri}
# docker-compose pull
# docker-compose up -d

Don’t forget to remove the old, unused, Etherpad image because it is now wasting 474 MB uncompressed disk space.

Summarizing

Even though we set it up as part of the Jitsi stack, we now have a standalone Etherpad running which requires you to login when you visit “https://meet.darkstar.lan/pad/”.
On the other hand, you can also access Etherpad via Jitsi Meet. What’s different?
When you start a Jitsi meeting, via “https://meet.darkstar.lan/” and then click on “Open shared document“, you are already authenticated against Keycloak and the Etherpad document will open for you right away, no second login required.

After login, you will be met with a much more powerful editor than the basic one that comes with Docker Jitsi Meet. You’ll notice the extended document export capability thanks to Abiword and the small video widget at the top for face-to-face communication thanks to the WebRTC plugin.

Happy collaborating!

Running the custom Etherpad standalone

If you are not interested in Jitsi Meet, this is the command to start the customized Etherpad container and make it listen at port 9001 of the loopback address:

# docker run -d -p 127.0.0.1:9001:9001 liveslak/etherpad

The Etherpad container is now accessible only on your computer by pointing your browser at http://localhost:9001/ . You still need to add an Apache reverse proxy definition to the VirtualHost site definition to make your Etherpad available for other users at https://meet.darkstar.lan/pad/ .
If you want to change the container’s behavior using the available variables as documented before, you can pass these to the ‘docker run‘ command using one or more “-e” parameters, like so (this example just enables the admin console):

# docker run -d -p 127.0.0.1:9001:9001 \
  -e ADMIN_PASSWORD="my_secret_admin_pass" \
  --name etherpad \
  liveslak/etherpad

With additional environment variables you can enable more of the latent functionality. See the earlier sections of this article for all the relevant variables: those that enable the MySQL database backend; the one that enables the Whiteboard; those that enable the Keycloak authentication, etc.

Thanks

Etherpad with integrated Whiteboard can be a compelling solution for some user groups. Even without Jitsi Meet, you can jointly write and draw, save your work to your local harddrive and you have voice & video in a small overlay if you need to discuss the proceedings.
I encourage you to try it out. With or without integration into Jitsi Meet or even without Keycloak authentication if you want to create this as a completely free and low-treshold service to your local community.

Let me know what you think of this Episode in the comments section below. The final Episode, how to setup your own private Docker image repository, will take some time to write… I have not yet started doing in-depth research on that topic. But the six available Episodes will hopefully keep you occupied for a while 🙂
Thanks for reading until the end.

Eric

Slackware Cloud Server Series Episode 5: Collaborative Document Editing

Hi all!
A spin-off from our previous Episode in this series is this fifth article about using Slackware as your private/personal ‘cloud server’.
Check out the list below which shows past, present and future episodes in the series, if the article has already been written you’ll be able to click on the subject.
The first episode also contains an introduction with some more detail about what you can expect.
These articles are living documents, i.e. based on readers’ feedback I may add, update or modify their content.

Collaborative document editing

In the previous Episode called “Productivity Platform” I have shown you how to setup the NextCloud platform on your Slackware server. I had promised a separate article about the addition of “collaborative editing” and this is it.

Collaborative editing on documents allows people from all over the world to have the exact same document (text, spreadsheet, presentation, vector graphics) open in a web-based online editor and collaborate on its content in real-time. Every editor can see what the others are currently working on.
The most widely used online office suite with these capabilities is Microsoft Office 365.

Of course, Microsoft 365 is not free. It uses a license model where you pay for its use per month. If you stop paying… you lose access to your online office suite and if you are unlucky, you lose access to your OneDrive files as well.

How is the situation in the Open Source world? Looking for free and open (source as well as standards-adhering!) desktop office programs, many people acknowledge that Libreoffice is an important OSOSS (Open Standards & Open Source Software) alternative to Microsoft’s Office line of programs. However… a cloud-native online web-based variant of the LibreOffice suite of programs is not trivially accessible. By nature, online software needs to be hosted somewhere and by extension, the documents you edit online need to be maintained on cloud storage as well… a challenge for free software enthusiasts when the truth is that hosting costs money. The commercially successful Microsoft Office 365 has the dominant position there.

Now, this article is going to free you (a bit) from Big Tech. I will show you how to enrich your personal Slackware Cloud Server with exactly that what seems unattainable for free software lovers: a web-based online version of LibreOffice which makes it possible for you and yours to (jointly if you want) edit the documents that you are already hosting in your NextCloud accounts.

This will be achieved by using the power of LibreOffice. An web-based version of LibreOffice exists and is called Collabora Online. It is being developed by Collabora Productivity, a subsidiary of the company Collabora who are a main contributor of LibreOffice code for many years already, and have a commercial partnership with The Document Foundation.
Formerly known under the name of LibreOffice Online, Collabora have moved the project development from LIbreOffice’s git repository to their own git repository and renamed it.
The Collabora Online Development Edition (CODE) is the version offered for free to the Open Source community (similar to the LibreOffice Community Edition) but Collabora also offer a commercial paid-for version of their Online suite. Companies using the commercial variant basically sponsor Collabora for the development of the Open Source version.

This article focuses on the integration of CODE into your NextCloud environment.

Preamble

For the sake of this article, I am using an ‘artificial’ non-existing domain name “darkstar.lan”.
I expect that your own real-life Slackware server is running Nextcloud at a publicly accessible URL, but in this article it will be:

  • https://darkstar.lan/nextcloud/

The Collabora Online Development Edition will run at its own hostname in the “darkstar.lan” domain. It is of course a virtual server running in Apache httpd, and you probably defined it in a “<VirtualHost></VirtualHost>” block. This article assumes that we are going to host CODE on a bare webserver which is already running at:

  • https://code.darkstar.lan/

Collabora Online Development Edition (CODE)

CODE is not a standalone application. It is a document-editor backend service without user interface and it communicates with your NextCloud platform via WOPI (the ‘Web Application Open Platform Interface’ protocol). It expects NextCloud to provide the user interface (a web page).
CODE is a ‘WOPI Client‘ with an API that offers editing capabilities for the documents that you host on your NextCloud (the ‘WOPI Host‘). The online editor is displayed in an embedded HTML frame right inside your familiar NextCloud environment.

The steps that we are going to take in order to integrate CODE into Nextcloud are:

  • Get a Docker container running with CODE inside and listening at 127.0.0.1:9980 for connection requests.
  • Configure Apache httpd with a reverse proxy so that this localhost port is hidden behind an externally accessible secure URL:  https://code.darkstar.lan .
  • Add the ‘richdocuments‘ app to your NextCloud server and connect it to our CODE container.
  • Tell your users!

First step: download the Collabora Online Docker image. The ‘docker run‘ command which we are going to execute in a moment would also perform that download if necessary, but it does not hurt to already make the image available locally ahead of time, so that any startup issues of the container are not clouded by connectivity issues toward the Docker Hub:

# docker pull collabora/code

The ‘docker run‘ commandline which starts the CODE container is a complex one, so let’s briefly look at its most important parameters.
As stated in the ‘preamble’, our Collabora Online Development Edition will run at hostname “code.darkstar.net” and you need to tell it explicitly which other hosts are permitted to embed it in a web-page. For us this means that our NextCloud server must be allowed to embed content originating from the CODE container when you open a document for editing. Our NextCloud hostname is passed to the container with the “aliasgroup1” environment variable.
In case you want to permit the use of your CODE Docker container to more than one Nextcloud server (for instance, you want to allow your friend who is also running a NextCloud server to use your CODE server as its collaborative editor)? Then add more hostnames using multiple ‘aliasgroupX‘ environment variables like this:

-e 'aliasgroup1=https://darkstar.lan/nextcloud' -e 'aliasgroup2=https://second.nextcloud.com'

The command to start the container is as follows:

# docker run -t -d -p 127.0.0.1:9980:9980 \
  -e "aliasgroup1=https://darkstar.lan/nextcloud" \
  -e "server_name=code.darkstar.lan" \
  -e "username=codeadmin" -e "password=My_Secret_Pwd" \
  -e "DONT_GEN_SSL_CERT" \
  -e "extra_params=--o:ssl.enable=false --o:ssl.termination=true --o:net.proto=IPv4 --o:net.post_allow.host[0]=.+ --o:storage.wopi.host[0]=.+" \
  --restart always --cap-add MKNOD collabora/code

Optionally, run with additional dictionaries.

-e 'dictionaries=nl de en fr es ..'

Through the “-p” parameter we expose the CODE container’s address at 127.0.0.1:9980 .

You see several parameters (-e "DONT_GEN_SSL_CERT" -e "extra_params=--o:ssl.enable=false --o:ssl.termination=true") that are meant to disable the container’s use of SSL encryption when communicating with the outside world. The Apache reverse proxy which we will place in front of it takes care of client-to-server encryption using a Let’s Encrypt certificate instead of the container’s self-signed certificate.

There are also a couple of parameters (-e "extra_params= --o:net.proto=IPv4 --o:net.post_allow.host[0]=.+ --o:storage.wopi.host[0]=.+") which allow the Collabora Online server to be used by hosts in your network – like your NextCloud instance. Note the use of wildcard “.+” in both the “net.post_allow.host” and “storage.wopi.host” options. I have been unsuccessful in determining a more restricted wildcard that is a better match with my network IP ranges. In the end I went for what I could find in online help forums as something which works.

The “MKNOD” capability is needed for CODE to do its work, apparently it needs to be able to create special device nodes in the filesystem using the ‘mknod‘ command. Note that according to the documentation, this makes the CODE image incompatible with Docker Swarm, but Swarm is not within the scope of my article series anyway.

If your ‘docker run‘ command-line contains a “username” and “password” parameter, then Collabora Online will enable its admin console (only accessible with the above username/password) at: https://code.darkstar.lan/browser/dist/admin/admin.html . At that URL you will find some statistics of the operations performed by the online editor.

Configuring Apache

Note that in many places on the Internet, the documentation for the reverse proxy still mentions the old LibreOffice OnLine “lool” and “loolwsd” phrases instead of using the new COllabora OnLine phrases “cool” and “coolwsd“. Luckily, Collabora’s own documentation is correct: https://sdk.collaboraonline.com/docs/installation/Proxy_settings.html. So here is what I am using on my CODE server, running on IP address:port “127.0.0.1:9980” and reverse-proxied to https://code.darkstar.lan/ .
I assume you know where to add it to your Apache httpd VirtualHost definition:

# START Reverse proxy to the CODE Docker container:
#
AllowEncodedSlashes NoDecode
ProxyPreserveHost On
ProxyTimeout 900

# Cert is issued for code.darkstar.lan and we proxy to localhost:
SSLProxyEngine On
RequestHeader set X-Forwarded-Proto "https"

# Static html, js, images, etc. served from coolwsd;
# And 'browser' is the client part of Collabora Online:
ProxyPass /browser http://127.0.0.1:9980/browser retry=0
ProxyPassReverse /browser http://127.0.0.1:9980/browser

# WOPI discovery URL:
ProxyPass /hosting/discovery http://127.0.0.1:9980/hosting/discovery retry=0
ProxyPassReverse /hosting/discovery http://127.0.0.1:9980/hosting/discovery

# Capabilities:
ProxyPass /hosting/capabilities http://127.0.0.1:9980/hosting/capabilities retry=0
ProxyPassReverse /hosting/capabilities http://127.0.0.1:9980/hosting/capabilities

# Do not forget WebSocket proxy:
RewriteEngine on
RewriteCond %{HTTP:Connection} Upgrade [NC]
RewriteCond %{HTTP:Upgrade} websocket [NC]

# Main websocket
ProxyPassMatch "/cool/(.*)/ws$" ws://127.0.0.1:9980/cool/$1/ws nocanon

# Admin Console websocket:
ProxyPass /cool/adminws ws://127.0.0.1:9980/cool/adminws

# Download as, Fullscreen presentation and Image upload operations:
ProxyPass /cool http://127.0.0.1:9980/cool
ProxyPassReverse /cool http://127.0.0.1:9980/cool
# Compatibility with integrations that use the /lool/convert-to endpoint:
ProxyPass /lool http://127.0.0.1:9980/cool
ProxyPassReverse /lool http://127.0.0.1:9980/cool
#
# END Reverse proxy to the CODE Docker container

Upgrading the Docker image for CODE

Occasionally, new versions of this docker image are released with security and feature updates. This is how you upgrade to a new version:

Grab the new docker image:

$ docker pull collabora/code

List docker images:

$ docker ps

From the output you can glean the Container ID of your CODE docker container. Stop and remove the Collabora Online docker container:

$ docker stop CONTAINER_ID
$ docker rm CONTAINER_ID

Remove the old un-used image, after looking up its ID (check the timestamp):

$ docker images | grep collabora
$ docker image rm IMAGE_ID

Start a container based on the new image, using the same ‘docker run -d‘ command as before.

CODE Docker container configuration

The default configuration for the CODE Docker image is contained in a file inside the container, called “/etc/coolwsd/coolwsd.xml” . Some of the configuration options are documented online, but the file itself is well-documented too.

After starting the container, you can copy the configuration file out of the container using docker commands as shown below. After making your changes you copy it back into the container using docker commands. When a configuration change is detected by the running container it will restart (this is why it is important to have “--restart always” as part of your ‘docker run‘ commandline).
How to do this:

Determine the CODE Docker ID by looking at the running containers:

$ docker ps | grep code

With an output like this:

CONTAINER ID IMAGE COMMAND CREATED STATUS PORTS NAMES
e3668a79b647 collabora/code "/start-collabora-onâ?¦?" 2 weeks ago Up 7 days 127.0.0.1:9980->9980/tcp suspicious_kirch

Copy out the “coolwsd.xml” configuration file into the current directory of your host filesystem:

$ docker cp e3668a79b647:/etc/coolwsd/coolwsd.xml coolwsd.xml

Make your configuration changes to the local copy and then add it back into the container:

$ docker cp coolwsd.xml e3668a79b647:/etc/coolwsd/coolwsd.xml

The CODE container needs some time for its automatic restart, so wait a bit before you try to access it again from inside NextCloud.

Custom Docker Image

The Docker image for CODE can be customized within limits, using the variables in its configuration file, see above. But if you need substantial customization like adding more fonts or removing the 20-concurrent-open-documents limit, you can rebuild the Docker image yourself.
The code to rebuild the image can be found in the Collabora Online github repository. Use the available scripts like “install-collabora-online-ubuntu.sh” to create a custom script for your Slackware server, add your desired customizations like additional fonts or packages to that script and build your own custom Docker image with it.
Of course, the command-line to start your CODE container must be adapted to use your custom image… since you no longer want the default image to be pulled from the “collabora/code” repository in the Docker Hub.

Adding CODE to NextCloud

The preliminaries have been dealt with. Now we are getting to the core of the story: connecting your NextCloud server to the online editor backend.

The ‘richdocuments‘ app is the glue we need on NextCloud to offer collaborative document editing capabilities to our users. The human-readable name of this app as listed in your app overview is “NextCloud Office”. In fact there is an extended version of the app called ‘richdocumentscode‘ which contains an embedded version of CODE, but it is severely under-performing. I enabled the embedded CODE server in that app only to find that it crippled my complete NextCloud platform. Every action slowed down to a horrible crawl. That was the moment I decided I needed CODE to run separately, in a Docker container and outside of NextCloud.

Get the ‘richdocuments’ app by going to “Profile > Apps” and search for it in the appstore. Install it and then go to the new menu item which has suddenly appeared: “Profile > System > Administration > Collabora Online Development Server” so you can configure the URL of your Collabora Online container:

The configuration boils down to:

  • Select the radio-button ‘Use your own server‘;
  • Enter the URL “https://code.darkstar.lan/“;
  • Save

NextCloud will make an attempt to contact your CODE server and if it gets the correct responses back, the configuration page will display a green checkbox along “Collabora Online server is reachable“.

All done! We can now check out how this online office suite looks on our NextCloud.
If you are more a ‘television personality’, you can also watch a video about how to add CODE to NextCloud, created by NextCloud’s own Marketing Director (and former member of the KDE marketing team) Jos Poortvliet:


Using CODE in NextCloud

Once CODE is available in your NextCloud and you click on a document, you see the connection to the online editor being initialized:

This process takes a few seconds and you end up in a web-based editor which looks like:

There it is. An online web-based office suite based on LibreOffice, which is able to open and edit the documents you are storing in your NextCloud account. And if you tell NextCloud to share your document(s) with others, then they too can collaborate on your document, all together in real-time.

Thanks

You made it! After reading and implementing the ideas from these first five articles in the Series you should now have a Slackware Cloud Server up and running, full of features that everybody will be envious of, and it’s all free and under your control! No more need for Google, Microsoft, Amazon, Zoom, Dropbox and the likes. Meet and collaborate to your hearts’ desire with family, friends, co-workers or groups of Open Source developers.

Good luck and let me know about your successes, but also your frustrations and how you overcame your knowledge gaps (these articles assumed quite a bit of prior knowledge of running a webserver, configuring an online domain, managing your firewall etcetera).

There’s some episodes remaining, doing a deep-dive into Etherpad and setting the first steps into creating your own private Docker Hub without artificial usage limitations. Writing those last two episodes will take more time, so do not expect them to be released in the next couple of weeks; however I hope you will like those as well.

Eric

« Older posts

© 2024 Alien Pastures

Theme by Anders NorenUp ↑