My thoughts on Slackware, life and everything

Tag: slackwarecloudserver (Page 2 of 2)

Slackware Cloud Server Series, Episode 4: Productivity Platform

Hi all!
Welcome to the fourth episode in a series of articles that I am writing about using Slackware as your private/personal ‘cloud server’.
Check out the list below which shows past, present and future episodes in the series, if the article has already been written you’ll be able to click on the subject.
The first episode also contains an introduction with some more detail about what you can expect.
These articles are living documents, i.e. based on readers’ feedback I may add, update or modify their content.

Nextcloud Productivity Platform

So far, I have explored Docker container infrastructure management, shown you how to build an Identity and Access Management service in Docker and used that to make a Video Conferencing platform available to the users of your Slackware Cloud server. Today we are going to explore other means of collaboration and personal productivity.
Some of the topics in the current Episode will cover cloud storage: how do you share your data (documents, music, photos, videos) across your computers with a safe backup copy on your Cloud server? How do you keep track of your activities, read your emails, plan your work, chat with your friends and setup video calls with them? Moreover, how can I achieve all of this without having to depend on the Cloud plaforms that Google, Dropbox, Amazon, Microsoft offer and which seem free but are most certainly not?

The Nextcloud platform which is the main topic of this article, offers a solution to this dilemma. Nextcloud is a spin-off from ownCloud. It was announced in 2016 by the original founder of ownCloud after he left the company because he did not agree to the course ownCloud was going to take. OwnCloud now offers part of its features exclusively as a paid-for subscription model, whereas Nextcloud is fully open source and all features are available to community users as well as paying customers.

The core of Nextcloud is called the Nextcloud Hub, the server product which integrates the three main components Files, Talk and Groupware and which you can host and manage on a server which you own and control. Client programs are available for Linux, Windows and Android platforms that allow you to sync your local files to the server, participate in videoconferences directly from your phone etc.

The goal of setting up Nextcloud on our Slackware Cloud Server is to achieve total control over your data, share these data securely with other people and eliminate dependencies on similar commercial offerings while enjoying the same functionality.

But first a slight detour before we dive into the setup of our Collaboration Platform.
Nextcloud allows for document collaboration in similar fashion to Microsoft Office 365. This is a topic which has its own Episode in the article series: the next one called “Collaborative Document Editing” will center around the integration of Collabora Online Development Edition (CODE) into our Nextcloud Hub.
Collabora is a major contributor to the LibreOffice suite. An online web-based front end to LibreOffice programs was initiated and is being developed by Collabora since 2014, and in essence, Collabora Online is the continued development of the original ‘LibreOffice Online’ code. Collabora moved the repository to github and it is the source used to build CODE, but is also used to create an “enterprise” version which has a paid subscription model. The pre-compiled CODE binaries have a limitation of 10 simultaneously edited documents, but compiling the source yourself will circumvent this artificial limitation.

Preamble

For the scope of this article I will assume that you have a Slackware 15.0 server with IP address “10.10.10.10“. Your own IP address is of course different but your (web)server needs to be accessible online.
Our example server (you need to apply real-life values here of course) has the following configuration:

  • a working Docker environment;
  • Apache httpd configured and running and reachable as “https://darkstar.lan/” with the DocumentRoot directory “/var/www/htdocs/” which is the default location for Apache httpd’s content in Slackware.
  • Keycloak configured and running at “https://sso.darkstar.lan/auth/”;
  • Jitsi Meet configured to use Keycloak for authentication and running at “https://meet.darkstar.lan/“; with the keycloak-jitsi bridge at “https://sso.meet.darkstar.lan/“.
  • PHP version 7.3, 7.4 or 8.0, which is the reason for the Slackware 15.0 requirement – the PHP of Slackware 14.2 is just too old.

Nextcloud Hub II

The Nextcloud Hub II is the new name of the Nextcloud server product which you can download as a single ZIP file and install into your webserver. Nextcloud Hub can be extended with plugins and for that, there is an active App Store. The Nextcloud administrator can search for, install, enable, disable, update, configure and remove these applications from the web-based management console or even from the command-line. This article will discuss some of these applications, in particular the ‘featured apps‘ which are the ones that are supported or developed by Nextcloud GmbH directly.
The core of Nextcloud Hub II consists of the following components:

Files:

Nextcloud Files allows easy access to your files, photos and documents. You can share files with other Nextcloud users, even with remote Nextcloud server instances. When CODE is installed (see the next Episode in this Series) you can even collaborate on documents in real-time with friends, family, team members, customers etc. We have inherent security through data encryption (in transit and on the local file storage) and access control mechanisms, so that only those people with whom you explicitly share your file(s) will be able to access them.

Users store files in their account and this translates to a per-user directory in the host’s filesystem. By default this storage area is not encrypted. If you don’t feel at ease with the idea that unauthorized access to the server potentially exposes userdata to the intruder, the Nextcloud administrator can enable on-disk encryption of all the users’ files. Once encrypted, the userdata can not be decrypted by anyone else than the owner of the files (aka the user) and those with whom files are shared. An encryption key is created per user and the user’s password unlocks that key which is always and only stored on the server. If the user loses their password, they will permanently lose access to their data!
The administrator can configure a ‘recovery key‘ however. You may pose that this allows that administrator to gain access to the userdata, but that’s the other side of the coin of being able to decrypt userdata in the event of loss of the password…

Talk:

Nextcloud Talk offers screensharing, online meetings and web conferencing. The video conferencing capabilities are not yet as strong as Jitsi Meet (in particular it does not scale well to a lot of simultaneous users) but the Talk component is being improved continuously.

Groupware:

Nextcloud Groupware consists of easy to use applications for Webmail, Calendaring and Contacts and is integrated with Nextcloud Files. In webmail you can configure multiple IMAP server accounts, PGP encryption is supported. Calendars can be shared and have Nextcloud Talk integration for video conferences. You can create appointments and define and book resources. Contacts can be grouped, shared with others, and synchronized to and from your phone.
In addition, you can install the featured app ‘Deck‘ which enables you to manage your work with others through private or shared Kanban-style task boards.

Setting up MariaDB SQL server

Nextcloud Hub uses a MariaDB server as its configuration back-end. The users’ files are stored in your host file-system.
You could use SQLite instead… but that is really going to affect the performance of your server negatively if the load increases. In case you have never setup a MariaDB SQL server, I will give you a brief rundown.

MariaDB is part of a full installation of Slackware, and since ‘full install‘ is the recommended install, I will assume you have a mariadb package installed. If not, because you decided to do only a partial installation on your server, be sure to start with an installation of mariadb and its dependencies lz4 and liburing.

  • Create the system tables for the SQL server:
    # mysql_install_db --user=mysql
    Installing MariaDB/MySQL system tables in '/var/lib/mysql' ...
    OK
  • Make the MariaDB boot script executable:
    # chmod +x /etc/rc.d/rc.mysqld
  • Comment the ‘ SKIP="--skip-networking" ‘ line in ‘rc.mysqld‘ because we will use client connections from outside.
  • Execute the boot script (or reboot the machine):
    # /etc/rc.d/rc.mysqld start
  • Perform initial configuration of the database server:
    # /usr/bin/mysql_secure_installation
    Switch to unix_socket authentication [Y/n] n
    Set root password? [Y/n] y
    Remove anonymous users? [Y/n] y
    Disallow root login remotely? [Y/n] y
    Remove test database and access to it? [Y/n] y
    Reload privilege tables now? [Y/n] y

    This script locks down your SQL server properly. It will prompt you to setup the admin (root) password and gives you the option of removing the test databases and anonymous user which are created by default. This is strongly recommended for production servers. I answered “NO” to “Switch to unix_socket authentication” because the Docker containers on our Slackware Cloud server will need to access this MariaDB SQL server over the local network.

You now have MariaDB SQL server up and running, the root (admin) password is set and the root user can only connect to the database from the localhost. It’s ready to setup its first database.
We will manually create the required SQL database  for NextCloud (you might want to insert your own account/password combo instead of my example “nextcloud/YourSecretPassword“). Since we are installing NextCloud on the ‘bare metal‘, NextCloud can communicate with the SQL server via the ‘localhost‘ network address:

# mysql -uroot -p
> CREATE USER 'nextcloud'@'localhost' IDENTIFIED BY 'YourSecretPassword';
> CREATE DATABASE IF NOT EXISTS ncslack CHARACTER SET utf8mb4 COLLATE utf8mb4_general_ci;
> GRANT ALL PRIVILEGES ON ncslack.* TO 'nextcloud'@'localhost';
> FLUSH PRIVILEGES;
> quit;

Configuring Apache and PHP

First of all, we are going to increase the PHP memory limit from the default 128 MB to 512 MB (recommended value) in the file ‘/etc/php.ini‘ or else the more complex operations will fail:

memory_limit = 512M

Don’t forget to enable PHP support in “/etc/httpd/httpd.conf” by un-commenting the line:
Include /etc/httpd/mod_php.conf‘.

Your Apache server needs some directives inside the ‘<VirtualHost></VirtualHost>‘ block that are not enabled by default.
This section needs to be added:

  <Directory /var/www/htdocs/nextcloud/>
    Require all granted
    Satisfy Any
    AllowOverride All
    Options FollowSymLinks MultiViews

    <IfModule mod_dav.c>
      Dav off
    </IfModule>
  </Directory>
  Alias "/localapps" "/opt/netxtcloud/localapps"
  <Directory "/opt/nextcloud/localapps">
    Require all granted
    AllowOverride All
    Options FollowSymLinks MultiViews
  </Directory>

Also, the Apache httpd modules mod_rewrite, mod_headers, mod_env, mod_dir and mod_mime need to be enabled. This is usually done in ‘/etc/http/httpd.conf‘.

Configuring local storage

We are going to maintain all of the Nextcloud users’ personal data separately from the server code and even outside of the webserver document root. Nobody should be able to access your files through a possible hole in your webserver.

Also, when the Nextcloud administrator (you) is going to extend the server’s functionality by installing additional apps, you will want these apps to be installed outside of the Nextcloud application directory. This allows for a clean upgrade process if we want to install a newer version in the future. The “/opt/nextcloud/” will be the root directory for all of this. The httpd user account “apache” needs to own these files.

Let’s start with creating the userdata directory:

#  mkdir -p /opt/nextcloud/data
#  chown apache:wheel /opt/nextcloud/data

And the directory where the add-ons will be installed:

# mkdir -p /opt/nextcloud/localapps
# chown apache:wheel /opt/nextcloud/localapps

To the Apache httpd VirtualHost configuration you should add an  ‘Alias‘ statement which points the webserver “/localapps” path component to the filesystem location “/opt/nextcloud/localapps“. This line was  already mentioned in the Apache configuration snippet further up:

Alias "/localapps" "/opt/netxtcloud/localapps"

Installing the Nextcloud Hub

We will download the latest stable release from their server installation page.
At the time of writing, 23.0.0 is the latest available so:

# cd ~
# wget https://download.nextcloud.com/server/releases/nextcloud-23.0.0.zip
# unzip -n nextcloud-23.0.0.zip -d /var/www/htdocs/
# chown -R apache:wheel /var/www/htdocs/nextcloud/

We have already created the SQL database, so we can immediately continue with the Web setup. Point your browser at http://darkstar.lan/nextcloud/ :

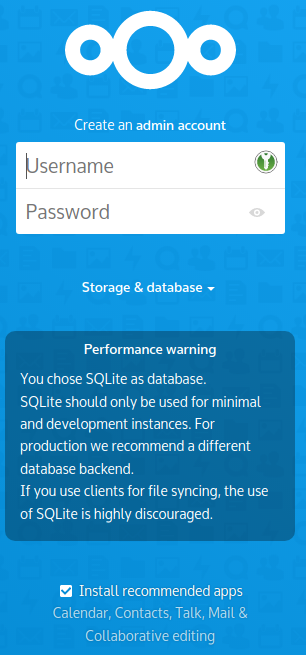
This is where you will define the account and password for the Nextcloud administrator. It will be the only account with local credentials (stored in the SQL backend). All  future Nextcloud user authentication & authorization will be configured and managed via the Keycloak IAM program. The green text snippets match with configuration settings documented higher up in this article.

  • I will use the name “
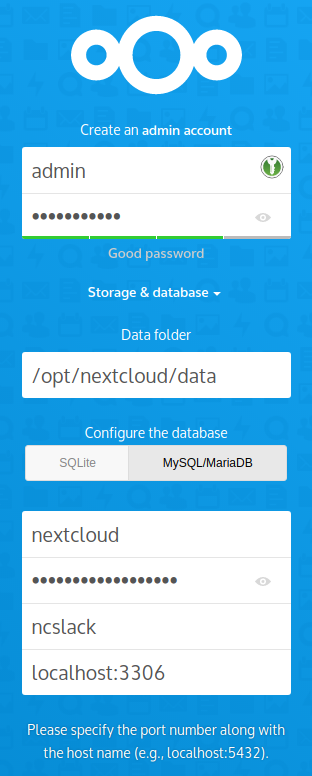
admin” for the account and give it a secure password.
  • Storage & Database:
    • Data Folder: “/opt/nextcloud/data
    • Database: MySQL/MariaDB
    • Database user: “nextcloud
    • Database password: “YourSecretPassword
    • Database name: “ncslack
    • Localhost: add the MariaDB port number so that it reads “localhost:3306”
  • Install recommended apps: Calendar, Contacts, Talk, Mail & Collaborative editing: ensure that this box is checked (note that the Collaborative Editing program – CODE – download will probably fail but we will install it as an external application later):

TIP: I experienced that when the password fields are set to “show password”, the installation will refuse to continue.

Click “Finish” to kick off the Nextcloud setup.

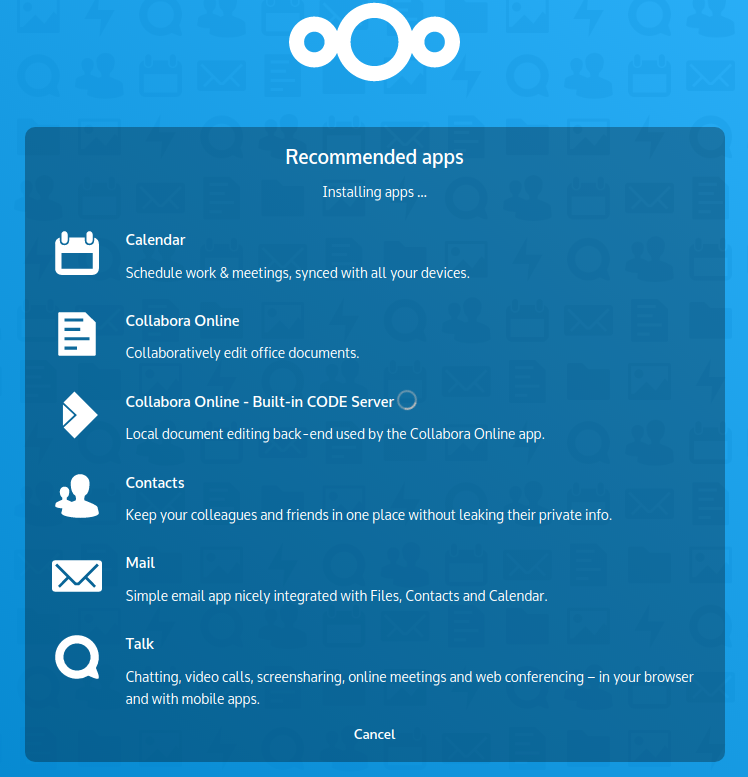
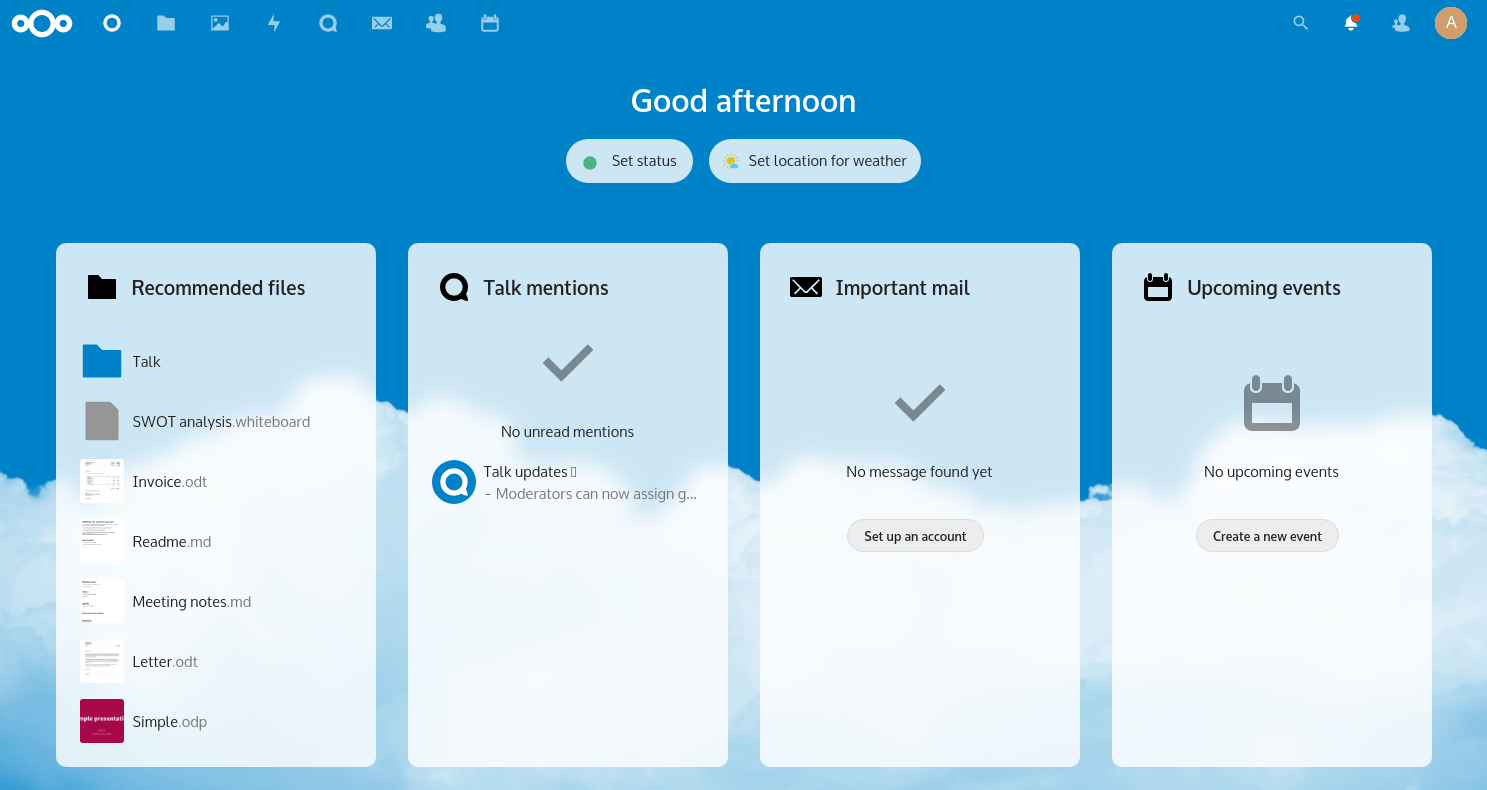
This configuration process ends with some screens that will show off the capabilities of the programs, you can either close these immediately (the “X” top right) or click through them until the end. You will end up in your Nextcloud dashboard:

Post-configuration

After installation and initial configuration we are now going to tune the server.

Pretty URLs

A Nextcloud URL looks like “http://localhost/nextcloud/index.php/apps/dashboard/” and I want to remove the “index.php” string which makes the URLs look nicer. Check the official documentation.

  • Edit “./config/config.php” file in the nextcloud directory. Add the following two variables right before the last line which goes like “);“:
    ‘overwrite.cli.url’ => ‘https://darkstar.lan/nextcloud’,
    ‘htaccess.RewriteBase’ => ‘/nextcloud‘,
  • We are going to use the NextCloud command-line interface ‘occ‘ (here it shows its heritage; ‘occ‘ stands for ‘Own Cloud Console‘) in order to apply the changes in ‘config.php‘ to the ‘.htaccess‘ file in the NextCloud installation directory.
    The ‘occ’ command needs to be run as the httpd user (‘apache‘ in the case of Slackware):
    # sudo -u apache php -d memory_limit=512M /var/www/htdocs/nextcloud/occ \
    maintenance:update:htaccess
    .htaccess has been updated
    Note that I have not been able to get this to actually work! Pointers with a fix for pretty URLs are welcome!

Server scan

You can run a “server scan” as admin user via “Settings > Administration > Security & Setup Warnings” to see if Nextcloud has suggestions on improving performance and functionality of the server.
In my case, it reports that a number of database indexes are  missing, and that the following commando will fix this:

# sudo -u apache php /var/www/htdocs/nextcloud/occ db:add-missing-indices

This scan will also point out performance issues about which I will share more details, below in “Tuning server performance” section.

Cron maintenance

It is advised to install a cron job which runs as the “apache” user, and performs maintenance every 5 minutes. In Nextcloud as the admin user, you configure the “Cron” maintenance type via “Settings > Administration > Basic Settings > Background Jobs“.
This needs to be accompanied by an actual cron job definition on the Slackware server; so this is the command that I added to the crontab for “apache“:

# crontab -u apache -l
# Run maintenance for NextCloud every 5 minutes:
*/5 * * * * /usr/bin/php -f /var/www/htdocs/nextcloud/cron.php

Install add-on applications outside of Nextcloud directory

We have already created a ‘/opt/nextcloud/localapps‘ directory with the intention of using that location for the installation of all the apps that we want to add to our Hub.
In order to enable a separate application installation path, you need to add the following lines to ‘./config/config.php‘:

'appstoreenabled' => true,
'apps_paths' => array(
    array(
    'path'=> OC::$SERVERROOT . '/apps',
    'url' => '/apps',
    'writable' => false,
  ),
  array(
    'path'=> '/opt/nextcloud/localapps',
    'url' => '/localapps',
    'writable' => true,
  ),
),

Note that if you get an error from external applications when they attempt to parse the ‘config.php’ file of NextCloud which looks like “Expected boolean literal, integer literal, float literal, string literal, ‘null’, ‘array’ or ‘[‘”, you may have to replace:
'path'=> OC::$SERVERROOT . '/apps',
with
'path'=> '/var/www/htdocs/nextcloud/apps',

Tuning server performance

Memory cache

The main optimizations which will boost your server’s performance and responsiveness are related to memory caching and transactional file locking.

You can address these both by installing redis (an in-memory key-value memory store) and php-redis (PHP extension for redis) as Slackware packages from my repository:

After installing redis, configure it correctly for Nextcloud.

  • Enable the php redis extension by editing ‘/etc/php.d/redis.ini‘ and removing the semicolon so that you get the following line:
    ; Enable redis extension module
    extension=redis.so

    Optionally add these lines to tune its performance:
    ; Should the locking be enabled? Defaults to: 0.
    redis.session.locking_enabled = 1
    ; How long should the lock live (in seconds)?
    ; Defaults to: value of max_execution_time.
    redis.session.lock_expire = 60
    ; How long to wait between attempts to acquire lock, in microseconds?.
    ; Defaults to: 2000
    redis.session.lock_wait_time = 10000
    ; Maximum number of times to retry (-1 means infinite).
    ; Defaults to: 10
    redis.session.lock_retries = -1
  • Make the redis daemon listen at a UNIX socket as well as a TCP port, uncomment these lines in the “/etc/redis/redis.conf” configuration file:
    unixsocket /var/run/redis/redis.sock
    unixsocketperm 660
  • Make the init script executable and start it manually (it gets added to rc.local so it will start on every boot from now on):
    # chmod +x /etc/rc.d/rc.redis
    # /etc/rc.d/rc.redis start

Enable the use of redis in Nextcloud’s main configuration file “/var/www/htdocs/nextcloud/config/config.php” by adding the following block:

'memcache.locking' => '\\OC\\Memcache\\Redis',
'memcache.local' => '\\OC\\Memcache\\Redis',
'memcache.distributed' => '\\OC\\Memcache\\Redis',
'redis' => 
array (
    'host' => '/var/run/redis/redis.sock',
    'port' => 0,
),

Finally, allow the “apache” user to be able to read the Redis socket by adding the user to the “redis” group:

# gpasswd -a apache redis

… and restart the Apache httpd service.

PHP OPcache

OPcache is a PHP extension for Apache httpd which stores (pre-)compiled PHP script bytecode in memory. This speeds up the performance of PHP-based applications like Nextcloud, because it reduces or eliminates the need to load PHP scripts from disk and parse them every time they are called.
Slackware’s PHP has opcache enabled in “/etc/php.ini“. Relevant settings are:

opcache.enable=1
opcache.memory_consumption=128
opcache.max_accelerated_files=10000
opcache.revalidate_freq=200

These are default values for Slackware and therefore they are commented-out in the “php.ini” file but you can validate that they are enabled via the command:

# php -i |grep opcache

If you find that OPcache is disabled, you should fix that ASAP.

Check your security

Nextcloud offers a neat online tool that connects to your Nextcloud instance and performs a series of security checks, and will advise you in case you need to improve on your server security: https://scan.nextcloud.com/ .

Commandline management

The web-based management interface for the “admin” user is ‘https://darkstar.lan/nextcloud/index.php/settings/user‘ but a lot of administration tasks can also be done directly from the Slackware server’s command prompt (as root) using the “Own Cloud Console” program ‘occ‘ I already briefly touched on earlier in this article.

Some examples:

Install an application, say “richdocumentscode” which is a built-in low-performance version of CODE (Collabora Online Development Edition):

# sudo -u apache php -d memory_limit=512M /var/www/htdocs/nextcloud/occ app:install richdocumentscode

App updates can be done on commandline too:

# sudo -u apache php -d memory_limit=512M /var/www/htdocs/nextcloud/occ app:update --all

Remove an app:

# sudo -u apache php -d memory_limit=512M /var/www/htdocs/nextcloud/occ app:remove richdocumentscode

Get the list of possible occ command options:

# sudo -u apache php -d memory_limit=512M /var/www/htdocs/nextcloud/occ app:list

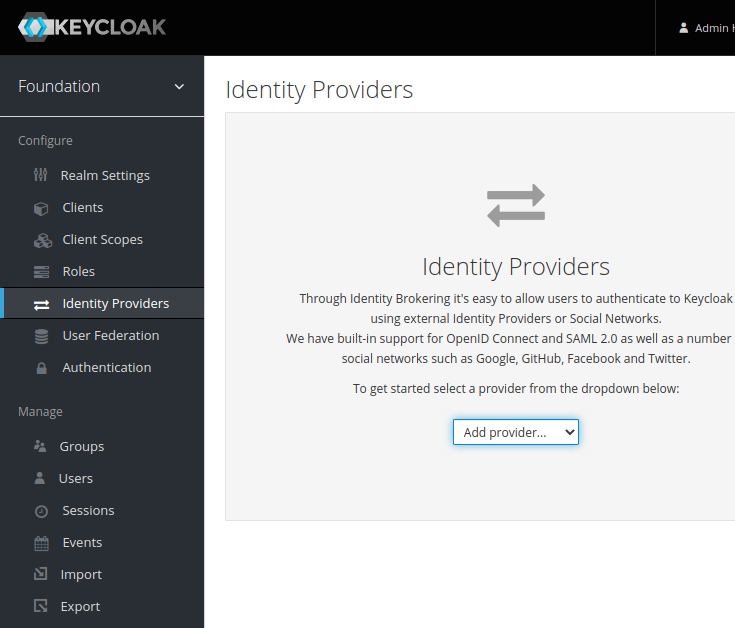
Integration with Keycloak IAM

The server is running nicely, and it is time to invite users. All our users will be managed by our Keycloak IAM program.
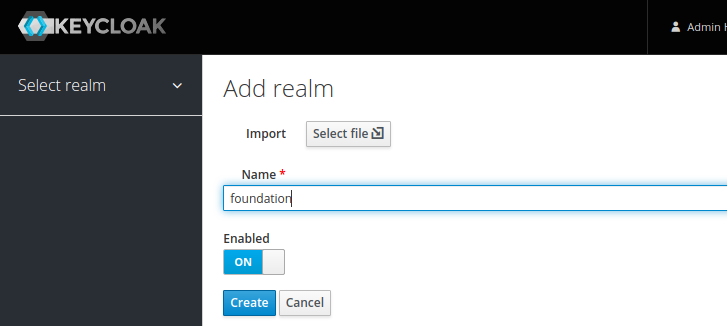
To integrate Keycloak into Nextcloud we first create a “Client ID” for Nextcloud in our Keykloak admin console and copy the relevant secret bits from that ID into Nextcloud. Nextcloud will contact Keycloak with a URL that will ebable login for the users in our “foundation” realm, i.e. the realm which we created when we setup Keycloak.

Keyloak:

  • Login to the Keycloak Admin Console, https://sso.darkstar.lan/auth/admin/ .
    • Under ‘Clients‘, create a new client:
      Client ID‘ = “nextcloud
      Root URL‘ = “darkstar.lan/nextcloud
    • Save.
    • In the ‘Settings‘ tab, change:
      Access Type‘ = “confidential” (default is “public”)
    • Save.
    • In the ‘Credentials‘ tab, copy the value of the ‘Secret‘, which we will use later in Nextcloud: “61a3dfa1-656d-45eb-943a-f3579a062ccb” (your own value will of course be different).

Nextcloud:

  • Login to Nextcloud as the admin user: https://darkstar.lan/nextcloud
    • In ‘Profile > Apps‘, install the ‘Social Login‘ app.
  • Configure Nextcloud’s social login to use Keycloak as the identity provider
    • Make sure ‘Disable auto create new users‘ is UN-checked because every user logging in via Keycloak for the first time must automatically be created as a new user.
    • DO check ‘Prevent creating an account if the email address exists in another account‘ to ensure that everyone will have only one account
    • Add a new ‘Custom OpenID Connect‘ by clicking on the ‘+‘:
      ‘Title’ = “keycloak”
      ‘Authorize url’ = “https://sso.darkstar.lan/auth/realms/foundation/protocol/openid-connect/auth”
      ‘Token url’ = “https://sso.darkstar.lan/auth/realms/foundation/protocol/openid-connect/token”
      ‘Client id’ = “nextcloud
      ‘Client Secret’ = “61a3dfa1-656d-45eb-943a-f3579a062ccb” (this is the value you obtained earlier in the Keycloak Client definition)
      ‘Scope’ = “openid”
      ‘Default group’ = “none”
    • ‘Groups claim’ = “nextcloud” (optional setting, make sure you create a group “nextcloud” in Keycloak’s “foundation” realm and have added your future Nextcloud users as members of this group).
    • Also optional, ‘Add group mapping‘ can automatically arrange that the Keycloak group “nextcloud” is mapped to Nextcloud group, e.g. called “My social circle” with which you can limit access in Nextcloud to only those apps that you approved.
    • Save.

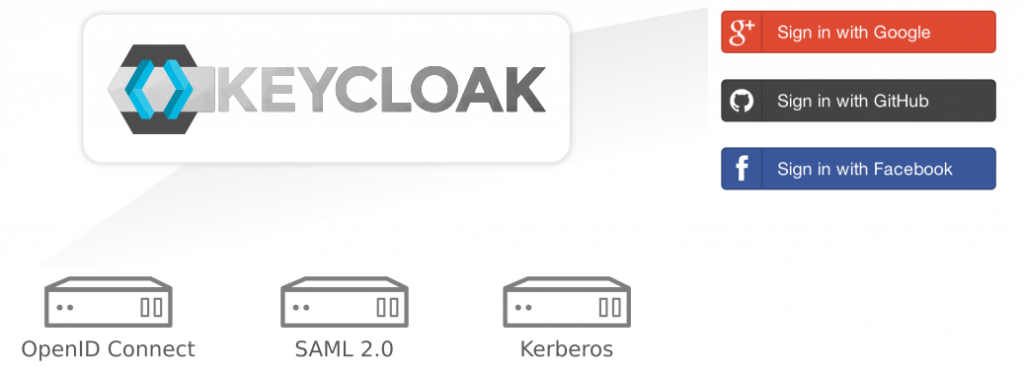
Your Nextcloud login page will now additionally offer a ‘Login with Keycloak Authentication” option. Clicking this will redirect you to a Keycloak authentication page. Screenshots of how this looks exactly can be found further down in the section “Nextcloud clients“.
After successful login and authorization with an existing Keycloak user account you will be returned to Nextcloud and logged in. If this was the user’s first login to Nextcloud using Keycloak credentials, Nextcloud will create an internal user account which is linked to the Keycloak credentials.

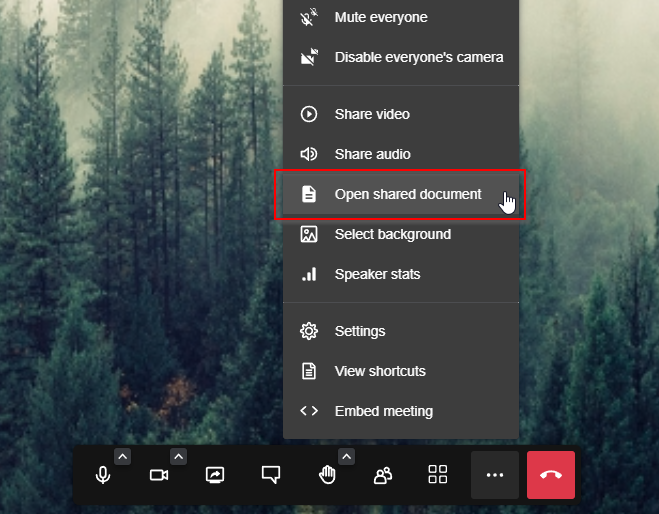
Integrating Jitsi Meet

The integration of an embedded Jitsi Meet window into Nextcloud requires some configuration in Apache httpd (for the embedding) and in Nextcloud itself (securing the intercommunication via a JSON Web Token).

Apache:

Add the following to your httpd global configuration, for instance to ‘/etc/httpd/httpd.conf‘ (the parts in green need to be replaced by your real-life hostnames of course):

# Mitigate the risk of "click-jacking" (other sites embedding your pages
# and adding other, possibly malicious, content)
# See https://developer.mozilla.org/en-US/docs/HTTP/X-Frame-Options
Header always append X-Frame-Options SAMEORIGIN
# And allow embedding of Jitsi Meet in Nextcloud (add any URL for which you would also allow embedding):
RequestHeader set X-HTTPS 1
Header always set Content-Security-Policy "frame-ancestors 'self';"
Header always set Content-Security-Policy "frame-ancestors https://darkstar.lan https://sso.darkstar.lan https://meet.darkstar.lan ;"

Followed by a restart of Apache httpd.

Nextcloud:

  • Install the “Jitsi Integration” app as the admin user via ‘Profile > Apps
  • Go to  ‘Profile >Settings > Jitsi’
    • ‘Server URL’: enter “https://meet.darkstar.lan
    • ‘JWT Secret’: enter “NmjPGpn+NjTe7oQUV9YqfaXiBULcsxYj” (this is the JWT token which you entered as the value for ‘JWT_APP_SECRET‘ variable in the ‘.env‘ file of  our ‘docker-jitsi-meet‘  instance, see the previous Episode on Video Conferencing for details)
    • JWT App Id‘: enter “jitsi” (which is the value of the  ‘JWT_APP_ID‘ variable in that same ‘.env‘ file)
    • Save

That’s it!
Users will now find a ‘Conferences‘ icon in the application bar at the top of their Nextcloud home. Clicking it will open an embedded Jitsi video conferencing window.

One obvious advantage to using this NextCloud embedded Jitsi Meet is that the resulting Meet URLs are impossible to guess, they will not mention the meeting room name but instead use a UUID like ‘https://meet.darkstar.lan/06135d8e-5365-4a6f-b31b-a654d92e8985‘.
If you compare this to the regular Jitsi Meet at ‘https://meet.darkstar.lan/‘, your meeting room with the name ‘roomname‘ would be accessible as ‘https://meet.darkstar.lan/roomname‘ which is a lot easier to guess… un-desirable if you want to hold private meetings.

Adding new apps

I encourage you to check out the Nextcloud App Store. There’s a wealth of cool, useful and fun applications to be found there.

Some of the apps that I installed are: GPXPod (visualize your GPX routes); Carnet (powerful note-taking app); Music (listen to your local collection or tune into online streams); PhoneTrack (keep track of your phone, needs the Android app to be installed too); Element (messenger app with bridges to Matrix and Libera.Chat for instance); Cookbook (maintain your own recipe database and easily import new recipes from external websites using only the URL to the recipe), etc…

Adding client push daemon

Extremely useful is Push update support for the desktop app. The 21 release of Nextcloud introduced a ‘high performance backend‘ for filetransfers. This increases the speed of filetransfers substantially, but it needs a couple of things to make it work.

  • The worker app is called “Client Push” and needs to be installed on your server from the Nextcloud App Store. Once the app is installed, the push binary still needs to be setup. The README on github contains detailed setup instructions. For the Slackware way, read on.
  • You need to have the redis package installed and the redis server needs to be started and running. We already took care of this in the section ‘Performance tuning‘.
  • Slackware, Apache and Nextcloud need to be configured for redis and the notify_push daemon.

Slackware:

The notify_push binary gets installed as ‘/opt/nextcloud/localapps/notify_push/bin/x86_64/notify_push‘. Hint: this is 64-bit only. This binary needs to run always, so the easiest way is to add a Slackware init script and call that in ‘/etc/rc.d/rc.local‘.

The init script can be downloaded from my repository, but it’s listed here in full as well. I highlighted the texts in green that are relevant. Save it as ‘/etc/rc.d/rc.ncpush‘ and make it executable:

#!/bin/bash
# Description: Push daemon for NextCloud clients.
# Needs: redis php-fpm mariadb
# Written by: Eric Hameleers <alien@slackware.com> 2021
daemon=/usr/bin/daemon
description="Push daemon for Nextcloud clients"
pidfile=${pidfile:-/var/run/nextcloud/notify_push.pid}
ncconfig=${ncconfig:-/var/www/htdocs/nextcloud/config/config.php}
command=${command:-/opt/nextcloud/localapps/notify_push/bin/x86_64/notify_push}
command_user=${command_user:-apache}
command_args="--bind 127.0.0.1 --port 7867 $ncconfig"

[ ! -x $command ] && exit 99
[ ! -f $ncconfig ] && exit 99

RETVAL=0

start() {
  if [ -e "$pidfile" ]; then
    echo "$description already started!"
  else
    echo -n "Starting $description: "
    mkdir -p $(dirname $pidfile)
    chown $command_user $(dirname $pidfile)
    chmod 0770 $(dirname $pidfile)
    $daemon -S -u $command_user -F $pidfile -- $command $command_args
    RETVAL=$?
    [ $RETVAL -eq 0 ] && touch /var/lock/subsys/$(basename $command)
    echo "- done."
  fi
}
stop(){
  echo -n "Stopping $description: "
  kill -TERM $(cat $pidfile)
  RETVAL=$?
  [ $RETVAL -eq 0 ] && rm -f /var/lock/subsys/$(basename $command)
  echo "- done."
}
restart(){
  stop
  start
}
condrestart(){
  [ -e /var/lock/subsys/$(basename $command) ] && restart
}
status() {
  pids=$(cat $pidfile 2>/dev/null)
  if test "$pids" ; then
    echo "$description is running."
    ps up $pids
  else
    echo "$description is stopped."
  fi
}
# See how we were called.
case "$1" in
start)
  start
  ;;
stop)
  stop
  ;;
status)
  status
  ;;
restart)
  restart
  ;;
condrestart)
  condrestart
  ;;
*)
  echo "Usage: $0 {start|stop|status|restart|condrestart}"
  RETVAL=1
esac
exit $RETVAL
# ---

The script is then called on boot by adding the following to your server’s ‘/etc/rc.d/rc.local‘:

if [ -x /etc/rc.d/rc.ncpush ]; then
  # Start Nextcloud Client Push Daemon
  echo "Starting Nextcloud Client Push Daemon: /etc/rc.d/rc.ncpush start"
  /etc/rc.d/rc.ncpush start
fi

Apache:

Setup the bits of Apache configuration for your webserver. The following block of configuration needs to be added:

ProxyPreserveHost On
ProxyTimeout 900
SSLProxyEngine on
RequestHeader set X-Forwarded-Proto "https"

# Setup a reverse proxy for the client push server
# https://github.com/nextcloud/notify_push/blob/main/README.md :
<Location /push/ws>
    ProxyPass ws://127.0.0.1:7867/ws
</Location>
<Location /push/>
    ProxyPass http://127.0.0.1:7867/
    ProxyPassReverse http://127.0.0.1:7867/
</Location>

# Do not forget WebSocket proxy:
RewriteEngine on
RewriteCond %{HTTP:Connection} Upgrade [NC]
RewriteCond %{HTTP:Upgrade} websocket [NC]

You know where to add the above.

Nextcloud:

Add these lines to “./config/config.php“. Relevant pieces are highlighted in green, you should of course change that into your own Internet IP address:

‘trusted_proxies’ => [‘10.10.10.10‘],
‘forwarded_for_headers’ => [‘HTTP_X_FORWARDED’, ‘HTTP_FORWARDED_FOR’, ‘HTTP_X_FORWARDED_FOR’],

Piecing it all together:

Preparations are complete after you have restarted Apache httpd and started the ‘rc.ncpush‘ script. Redis should also be running.
Now we can finally enable the app we installed in Nextcloud:

# sudo -u apache php -d memory_limit=512M /var/www/htdocs/nextcloud/occ app:enable notify_push

Setup the connection between the app and the daemon:

# sudo -u apache php -d memory_limit=512M /var/www/htdocs/nextcloud/occ notify_push:setup https://darkstar.lan/push/
> redis is configured
> push server is receiving redis messages
> push server can load mount info from database
> push server can connect to the Nextcloud server
> push server is a trusted proxy
> push server is running the same version as the app
configuration saved

Upgrading to newer release

Here is an example of the steps to take when you upgrade from one major release to the next (for instance you want to upgrade from 23 to 24).

First, download and extract the release tarball, and set the file ownership to the ‘apache‘ user:

# cd ~
# wget https://download.nextcloud.com/server/releases/nextcloud-24.0.0.tar.bz2
# tar xf nextcloud-24.0.0.tar.bz2
# chown -R apache:wheel /root/nextcloud

Disable the server-maintenance cronjob of the “apache” user before continuing, for instance by adding ‘#” in front of the cron commandline!

# crontab -u apache -e
# crontab -u apache -l
# Run maintenance for NextCloud every 5 minutes:
####*/5 * * * * /usr/bin/php -f /var/www/htdocs/nextcloud/cron.php

Stop the Apache httpd:

# /etc/rc.d/rc.httpd stop

Rename the old “/var/www/htdocs/nextcloud/” installation directory and move the new ‘nextcloud‘ directory in its place:

# mv -i /var/www/htdocs/nextcloud /root/nextcloud.orig
# mv -i /root/nextcloud /var/www/htdocs/nextcloud

Copy your Nextcloud configuration into the new directory (this should only overwrite the ‘config.sample.php‘ file):

# cp -ia /root/nextcloud.orig/config/* /var/www/htdocs/nextcloud/config/

Start the Apache httpd again:

# /etc/rc.d/rc.httpd start

Start the commandline updater. This MUST be done from within the Nextcloud installation directory:

# cd /var/www/htdocs/nextcloud/
# sudo -u apache php -d memory_limit=512M occ upgrade

Now, re-enable the cronjob for user “apache“.
Then re-create the now again missing database indices:

# sudo -u apache php /var/www/htdocs/nextcloud/occ db:add-missing-indices

Stable versus beta channels

Nextcloud offers “Stable” and “Beta” channels of its software. From time to time, new functionality becomes available in the Beta channel that you really want to use.
As the admin user, you can configure your preferred release channel in “Settings > Administration > Overview > Version > Update Channel” if you have installed Nextcloud from a release tarball like we did.

NOTE that you can only upgrade to a newer versionSkipping major versions when upgrading and downgrading to older versions is not supported by Nextcloud.
For instance, if you went via ‘Beta‘ to 24.0.0rc4 and ‘Stable‘ is still on 23.0.5, you have to wait with further upgrades until 24.0.0 or later becomes available in the ‘Stable‘ channel.

Nextcloud makes new versions incrementally available to user installations in the Stable channel which means it can take a while before your server alerts you that a new release is available.

Nextcloud clients

Nextcloud mobile and desktop clients are available from https://nextcloud.com/clients/ .

Client applications can keep your files synchronized between Nextcloud server and your desktop or phone; can manage your passwords that you store securely on the server; can manage your calendar, setup chat and video connections to other users of your server; and more.

The desktop file-sync client (nextcloud-client) is available in my own repository as a package and on SlackBuilds.org as a build script (but the SBo version is actually still the old OwnCloud mirall client). Its GUI is Qt5-based. This is a free alternative for Dropbox and the likes!

When you start the nextcloud-client desktop application for the first time, you will go through an initial setup. The client needs to get configured to connect to your Nextcloud server:

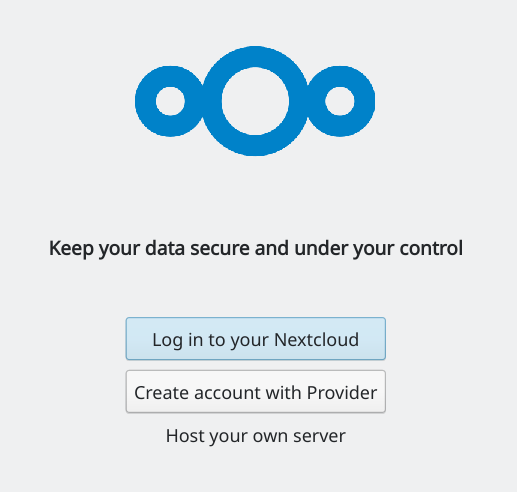
After clicking “Log in to your Nextcloud” you can enter the URL at which your server is available:

The client will open your default browser (in case of my KDE Plasma5, this was Konqueror) and ask you to switch to that browser window to logon to your Nextcloud:

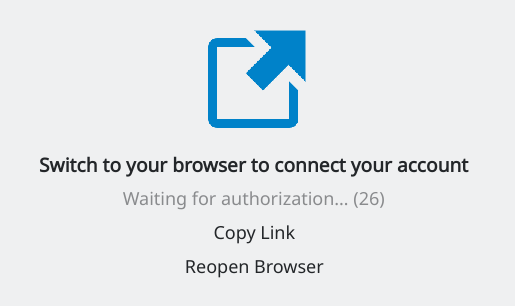
You can click “Copy Link” so that you  can use another browser if you are not happy with the default browser choice. The next steps take place inside that browser window:

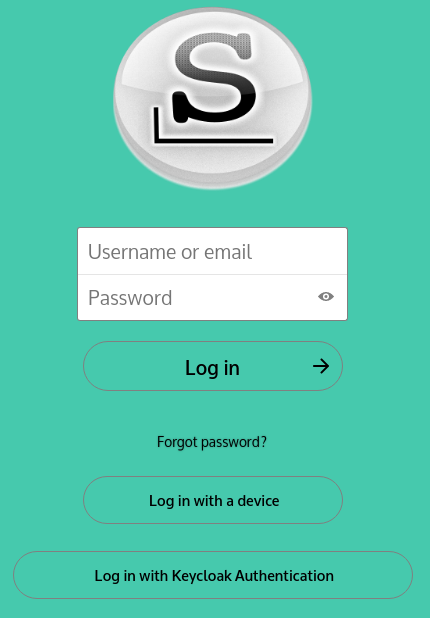
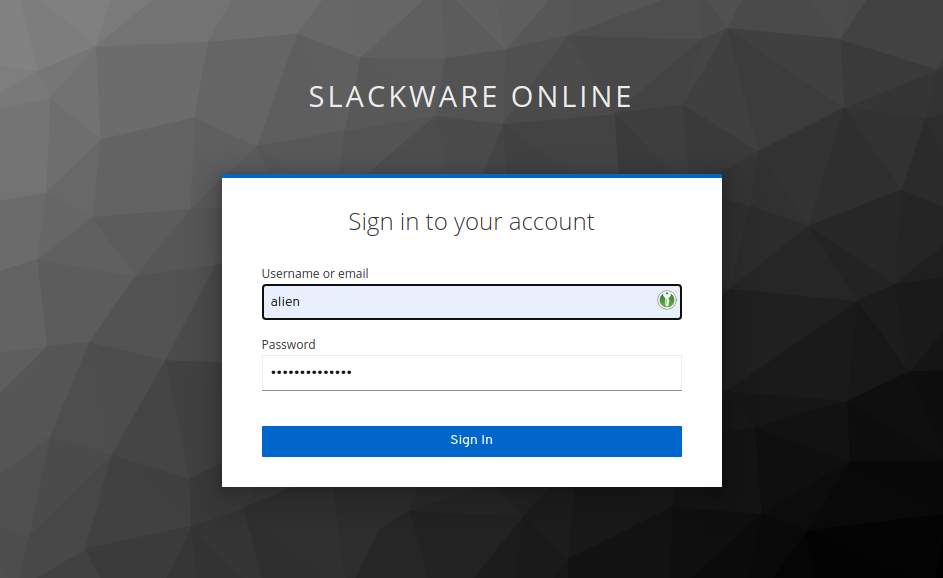
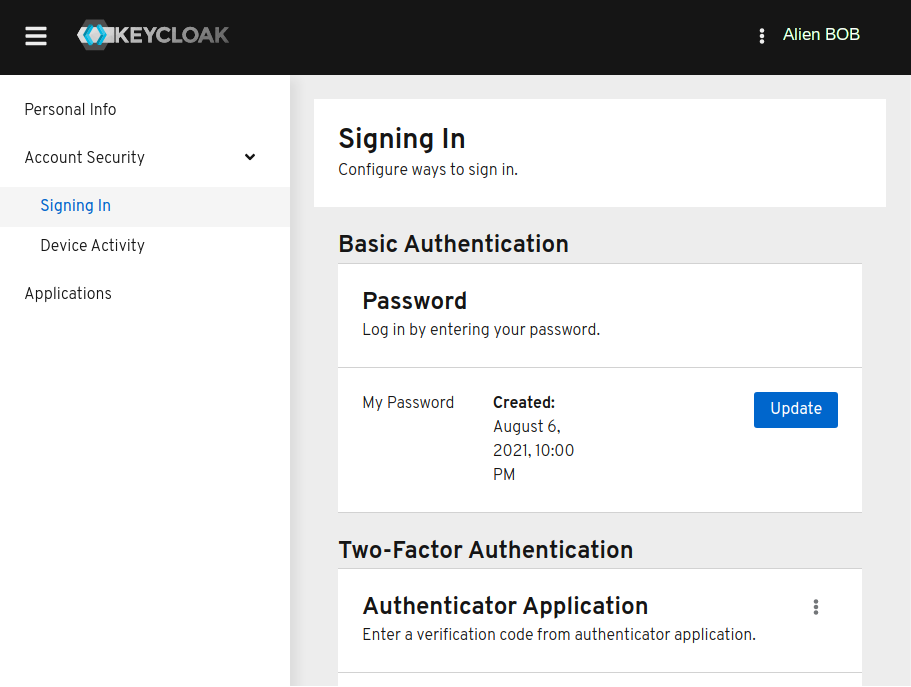
You need to login with your Nextcloud user account. In this dialog we click on “Log in with Keycloak Authentication” instead of entering an account/password into the top entry fields – remember, only the admin user has an account with local credentials:

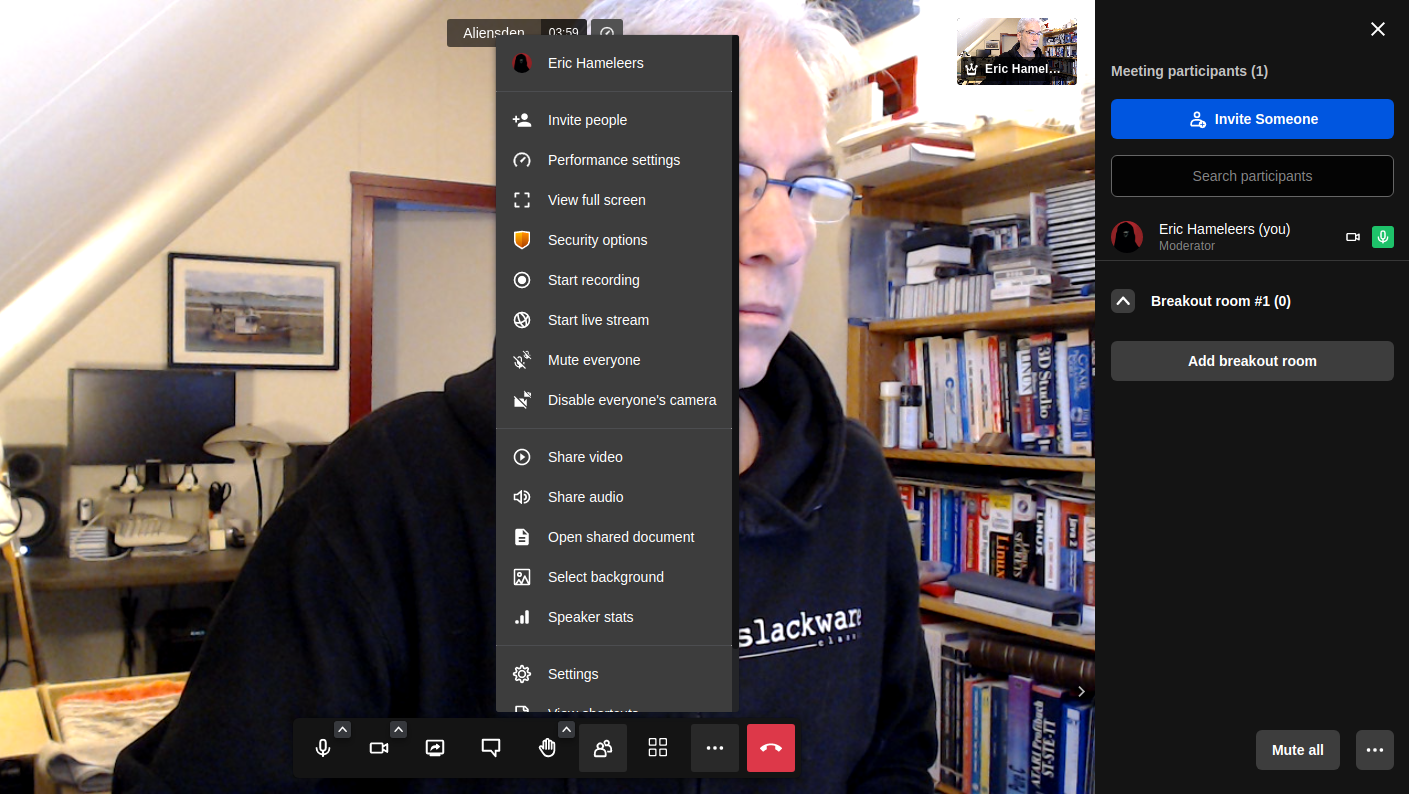
You will probably recognize the familiar Keycloak Single Sign On dialogs from the previous Episode (Video Conferencing):

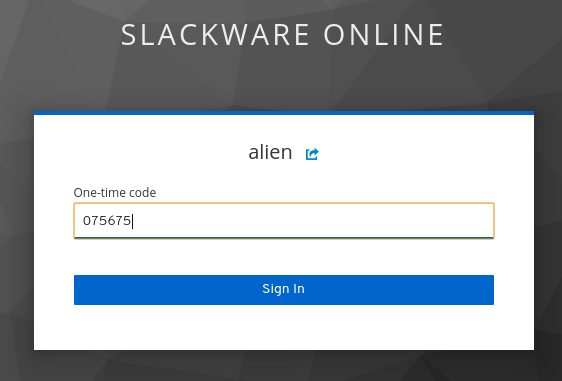
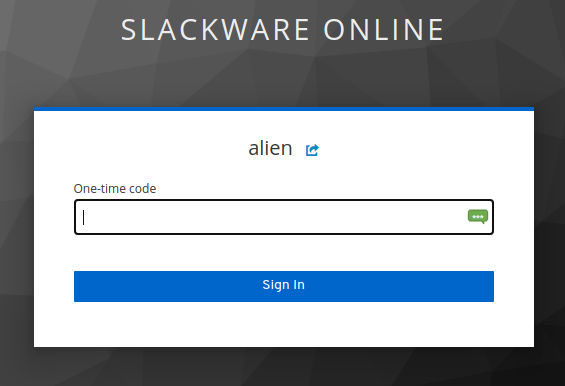
This account has 2-Factor Authentication (2FA) enabled:

After succesful login, the Nextcloud server wants to get your explicit permission to grant access for the desktop client to your server data:

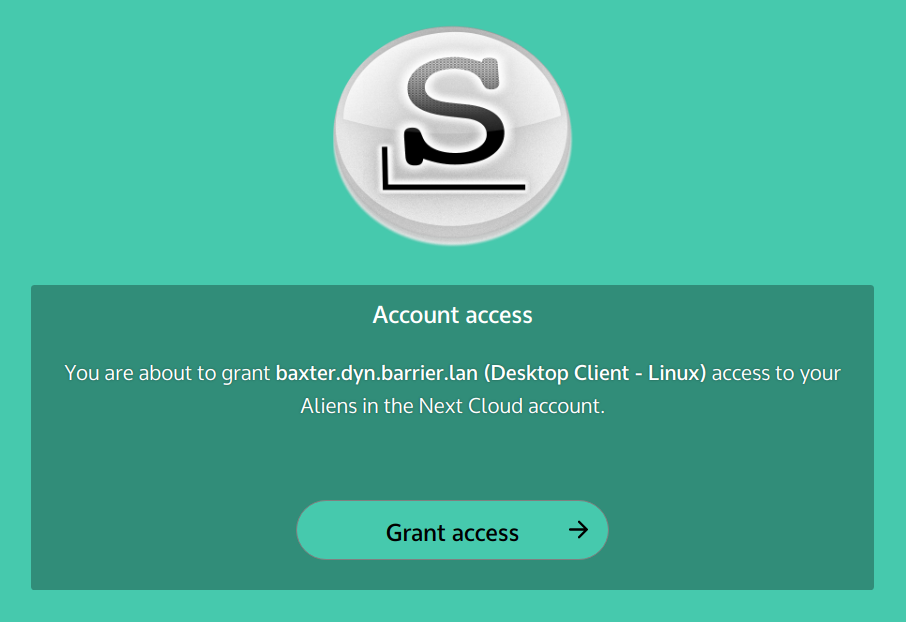
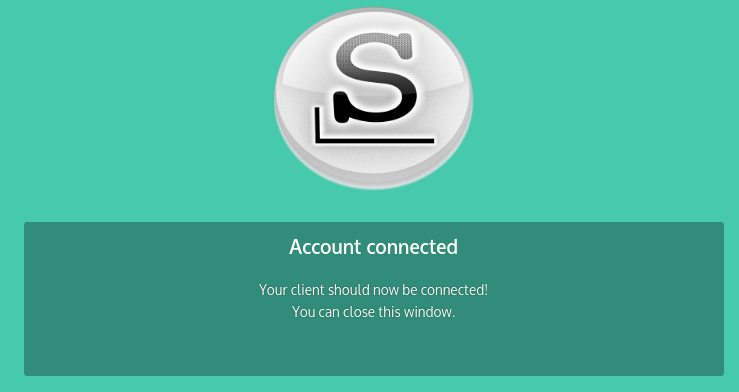
After you click “Grant access” the client will finally be able to connect to your data and start syncing:

You get a choice of the local desktop directory to synchronize with your server data – by default this is ‘~/Nextcloud/‘:

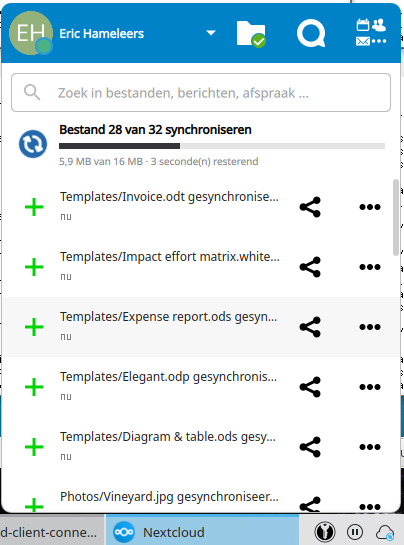
The client docks into the system tray from where you can access your files and manage the sync. The desktop client integrates nicely with KDE’s Dolphin and Konqueror, and shows the sync status of the ‘~/Nextcloud/‘ directory (and the files in it) with a badge – similar to what Dropbox does.
All files inside ‘~/Nextcloud/‘ will have a right-mouseclick context menu offering some filesharing options and the possibility to open the serverlocation of the file in your webbrowser.

Fixes

To end this Episode, I will collect the fixes that were necessary to make Nextcloud do what I wanted it to do.

Enable geolocation in the NextCloud phonetrack app by applying this patch:

# diff -u lib/public/AppFramework/Http/FeaturePolicy.php{.orig,}
--- lib/public/AppFramework/Http/FeaturePolicy.php.orig 2021-10-02 12:57:56.1506
83402 +0200
+++ lib/public/AppFramework/Http/FeaturePolicy.php      2021-10-11 15:38:01.2146
23284 +0200
@@ -49,7 +49,9 @@
        ];

        /** @var string[] of allowed domains that can use the geolocation of the
 device */
-       protected $geolocationDomains = [];
+       protected $geolocationDomains = [
+               '\'self\'',
+       ];

        /** @var string[] of allowed domains that can use the microphone */
        protected $microphoneDomains = [];

Thanks

Thanks for reading all the way to the end of this Episode. I hope you learnt from it and are eager to try this Nextcloud platform on your own private Slackware Cloud Server!
As always, leave constructive and helpful feedback in the comments section below.

Cheers, Eric

Slackware Cloud Server Series, Episode 3: Video Conferencing

Hi all!
This is already the third episode in a series of articles I am writing about using Slackware as your private/personal ‘cloud server’. Time flies when you’re having fun.
We’re still waiting for Slackware 15.0 and in the meantime, I thought I’d speed up the release of my article on Video Conferencing. My initial plan was to release one article per week after Slackware 15 had been made available. The latter still did not happen (unstuck in time again?) but then I realized, an article about Docker and another about Keykloak still won’t give you something tangible and productive to run and use. So here is Episode 3, a couple of days earlier than planned, to spend your lazy sunday on: create your own video conferencing platform.
Episodes 4 and 5 won’t be far off, since I have already written those as well.

Check out the list below which shows past, present and future episodes in the series, if the article has already been written you’ll be able to click on the subject.
The first episode also contains an introduction with some more detail about what you can expect.

  • Episode 1: Managing your Docker Infrastructure
  • Episode 2: Identity and Access management (IAM)
  • Episode 3 (this article): Video Conferencing
    Setting up Jitsi Meet – the Open Source video conferencing platform. This makes us independent of cloud conferencing services like MS Teams, Zoom or Google Meet. The Jitsi login is offloaded to our Keycloak IAM provider.

    • Jitsi Meet on Docker
    • Preamble
    • Initial Configuration
    • Adding Etherpad integration
    • Creating application directories
    • Starting Jitsi Meet
    • Considerations about the “.env” file
    • Upgrading Docker-Jitsi-Meet
    • Apache reverse proxy setup
    • Fixing Etherpad integration
    • Network troubleshooting
    • Creating internal Jitsi accounts
    • Connecting Jitsi and Keycloak
      • Adding jitsi-keycloak
      • Configuration of jitsi-keycloak in the Keycloak Admin console
      • Remaining configuration done in jitsi-keycloak
    • Configure docker-jitsi-meet for use of jitsi-keycloak
    • Firing up the bbq
    • Thanks
    • Attribution
  • Episode 4: Productivity Platform
  • Episode 5: Collaborative document editing
  • Episode 6: Etherpad with Whiteboard
  • Episode 7: Decentralized Social Media
  • Episode 8: Media streaming platform
  • Episode 9: Cloudsync for 2FA Authenticator
  • Episode X: Docker Registry

Secure Video Conferencing

Actually, my original interest in Docker was raised in the beginning of 2020 when the Corona pandemic was new, everybody was afraid and people were sent home to continue work and school activities from there.
One of the major challenges for people was to stay connected. Zoom went from a fairly obscure program to a hugely popular video conferencing platform in no time at all (until severe security flaws made a fair-sized dent in its reputation); Microsoft positioned its Teams platform as the successor of Skype but targets mostly corporate users; Google Hangouts became Google Meet and is nowadays the video conferencing platform of choice for all corporations that have not yet been caught in the Microsoft vendor lock-in.
None of these conferencing platforms are open source and all of them are fully cloud-hosted and are inseparable from privacy concerns. In addition, un-paid use of these platforms imposes some levels of limitation to the size and quality of your meetings. As a user, you do not have control at all.

Enter Jitsi, whose Jitsi Meet platform is available for everybody to use online for free and without restrictions. Not just free, but Open Source, end-to-end encrypted communication and you can host the complete infrastructure on hardware that you own and control.
People do not even have to create an account in order to participate – the organizer can share a URL with everyone who (s)he wants to join a session.

Jitsi is not as widely known as Zoom, and that is a pity. Therefore this Episode in my Slackware Cloud Server series will focus on getting Jitsi Meet up and running on your server, and we will let login be handled by the Keycloak Identity and Access Management (IAM) tool which we have learnt to setup in the previous Episode.

In early 2020, when it became clear that our Slackware coreteam member Alphageek (Erik Jan Tromp) would not stay with us for long due to a terminal illness, I went looking for a private video conferencing platform for our Slackware team and found Jitsi Meet.
I had no success in getting it to work on my Slackware server unfortunately. Jitsi Meet is a complex product made of several independent pieces of software which need to be configured ‘just right‘ to make them work together properly. I failed. I was not able to make it work in time to let alphageek use it.
But I also noticed that Jitsi Meet was offered as a Docker-based solution. That was the start of a learning process full of blood sweat & tears which culminated in this article series.

With this article I hope to give you a jump-start in getting your personal video conferencing platform up and running. I will focus on the basic required functionality but I will leave some of the more advanced scenarios for you to investigate: session recording; automatic subtitling of spoken word; integrating VOIP telephony; to name a few.

Jitsi Meet on Docker

Docker-Jitsi-Meet is a Jitsi Github project which uses Docker Compose to create a fully integrated Jitsi application stack which works out of the box. All internal container-to-container configurations are pre-configured.

As you can see from the picture below, the only network ports that need to be accessible from the outside are the HTTPS port (TCP port 443) of your webserver, UDP port 10000 for the WebRTC (video) connections and optionally (not discussed in my article) UDP port range 20000 – 20050 for allowing VOIP telephones to take part in Jitsi meetings.

These ports need to be opened in your server firewall.

Installing docker-jitsi-meet is relatively straight-forward if you go the quick-start page and follow the instructions to the letter. Integrating Jitsi with Keycloak involves using a connector which is not part of either programs; I will show you how to connect them all.

You will be running all of this in Docker containers eventually, but there’s stuff to download, edit and create first. I did not say it was trivial…

Preamble

For the sake of this instruction, I will use the hostname “https://meet.darkstar.lan” as the URL where users will connect to their conferences; The server’s public IP address will be “10.10.10.10“.
Furthermore, “https://sso.meet.darkstar.lan” will be the URL for the connector between Jitsi and Keycloak and “https://sso.darkstar.lan/auth” is the Keycloak base URL (see Episode 2 for how we did the Keycloak setup).

Setting up your domain (which will hopefully be something else than “darkstar.lan”…) with new hostnames and then setting up web servers for the hostnames in that domain is an exercise left to the reader. Before continuing, please ensure that your equivalents for the following two hosts have a web server running. They don’t have to serve any content yet but we will add some blocks of configuration to their VirtualHost definitions during the steps outlined in the remainder of this article:

  • meet.darkstar.lan
  • sso.meet.darkstar.lan

I expect that your Keycloak application is already running at your own real-life equivalent of https://sso.darkstar.lan/auth .

Using a  Let’s Encrypt SSL certificate to provide encrypted connections (HTTPS) to your webserver is documented in an earlier blog article.

Note that I am talking about webserver “hosts” but in fact, all of these are just virtual webservers running on the same machine, at the same IP address, served by the same Apache httpd program, but with different DNS entries. There is no need at all for multiple computers when setting up your Slackware Cloud server.

Initial Configuration

Download and extract the tarball of the latest stable release: https://github.com/jitsi/docker-jitsi-meet/releases/latest into the “/usr/local/” directory. Basically any directory will do but I am already backing up /usr/local so the Jitsi stuff will automatically be taken into backup with all the rest.
At the moment of writing, the latest stable version number is ‘6826‘. Which means, after extracting the tarball we do:

cd /usr/local/docker-jitsi-meet-stable-6826/

A Jitsi Meet container stack for Docker Compose is defined in the file “docker-compose.yml” which you find in this directory.
In addition to this YAML file, the ‘docker-compose‘ program parses a file named “.env” if it exists in the same directory. Its content is used to initialize the container environment. You can for instance store passwords and other secrets in “.env” but also all the configuration variables that define how your stack will function.
Docker-Jitsi-Meet ships an example environment file containing every configurable option, but mostly commented-out.

Configuration:

We start with creating a configuration file “.env” from the example file “env.example“:

$ cp -i env.example .env

And then edit the “.env” file to define our desired configuration.

First of all,

  • Change “CONFIG=~/.jitsi-meet-cfg” to “CONFIG=/usr/share/docker/data/jitsi-meet-cfg” because I do not want application data in my user’s or root’s homedirectory.

Then the ones that are easy to understand:

  • Change “HTTP_PORT=8000” to "HTTP_PORT=8440” because port 8000 is used by far too many applications. Port 8440 is what we will use again in the reverse proxy configuration.
  • Change “TZ=UTC” to “TZ=Europe/Amsterdam” or whatever timezone your server is in.
  • Change “#PUBLIC_URL=https://meet.example.com” to “PUBLIC_URL=https://meet.darkstar.lan/” i.e. change it to the URL where you want people to connect. The connections will be handled by your Apache httpd server who will manage the traffic back and forth between Jitsi container and the client.
  • Change “#DOCKER_HOST_ADDRESS=192.168.1.1” to “DOCKER_HOST_ADDRESS=10.10.10.10” where of course “10.10.10.10” needs to be replaced by your server’s actual public Internet IP address.

Other settings that I would explicitly enable but their commented-out values are the default values anyway (matter of taste, it avoids getting bitten by a future change in application default settings):

  • ENABLE_LOBBY=1“; “ENABLE_PREJOIN_PAGE=1“; “ENABLE_WELCOME_PAGE=1“; “ENABLE_BREAKOUT_ROOMS=1“; “ENABLE_NOISY_MIC_DETECTION=1“.

IPv6 Network consideration:

  • Change “#ENABLE_IPV6=1” to “ENABLE_IPV6=0” if your Docker installation has ipv6 disabled. This is a requirement if your host server would have ipv6 disabled.
    You can find out whether ipv6 is disabled in Docker, because in that case the file “/etc/docker/daemon.json” will contain this statement:

    { "ipv6": false }

Connection encryption:

  • Change “#DISABLE_HTTPS=1” to “DISABLE_HTTPS=1“. We disable HTTPS in the container because we will again use Apache http reverse proxy to handle encryption.
  • Change “#ENABLE_LETSENCRYPT=1” to “ENABLE_LETSENCRYPT=0” because we do not want the container to handle automatic certificate renewals – it’s just too much of a hassle on a server where you already run a webserver on ports 80 and 443. Our Apache reverse proxy is equipped with a Let’s Encrypt SSL certificate and I want to handle SSL certificate renewals centrally – on the host.

Authentication:

The authentication will be offloaded to Keycloak using JSON Web Tokens aka ‘JWT‘ for the inter-process communication. The following variables in “.env” need to be changed:

  • #ENABLE_AUTH=1” should become “ENABLE_AUTH=1
  • #ENABLE_GUESTS=1” should become “ENABLE_GUESTS=1
  • #AUTH_TYPE=internal” should become “AUTH_TYPE=jwt
  • TOKEN_AUTH_URL=https://auth.meet.example.com/{room}” should become “TOKEN_AUTH_URL=https://sso.meet.darkstar.lan/{room}
  • #JWT_APP_ID=my_jitsi_app_id” should become “JWT_APP_ID=jitsi
  • #JWT_APP_SECRET=my_jitsi_app_secret” should become “JWT_APP_SECRET=NmjPGpn+NjTe7oQUV9YqfaXiBULcsxYj

Actually, to avoid confusion: my proposed value of “JWT_APP_SECRET" (the string “NmjPGpn+NjTe7oQUV9YqfaXiBULcsxYj”) is a value which you will be generating yourself a few sections further down. It is a string which is used by two applications to establish mutual trust in their intercommunication.

We will re-visit the meaning and values of JWT_APP_ID and JWT_APP_SECRET in a moment.

When our modifications to the “.env” file are complete, we run a script which will fill the values for all PASSWORD variables with random strings (this can be done at any time really):

$ ./gen-passwords.sh

Note that in later versions of docker-jitsi-meet, the env.example file has become a lot smaller. Docker Jitsi has implemented all variables with default values. Beware that these defaults might not be working for your case!
The full documentation on configurable parameters is found at:
https://jitsi.github.io/handbook/docs/devops-guide/devops-guide-docker

Adding Etherpad integration

Etherpad is an online editor for real-time collaboration. The Docker version of Jitsi Meet is able to integrate Etherpad into your video conferences. I am going to show you how to run Etherpad on your Slackware Cloud server and integrate collaborative editing into your video meetings.

The git checkout of ‘docker-jitsi-meet‘ into /usr/local/docker-jitsi-meet-stable-6826/will have given you not only a docker-compose.yml file which starts Jitsi and its related containers, but also a file etherpad.yml. This is a Docker Compose file which starts an Etherpad container and connects it to the Jitsi Meet container stack.
FYI: you can use Docker Compose to process multiple YAML files in one command-line instead of implicitly processing only the ‘docker-compose.yml’ file (which happens if you do not explicitly mention the YAML filename in a “-f” parameter).
For instance if you wanted to start Jitsi and Etherpad together, you would use a command like this, using two “-f” parameters to specify the two YAML files:

# docker-compose -f docker-compose.yml -f etherpad.yml up -d

But I found out the hard way that this is risky.
Because sometime in the future you may want to bring that container stack down, for instance to upgrade Jitsi Meet to the latest version. If you forget that you had actually started two stacks (I consider the ‘etherpad.yml’ as the source for a second stack ) and you simply run “docker-compose down” in the directory… then only the Jitsi Meet stack will be brought down and Etherpad will happily keep running.
To protect myself from my future self, I have copied the content of ‘etherpad.yml‘ and added it to the bottom of ‘docker-compose.yml‘, so that I can simply run:

# docker-compose up -d

I leave it up to you to pick either scenario. Whatever works best for you.

Now on to the stuff that needs fixing because the standard configuration will not result in a working Etherpad integration.
First of all, add a “ports” configuration to expose the Etherpad port outside of the container. This is how that looks in the YAML file:

# Etherpad: real-time collaborative document editing
etherpad:
    image: etherpad/etherpad:1.8.6
    restart: ${RESTART_POLICY}
    ports:
        - '127.0.0.1:9001:9001'
    environment:
        - TITLE=${ETHERPAD_TITLE}
        - DEFAULT_PAD_TEXT=${ETHERPAD_DEFAULT_PAD_TEXT}
        - SKIN_NAME=${ETHERPAD_SKIN_NAME}
        - SKIN_VARIANTS=${ETHERPAD_SKIN_VARIANTS}
networks:
    meet.jitsi:
        aliases:
            - etherpad.meet.jitsi

You will also have to edit the “.env” file a bit more. Look for the ETHERPAD related variables and set them like so:

# Set etherpad-lite URL in docker local network (uncomment to enable)
ETHERPAD_URL_BASE=http://etherpad.meet.jitsi:9001
# Set etherpad-lite public URL, including /p/ pad path fragment (uncomment to enable)
ETHERPAD_PUBLIC_URL=https://meet.darkstar.lan/pad/p/
# Name your etherpad instance!
ETHERPAD_TITLE=Slackware EtherPad Chat
# The default text of a pad
ETHERPAD_DEFAULT_PAD_TEXT="Welcome to Slackware Web Chat!\n\n"

The most important setting is highlighted in green: “https://meet.darkstar.lan/pad/p/” . This is the external URL where we will expose our Etherpad. Since the Docker container exposes Etherpad only at the localhost address “127.0.0.1:9001” we need to setup yet another Apache reverse proxy. See the section “Apache reverse proxy setup” below.
There is one potential snag and you have to consider the implications: in the above proposed setup we expose Etherpad in the “/pad/” subdirectory of our Jitsi Meet server. But the Jitsi conference rooms also are exposed as a subdirectory, but then without the trailing slash. Which means everything will work just fine as long as nobody decides to call her conference room “pad” – that can lead to unexpected side effects. You could remedy that by choosing a more complex string than “/pad/” for Etherpad, or else setup a separate web host (for instance “etherpad.darkstar.lan“) just for Etherpad.

In any case, with all the preliminaries taken care of, you can continue with the next sections of the article.
Note: After starting the containers, you will have to do one last edit in the configuration of Jitsi Meet to actually make Etherpad available in your videomeetings. See the section “Fixing Etherpad integration” below.

I am still investigating the integration of Keycloak authentication with Etherpad. Once I am sure I have a working setup, I will do a write-up on the subject in a future article in this series. In the meantime, you need to realize that your Etherpad is publicly accessible.

Creating application directories

The various Docker containers that make up Docker-Jitsi-Meet need to write data which should persist across reboots. The “CONFIG” variable in “.env” points to the root of that directory structure and we need to create the empty directory tree manually before firing up the containers.
Using one smart command which will be expanded by Bash to a lot of ‘mkdir‘ commands:

# mkdir -p /usr/share/docker/data/jitsi-meet-cfg/{web/letsencrypt,transcripts,prosody/config,proso
dy/prosody-plugins-custom,jicofo,jvb,jigasi,jibri}

Starting Jitsi Meet

# cd /usr/local/docker-jitsi-meet-stable-*
# docker-compose up -d

With an output that will look somewhat like:

Creating network "docker-jitsi-meet-stable-4548-1_meet.jitsi" with the default driver
Creating docker-jitsi-meet-stable-4548-1_prosody_1 ... done
Creating docker-jitsi-meet-stable-4548-1_web_1 ... done
Creating docker-jitsi-meet-stable-4548-1_jicofo_1 ...
Creating docker-jitsi-meet-stable-4548-1_jvb_1 ...
...
Pulling web (jitsi/web:stable-4548-1)...
stable-4548-1: Pulling from jitsi/web
b248fa9f6d2a: Pull complete
173b15edefe3: Pull complete
3242417dae3a: Pull complete
331e7c5436be: Pull complete
6418fea5411e: Pull complete
0123aaecd2d8: Pull complete
bd0655288f32: Pull complete
f2905e1ad808: Pull complete
8bcc7f5a0af7: Pull complete
20878400e460: Extracting [====================================> ]
84.67MB/114.9MBB
..... etcetera

And that’s it. Our Jitsi Meet video conferencing platform is up and running.
But it is not yet accessible: we still need to connect the container stack to the outside world. This is achieved by adding an Apache httpd reverse proxy between our Docker stack and the users. See below!


Considerations about the “.env” file

Note that the “.env” file is only used the very first time ‘docker-compose‘ starts up your docker-jitsi-meet container stack, in order to  populate /usr/share/docker/data/jitsi-meet-cfg/ and its subdirectories.

After that initial start of the docker-jitsi-meet container stack you can tweak your setup by editing files in the /usr/share/docker/data/jitsi-meet-cfg/ directory tree, since these directories are mounted inside the various containers that make up Docker-Jitsi-Meet.
But if you ever edit that “.env” file again… you need to remove and re-create the directories below /usr/share/docker/data/jitsi-meet-cfg/ and restart the container stack.

NOTE: ‘docker-compose stop‘ stops all containers in the stack which was originally created by the ‘docker-compose up -d‘ command. Using ‘down‘ instead of ‘stop‘ will additionally remove containers and networks as defined in the Compose file(s). After using ‘down‘ you would have to use ‘up -d‘ instead of ‘start‘ to bring the stack back online.

This is how you deal with “.env” configuration changes:

# cd /usr/local/docker-jitsi-meet-stable-*
# docker-compose stop
# vi .env
# ... make your changes
# rm -rf /usr/share/docker/data/jitsi-meet-cfg/
# mkdir -p /usr/share/docker/data/jitsi-meet-cfg/{web/letsencrypt,transcripts,prosody/config,prosody/prosody-plugins-custom,jicofo,jvb,jigasi,jibri}
# docker-compose start

Upgrading Docker-Jitsi-Meet

You don’t need to follow the above process if you want to upgrade Docker-Jitsi-Meet to the latest stable release as part of life cycle management, but with an un-changed.env” file. In such a case, you simply execute:

# cd /usr/local/docker-jitsi-meet-stable-*
# docker-compose down
# docker-compose pull
# docker-compose up -d

Apache reverse proxy setup

We need to connect the users of our Jitsi and Etherpad services to the containers. Since these containers are exposed by Docker only at the loopback address (127.0.0.1 aka localhost) we use the Apache httpd’s ‘reverse proxy‘ feature.

These three blocks of text need to be added to the VirtualHost definition for your “meet.darkstar.lan” webserver so that it can act as a reverse proxy and connects your users to the Docker Jitsi Meet and Etherpad containers:

Generic block:

SSLProxyEngine on
RequestHeader set X-Forwarded-Proto "https"
ProxyTimeout 900
ProxyVia On
ProxyRequests Off
ProxyPreserveHost On
Options FollowSymLinks MultiViews
AllowOverride All
Order allow,deny
allow from all

Specific to Jitsi Meet:

<Location />
    ProxyPass http://127.0.0.1:8440/
    ProxyPassReverse http://127.0.0.1:8440/
</Location>
# Do not forget WebSocket proxy:
RewriteEngine on
RewriteCond %{HTTP:Connection} Upgrade [NC]
RewriteCond %{HTTP:Upgrade} websocket [NC]
RewriteRule ^/?(.*) "ws://127.0.0.1:8440/$1" [P,L]

And specific to Etherpad:

<Location /pad/>
    ProxyPass http://127.0.0.1:9001/ retry=0 timeout=30
    ProxyPassReverse http://127.0.0.1:9001/
    AddOutputFilterByType SUBSTITUTE text/html
    Substitute "s|meet.darkstar.lan/|meet.darkstar.lan/pad/|i" 
</Location>
<Location pad/socket.io>
    # This is needed to handle websocket transport through the proxy, since
    # etherpad does not use a specific sub-folder, such as /ws/
    # to handle this kind of traffic.
    RewriteEngine On
    RewriteCond %{QUERY_STRING} transport=websocket [NC]
    RewriteRule /(.*) ws://127.0.0.1:9001/socket.io/$1 [P,L]
    ProxyPass http://127.0.0.1:9001/socket.io retry=0 timeout=30
    ProxyPassReverse http://127.0.0.1:9001/socket.io
    AddOutputFilterByType SUBSTITUTE text/html
    Substitute "s|meet.darkstar.lan/|meet.darkstar.lan/pad/|i" 
</Location>

In “127.0.0.1:8440” you will recognize the TCP port 8440 which we configured for the Jitsi container in the “.env" file earlier. The “127.0.0.1:9001” corresponds to the port 9001 which we exposed explicitly in the ‘docker-compose.yml‘ file for the Etherpad service.

After adding this reverse proxy configuration and restarting Apache httpd. your video conference server will be publicly accessible at https://meet.darkstar.nl/ .

Fixing Etherpad integration

I told you earlier that you needed to make a final edit after the Jitsi Meet stack is up & running to fix the Etherpad integration.
Open the stack’s global config file “/opt/jitsi-meet-cfg/web/config.js” in your editor and look for this section of text:

// If set, add a "Open shared document" link to the bottom right menu that
// will open an etherpad document.
// etherpad_base: 'https://meet.darkstar.lan/pad/p/',

You need to un-comment the last line so that this section looks like:

// If set, add a "Open shared document" link to the bottom right menu that
// will open an etherpad document.
etherpad_base: 'https://meet.darkstar.lan/pad/p/',

It’s a long-standing bug apparently.

Note that in newer releases of docker-jitsi-meet, this manual edit in web/config.js is no longer needed for proper Etherpad integration, It’s automatically added there now as:
config.etherpad_base = 'https://meet.darkstar.lan/pad/p/';
The ‘ports’ section still needs to be added to the etherpad definition in our docker-compose.yml file.

Now, when you join a Jitsi Meeting, the menu which opens when you click the three-dots “more actions” menu in the bar at the bottom of your screen, will contain an item “Open shared document“:

If you select this, your video will be replaced by an Etherpad “pad” with the name of your Jitsi meeting room.

Externally i.e. outside of the Jitsi videomeeting, your Etherpad ‘pad‘ will be available as “https://meet.darkstar.lan/pad/p/jitsiroom” where “jitsiroom” is the name you gave your Jitsi videomeeting aka ‘room‘. This means that people outside of your videomeeting can still collaborate with you in real-time.

Network troubleshooting

Docker’s own dynamic management of iptables chains and rulesets will be thwarted if you decide to restart your host firewall. The custom Docker chains disappear and the docker daemon gets confused. If you get these errors in logfiles when starting the Docker-Jitsi-Meet containers, simply restart the docker daemon itself (/etc/rc.d/rc.docker restart):

> driver failed programming external connectivity on endpoint docker-jitsi-meet
> iptables failed
> iptables: No chain/target/match by that name

Creating internal Jitsi accounts

Just for reference, in case you want to play with Jitsi before integrating it with Keycloak.
Internal Jitsi users must be created with the “prosodyctl” utility in the prosody container.

In order to run that command, you need to first start a shell in the corresponding container – and you need to do this from within the extracted tarball directory “/usr/local/docker-jitsi-meet-stable-*“:

# cd /usr/local/docker-jitsi-meet-stable-*
# docker-compose exec prosody /bin/bash

Once you are at the prompt of that shell in the container, run the following command to create a user:

> prosodyctl --config /config/prosody.cfg.lua register TheDesiredUsername meet.jitsi TheDesiredPassword

Note that the command produces no output. Example for a new user ‘alien‘:

> prosodyctl --config /config/prosody.cfg.lua register alien meet.jitsi WelcomeBOB!

Now user “alien” will be able to login to Jitsi Meet and start a video conference.

Connecting Jitsi and Keycloak

The goal is of course to move to a Single Sign On solution instead of using local accounts. Jitsi supports JWT Tokens which it should get from a OAuth/OpenID provider. We have Keycloak lined up for that, since it supports OAuth, OpenID, SAML and more.

Adding jitsi-keycloak

Using Keycloak as OAuth provider for Jitsi Meet is not directly possible, since unfortunately Keycloak’s JWT token is not 100% compatible with Jitsi. So a ‘middleware‘ is needed, and jitsi-keycloak fills that gap.

We will download the middleware from their git repository and setup a local directory below “/usr/share/docker/data” where we have been storing configurations for all our applications so far. All we are going to use from that repository checkout is the Docker Compose file you can find in there. The actual ‘jitsi-keycloak‘ middleware will eventually be running as yet another Docker container.

# cd /usr/local/
# git clone https://github.com/d3473r/jitsi-keycloak jitsi-keycloak
# mkdir -p /usr/share/docker/data/jitsi-keycloak/config
# cp ./jitsi-keycloak/example/docker-compose.yml /usr/share/docker/data/jitsi-keycloak/

Edit our working copy ‘/usr/share/docker/data/jitsi-keycloak/docker-compose.yml‘ to provide the correct environment variables for our instances of our already running Jitsi and Keycloak containers:

# --- start ---
version: '3'

services:
    jitsi-keycloak:
    image: d3473r/jitsi-keycloak
    container_name: jisi-keycloak
    hostname: jisi-keycloak
    restart: always
environment:
    JITSI_SECRET: NmjPGpn+NjTe7oQUV9YqfaXiBULcsxYj
    DEFAULT_ROOM: welcome
    JITSI_URL: https://meet.darkstar.lan/
    JITSI_SUB: meet.darkstar.lan
volumes:
    - /usr/share/docker/data/jitsi-keycloak/config:/config
ports:
    - "3000:3000"
networks:
    keycloak0.lan:
    ipv4_address: 172.20.0.6
aliases:
    - jitsi-keycloak.keycloak0.lan

networks:
    keycloak0.lan
    external: true
# --- end ---

The string value for the JITSI_SECRET variable needs to be the same string we used in the definition of the Jitsi container earlier, where the variable is called JWT_APP_SECRET.

Hint: in Bash you can create a random 32 character string like this:

$ cat /dev/urandom | tr -dc 'a-zA-Z0-9' | fold -w 32 | head -n 1
BySOoKBDIC1NWfeYpktvexJIqOAcAMEt

If you have nodejs installed, generate a random ‘secret’ string using this ‘node’ command:

$ node -e "console.log(require('crypto').randomBytes(24).toString('base64'));"
NmjPGpn+NjTe7oQUV9YqfaXiBULcsxYj

Configuration of jitsi-keycloak in the Keycloak Admin console

Point your browser to the Keycloak Admin console https://sso.darkstar.lan/auth/admin/ to start the configuration process.

Add a public openid-connect client in the ‘foundation‘ Keycloak realm (the realm where you created your users in the previous Episode of this article series):

  • Select ‘foundation‘ realm; click on ‘Clients‘ and then click ‘Create‘ button.
    • Client ID‘ = “jitsi
    • Client Protocol‘ = “openid-connect” (the default)
    • Save.
  • Also in ‘Settings‘, allow this app from Keycloak.
    Our Jitsi-keycloak container is running on https://sso.meet.darkstar.lan . Therefore we add

    • Valid Redirect URIs‘ = https://sso.meet.darkstar.lan/*
    • Web Origins‘ = https://sso.meet.darkstar.lan
    • Save.
  • Download the ‘keycloak.json‘ file for this new client. Its contents look like this:
    # ---
    {
        "realm": "foundation",
        "auth-server-url": "https://sso.darkstar.lan/auth",
        "ssl-required": "external",
        "resource": "jitsi",
        "public-client": true,
        "confidential-port": 0
    }
    # ---

    To obtain this file;
    On Keycloak < 20.x,

    • Go to ‘Installation‘ tab
    • Format Option‘ = “Keycloak OIDC JSON”
    • Click ‘Download‘ which downloads a file “keycloak.json” with the below content:

On Keycloak >= 20.x,

    • Go to ‘Clients‘ tab
    • Select the ‘jitsi‘ client
    • Click the ‘Action‘ dropdown in the top right of the page
    • Select ‘Download adapter config‘ and keep the default format option ‘Keycloak OIDC JSON
    • Click ‘Download‘ or else copy/paste the JSON code which is displayed on-screen.

Remaining configuration done in jitsi-keycloak

Back at your server’s shell prompt again, do as follows:

Copy the downloaded “keycloak.json” file into the ‘/config‘ directory of jitsi-keycloak (the container’s /config is exposed in the host filesystem as /usr/share/docker/data/jitsi-keycloak/config).

# cp ~/Download/keycloak.json /usr/share/docker/data/jitsi-keycloak/config/

Start the jitsi-keycloak container in the directory where we have our tailored ‘docker-compose.yml‘ file:

# cd /usr/share/docker/data/jitsi-keycloak
# docker-compose up -d

Once the container is running, we make jitsi-keycloak available at https://sso.meet.darkstar.lan/ using a reverse-proxy setup (jitsi-keycloak will not work in a sub-folder).
Add these reverse proxy lines to your VirtualHost definition of the “sso.meet.darkstar.lan” web site configuration and restart httpd:

# ---
# Reverse proxy to jitsi-keycloak Docker container:
SSLProxyEngine On
SSLProxyCheckPeerCN on
SSLProxyCheckPeerExpire on
RequestHeader set X-Forwarded-Proto: "https"
RequestHeader set X-Forwarded-Port: "443"

<Location />
    AllowOverride None
    Require all granted
    Order allow,deny
    Allow from all
</Location>

ProxyPreserveHost On
ProxyRequests Off
ProxyVia on
ProxyAddHeaders On
AllowEncodedSlashes NoDecode

# Jitsi-keycloak:
ProxyPass / http://127.0.0.1:3000/
ProxyPassReverse / http://127.0.0.1:3000/
# ---

Configure docker-jitsi-meet for use of jitsi-keycloak

Actually, you have already done all the correct changes which are needed in the ‘.env‘ file for Docker Compose!
The  docker-jitsi-meet configurations that are relevant for jitsi-keycloak are as follows:

ENABLE_AUTH=1
AUTH_TYPE=jwt
JWT_APP_ID=jitsi
JWT_APP_SECRET=NmjPGpn+NjTe7oQUV9YqfaXiBULcsxYj
# To enable an automatic redirect from Jitsi to the Keycloak login page:
TOKEN_AUTH_URL=https://sso.meet.darkstar.lan/{room}

The values for ‘JWT_APP_SECRET‘ and ‘JITSI_SECRET‘ must be identical, and the value of ‘JWT_APP_ID‘ must be equal to “jitsi“.

Firing up the bbq

With all the prep work completed and the containers are running, we can enjoy the new online video conferencing platform we now operate for friends and family.

So, how does this actually look in practice? I’ll share a couple of screenshots from a Jitsi Meet session that I setup. Look at how cool it looks (and not just because of the screenshot of my den and the Slackware hoodie I am wearing…)

The Jitsi Meet welcome screen:

Device settings:

Joining a meeting:

Logging in via Keycloak SSO, you’ll notice that I have configured 2-Factor Authentication for my account:

After having logged in, I am back at the “join meeting screen” but now with my name written as Keycloak knows it (“Eric Hameleers” instead of “Alien BOB“) and I need to click one more time on the “Join” button.
Then I am participating in the meeting as the moderator.
You’ve probably noticed that I flipped my camera view here. I also added one ‘break-out room‘ to allow for separate discussions to take place outside of the main room:


And if you are not the moderator but a guest who received the link to this meeting, this is what you’ll see at first:


Cool, eh?

Thanks

… again for taking the time to read through another lengthy article. Share your feedback in the comments section below, if you actually implemented Jitsi Meet on your own server.


Attribution

The Docker-Jitsi-Meet architecture image was taken from Jitsi’s github site.

Slackware Cloud Server Series, Episode 2: Identity and Access Management (IAM)

Hi all!
This is the second episode in a series of articles I am writing about using Slackware as your private/personal ‘cloud server’ while we are waiting for the release of Slackware 15.0.
Below is a list of past, present and future episodes in the series. If the article has already been written you’ll be able to access it by clicking on its subject.
The first episode also contains an introduction with some more detail about what you can expect from these articles.

Identity and Access Management (IAM)

When you run a server that offers all kinds of web-based services, and you want all these services to be protected with an authentication and authorization layer (i.e. people have to login first and then you decide what kind of stuff they can access) it makes sense to let people have only one identity (one set of credentials) that can be used everywhere. Not exactly ‘Single Sign On‘ because you may have to logon to the various parts separately but you would be using that single identity everywhere.

Slackware comes with Kerberos and OpenLDAP servers which can be used  together with for instance Samba to create a Single Sign On environment on a local network. But since I am looking for something more infrastructure agnostic which works all across the Internet, I ended up with something I vaguely knew since it’s used in places in our own company to provide credential management: Keycloak.

Keycloak offers web-based Open Source Identity and Access Management (IAM). Using Keycloak, I will show you how to add authentication and authorization to the applications that I will be adding to my “Slackware Cloud Server”.
Keycloak can be used to manage your users, but if you already manage your users in an OpenLDAP server or in Active Directory, Keycloak can use these as its back-end instead of its own local SQL database.

The users of our Slackware server will authenticate with Keycloak rather than with the individual applications. Ideally, once your users have logged into Keycloak they won’t have to login again to access a different application. Likewise, Keycloak provides single-sign out, which means after a user logs out of Keycloak, that will apply to all the applications that use Keycloak.

Keycloak can also act as an Identity Broker for “social login” so that you are able to use social networks like Facebook, Google etc as Identity Providers. Our Slackware server applications that ask Keycloak to handle the user login and authorizations don’t know and don’t care about exactly how the authentication took place, as long as it’s a process the administrator trusts.


For the purposes of this article however, I will limit the use of Keycloak to  authentication through OpenID Connect (OIDC) or SAML 2.0 Identity Providers. The applications I will discuss in the upcoming articles (NextCloud, Jitsi Meet, Quay, Docker Registry) all support the OIDC protocol for off-loading authentication / authorization so we’ve got that covered.

Keycloak does not only manage the identities that allow your users to login; Keycloak can also manage authorizations.
You may want to allow specific users a different level of access to your applications, or prevent access to some of them entirely. You can assign roles to users or add them to groups and then configure the access to your applications using the available roles or group memberships.

Preamble

For the sake of this instruction and for future articles in this series, “https://sso.darkstar.lan/auth” is the base URL that eventually the Keycloak application will be available at at.

Configuring the DNS for your own domain (will probably be something else than “darkstar.lan”…) with new hostnames and then setting up web servers for the hosts in that domain is an exercise left to the reader.
Before continuing, please ensure that your real-life equivalent for the following host has a web server running:

  • sso.darkstar.lan

It doesn’t yet  have to serve any content yet but its URL needs to be accessible to all applications and users that you want to give access to your Slackware Cloud Server. We will add some blocks of configuration to the VirtualHost definition during the steps outlined in the remainder of this article.

Using a  Let’s Encrypt SSL certificate to provide encrypted connections (HTTPS) to your webserver is documented in an earlier blog article.

Setting up Keycloak

NOTE!

Starting with Keycloak 20 (released in November 2022), the WildFly based distribution is no longer supported. For the newer Quarkus distribution of Keycloak, check out the new documentation .
This article targets a pre-20 release Docker container. I will have to update the text to make it reflect the new Docker options.

Working with a Docker based server infrastructure is something I covered in the previous article of this series. I assume you have Docker up and running and are at least somewhat comfortable creating containers and managing their life-cycle.

Keycloak can be installed on a bare metal server but I have opted to go for their Docker-based install instead. The configuration will be stored in a MariaDB backend and an Apache reverse proxy will be the frontend which will handle the incoming connection requests and also enforces data encryption using a Let’s Encrypt SSL certificate.
The Keycloak github contains an example of a docker-compose solution with MariaDB and Keycloak in two separate containers (see https://github.com/keycloak/keycloak-containers/tree/master/docker-compose-examples) however the documentation states that this does not work currently because MariaDB does not start fast enough for Keycloak.
Also I think that having your database inside the container, or even mounting the host’s “/var/lib/mysql” directory into the container, will make backups difficult. So, our Keycloak application will connect to Slackware’s own included MariaDB database via the host’s IP address. There’s a paragraph further down where I share my considerations about this setup.

Here’s what we are going to do now: create the MariaDB database, create a private network for the Keycloak container so that it at least has some isolation from other containers, ensure that we have some kind of DNS service for the custom network (this example uses dnsmasq for that) and finally: start the Keycloak service as a single container, no Compose needed.

The MariaDB database

MariaDB in Slackware 15.0 is at version 10.5.13. Considering future upgrades: any security update in a stable Slackware release should not introduce breaking changes, but it’s always good to have read the MariaDB pages on database upgrades to avoid surprises. And always make backups that you have tested (are the backups useable).

Login to MariaDB as the administrator (commonly the user ‘root’):

$ mysql -uroot -p

Create the database:

> CREATE DATABASE IF NOT EXISTS keycloakdb CHARACTER SET utf8 COLLATE utf8_unicode_ci;

Create a database user for Keycloak:

> CREATE USER 'keycloakadm'@localhost IDENTIFIED BY 'your_secret_passwd';

Grant all privileges:

> GRANT ALL PRIVILEGES ON keycloakdb.* TO 'keycloakadm'@localhost;

Reload the grant tables (flush privileges) and quit the management interface:

> FLUSH PRIVILEGES;
> quit;

Network defaults in Docker

Docker claims a network range when it starts, in order to connect its containers to each other and to the real world. By default, the range is 172.17.0.0/255.255.0.0 and there is no reason to change that unless it collides with pre-existing network segments in your LAN. In that case, you would want to edit “/etc/docker/daemon.json” and add something like this to define a custom Bridge IP address and container IP range:

{
  "bip": "172.100.0.1/16",
  "fixed-cidr": "172.100.0.0/24",
}

If you would want your containers to be in yet another IP range, you could add something like:

{
  "default-address-pools": [
    {
      "base": "192.168.56.0/21",
      "size": 28
    }
  ]
}

Docker needs a restart to pick up the changes. Newly created networks will then be dynamically assigned a /28 subnet of the larger IP range “192.168.56.0/21” unless you manually specify other ranges (see below).

Private network for Keycloak

We create a Docker network “keycloak0.lan” just for Keycloak, and make it use a different IP range than Docker’s default. Otherwise it would share its network with the rest of the containers and we want to create some level of real containment, as well as the ability to assign the Keycloak container a fixed IP address.
We need a fixed IP address in order to assign a hostname on the host so that Sendmail allows emails to be sent from within the container. Otherwise we would get ‘Relaying denied: ip name lookup failed” error from Sendmail.
Summarizing: the “keycloak0.lan” network will have a range of 172.19.0.0/16; and the fixed IP address for the Keycloak service will be 172.19.0.2 (since 172.19.0.1 will be the IP address of the Docker bridge).

$ docker network create --driver=bridge --subnet=172.19.0.0/16 --ip-range=172.19.0.0/25 --gateway=172.19.0.1 keycloak0.lan

Add host and network to /etc/hosts and /etc/networks:

$ grep keycloak /etc/hosts
172.19.0.2 keycloak keycloak.keycloak0.lan
$ grep keycloak /etc/networks
keycloak0.lan 172.19

My assumption is that your host does not act as the LAN’s DNS server. We will use dnsmasq to serve our new entries from /etc/hosts and /etc/networksdnsmasq will be our local nameserver. For this we use the default, unchanged “/etc/dnsmasq.conf” configuration file.

You will also have to add this single line at the top of “/etc/resolv.conf” first, so that all DNS queries will go to our local dnsmasq:

nameserver 127.0.0.1

If you have not yet done so, (as root) make “/etc/rc.d/rc.dnsmasq” executable and start dnsmasq manually (Slackware will take care of starting it on every subsequent reboot):

# chmod +x /etc/rc.d/rc.dnsmasq
# /etc/rc.d/rc.dnsmasq start

Make Sendmail aware that the Keycloak container is a known local host by adding a line to “/etc/mail/local-host-names” and restarting the sendmail daemon:

$ grep keycloak /etc/mail/local-host-names
keycloak.keycloak0.lan

If you use Postfix instead of Sendmail, perhaps this is not even an issue, but since I do not use Postfix I cannot tell you. Leave your comments below if I should update this part of the article.

MariaDB access from the network

Since our Keycloak container will connect to the MariaDB server over the network, we need to grant the Keycloak database account access to the database when it logs in from the network instead of via the localhost.
Login to ‘mysql’ as the admin (root) user and execute these commands that come on top of the ones that we already executed earlier:

> CREATE USER 'keycloakadm'@'%' IDENTIFIED BY 'your_secret_passwd';
> GRANT ALL PRIVILEGES ON keycloakdb.* TO 'keycloakadm'@'%';
> FLUSH PRIVILEGES;
> quit;

Keycloak container

We use a Docker container to run this IAM service. Remember that containers do not persist their data. In our case it means that the complete configuration which is needed by the Keycloak application inside that container in order to start up properly, has to be passed as command-line parameters to the ‘docker run‘ command.

This is how we start the Keycloak container, connecting it to the newly created network, assigning a static IP, using the ‘keycloak.lan‘ network gateway as the IP address for the MariaDB and passing it the required database properties.
By default, Keycloak listens at port “8080” but that is a portnumber which is (ab)used by many applications including proxy servers. Instead of accepting the default “8080” value we do a port-mapping and make Keycloak available at port “8400” instead by using the “-p” argument to ‘docker run‘.
We also pass the front-end URL which is going to be used by every application that wants to interact with the service (https://sso.darkstar.lan/auth). This URL is actually served by a Apache httpd reverse-proxy which we will put between the exposed port of the Keycloak container and the rest of the world:

$ mkdir -p /usr/share/docker/data/keycloak
$ cd /usr/share/docker/data/keycloak
$ echo 'keycloakadm' > keycloak.dbuser
$ echo 'your_secret_passwd' > keycloak.dbpassword
$ docker run -d --restart always -p 8400:8080 --name keycloak \
    --net keycloak0.lan \
    --network-alias keycloak.keycloak0.lan \
    --ip 172.19.0.2 \
    -e DB_VENDOR=mariadb \
    -e DB_ADDR=172.19.0.1 \
    -e DB_DATABASE=keycloakdb \
    -e DB_USER_FILE=$(pwd)/keycloak.dbuser \
    -e DB_PASSWORD_FILE=$(pwd)/keycloak.dbpassword \
    -e KEYCLOAK_FRONTEND_URL=https://sso.darkstar.lan/auth \
    -e PROXY_ADDRESS_FORWARDING=true \
    jboss/keycloak \
    -Dkeycloak.profile.feature.docker=enabled

That last argument ‘-Dkeycloak.profile.feature.docker=enabled‘ enables the “docker-v2” protocol in Keycloak for creating a Client in the realm. A Keycloak ‘Client ID‘ is what we need to connect an application to Keycloak as the login provider. This is a topic we will visit in future Episodes.
This ‘docker-v2‘ protocol is not fully compatible with the default OIDC protocol ‘openid-connect‘ and while not enabled in Keycloak by default, it is an officially supported Client Protocol.
We need ‘docker-v2‘ when we want the Docker Registry to be able to use Keycloak for authentication / authorization (the topic of Episode 6 in our Series).

A note about the Keycloak service URL (https://sso.darkstar.lan/auth). In this example I use a hostname “sso.darkstar.lan” but you will have to pick a name which fits your own network. This hostname will be used a lot and visible everywhere, so if you are paranoid and want to avoid people realizing that your “sso.” host is the key to all user-credentials, you might want to chose a more inconspicuous name like “pasture.darkstar.lan“. YMMV.
Also, the path component “/auth” in the URL is fixed and immutable, unless you want to hurt yourself. I tried to change that path component to something that made more sense to me but that “/auth” is so ubiquitous as hard-coded strings throughout the code that I quickly gave up.

Remember that our Keycloak container listens at the non-default TCP port 8400 on the docker0 interface, which we will use for the reverse proxy setup later on.

MariaDB considerations during Keycloak setup

At first, I tried with mounting the host’s MariaDB server socket in the Keycloak container and accessing the database through it via the ‘localhost’ target like below:

-e DB_ADDR=localhost -v /var/run/mysql/mysql.sock:/var/run/mysql/mysql.sock

…but JBoss would not be able to connect for whatever reason, and the resulting error was ‘connection refused‘.
I have tried various locations for the UNIX socket inside the container:

/var/run/mysql/mysql.sock
/var/run/mysqld/mysql.sock
/var/run/mysqld/mysqld.sock
/tmp/mysql.sock

… but none of those worked either.
Eventually I had to make MariaDB listen on all interfaces and rely on my firewall to block external access, for instance using:

# iptables -A INPUT -s 172.19.0.2 -p tcp --destination-port 3306 -j ACCEPT

This is the relevant MariaDB configuration line:

$ grep bind-address /etc/my.cnf.d/server.cnf
bind-address=0.0.0.0

If you have a better solution let me know! Of course, the easy way out of this dilemma is to deploy Keycloak using Docker Compose and give it its own internal database, but we need to be 100% sure that the SQL database server is up & running before we start the Keycloak container as part of the Docker infrastructure in “/etc/rc.d/rc.local“.
Also, my goal was to have a single SQL server on my host that would be the backend database for every application that needs one. A lot easier to backup and restore.

The admin user

Create the admin user once the container is running or else you won’t be able to connect at all (use ‘docker ps’ to find the containerID), and restart the container after that, but WAIT AFTER THAT RESTART LONG ENOUGH FOR THE INITIAL CONFIGURATION TO FINISH… or you’ll end up with Keycloak trying to initialize MariaDB twice, resulting in errors and failure.

This is how you run the command to create the admin user on the host, to be executed inside the running container:

$ containerID=$(docker ps -qaf "name=^keycloak$")
$ docker exec <containerID> /opt/jboss/keycloak/bin/add-user-keycloak.sh -u admin -p your_secret_admin_pwd
$ docker restart <containerID>

Write that password down in a safe place and remove  that command-line from your Bash history! It is the key to the Realm. Literally.

Reverse proxy setup for keycloak

In your Apache configuration for the “sso.darkstar.lan” host you need to add these lines to create a reverse proxy that connects the client users of your Keycloak service to the service endpoint:

SSLProxyEngine On
SSLProxyCheckPeerCN on
SSLProxyCheckPeerExpire on
RequestHeader set X-Forwarded-Proto: "https"
RequestHeader set X-Forwarded-Port: "443"
<LocationMatch /auth>
    AllowOverride None
    Require all granted
    Order allow,deny
    Allow from all
</LocationMatch>
ProxyPreserveHost On
ProxyRequests Off
ProxyVia on
ProxyAddHeaders On
ProxyPass        /auth http://127.0.0.1:8400/auth
ProxyPassReverse /auth http://127.0.0.1:8400/auth

Restart Apache httpd after making this change.

Initial configuration of Keycloak

Now that Keycloak is up and running behind a reverse proxy and interfaces with the world via the URL https://sso.darkstar.lan/auth , and has an admin account, we are going to create a “realm“. A realm is a space where the administrator manages identifiable objects, like users, applications, roles, and groups. A user belongs to only one realm and will always login to that realm.

Our realm will be named “foundation“. Here we go:

  • Point your browser at https://sso.darkstar.lan/auth/
  • Add a new Realm:
    • Click to open Admin Console (https://sso.darkstar.lan/auth/admin).
    • Logon with above configured ‘admin’ credentials.
    • Hover the mouse over the ‘Master‘ dropdown in the top-left corner.
    • Click ‘Add realm‘, enter Name: “foundation“.
    • Click ‘Create‘, add a Display name “My Cloud Foundation” (pick any name you like), click ‘Save‘.
  • (Optionally) configure email via SMTP:
    • Click ‘Email‘ (top of the page).
    • Enter your LAN’s SMTP server, the SMTP port (587 if you enable StartTLS at the bottom), and a reasonable ‘From‘ email address.
    • (Optionally) configure other parameters specific to your setup.
    • Click ‘Test Connection‘.
    • If your Keycloak container could successfully connect to the SMTP server, click ‘Save‘ and now Keycloak will be able to send you relevant emails, provided that you configured a working email address for the admin user of course.
  • Add a first user:
    • Click ‘Users‘ (left-hand menu) > ‘Add user’ (top-right corner of table)
    • Add user “alien” with full-name “Alien BOB” (of course, use whatever makes sense for you).
    • Set initial password to be able to login:
      • Click ‘Credentials‘ (top of the page).
      • Fill in ‘Set Password‘ form with a password like “WelcomeBOB!”.
      • (Optionally) click ‘ON‘ next to ‘Temporary‘ so that it toggles to ‘OFF‘. This removes the requirement for the user to update password on first login.
      • Click ‘Set password‘.
  • Test the new user login in a different browser (or logoff the admin user first):
    • Open User Console: https://sso.darkstar.lan/auth/realms/foundation/account
    • Login as ‘alien‘ and you’ll see the message: “You need to change your password to activate your account.
    • Set a new (permanent) password and explore the configurable user profile settings, for instance enabling 2-Factor Authentication (2FA) using an app like Authy or Google Authenticator.

Considerations

Your keycloak is now running at https://sso.darkstar.lan/auth and the user login-page for the “Foundation” realm is at https://sso.darkstar.lan/auth/realms/foundation/account . That URL is nowhere to be found easily, so if you don’t know it is there (or if you don’t know about Keycloak’s URL path template) then users may complain about not finding it.
On the one hand, this adds some “security through obscurity” if you’re the paranoid type.
Plus, Keycloak will redirect users to the correct login page anyway when an application asks for a credential check.
On the other hand, you want to give your server’s users a nice experience.
As a courtesy to your users, you could consider adding a HTML redirect to the root of that server. Assuming that https://sso.darkstar.lan/ just serves an empty page or spits out a “page not found” error, you could paste the following HTML snippet into an ‘index.html‘ file in the DocumentRoot directory, which will cause an immediate redirect from the URL root to the user login page for the “foundation” realm:

 <html>
  <head>
    <title>Slackware Cloud Server Logon</title>
    <meta http-equiv="refresh" content="0; URL="https://sso.darkstar.lan/auth/realms/foundation/account">
  </head>
  <body bgcolor="#ffffff"></body>
</html>

Keycloak discovery

In the previous section I mentioned that it is not trivial for users to discover the URL of their Keycloak profile page. But how do applications do this when they want to interact with Keycloak?
OpenID Connect Discovery is a layer on top of OAuth 2.0 protocol which allows a client application not only to authenticate a user but also to obtain certain user characteristics (called “claims” in OAuth2.0) like full name or email address. To obtain these claims, the client application connects to a well-known URL where it can find out which claims are supported.
Keycloak supports this OpenID Connect Discovery and provides a Discovery URL at “/auth/realms/<realm>/.well-known/openid-configuration”. For our Keycloak server, that will be:

https://sso.darkstar.lan/auth/realms/foundation/.well-known/openid-configuration

You can query this URL for instance via the ‘curl’ program and if you also have the ‘jq‘ program installed from my repository you can generate nicely formatted human-readable colorized output:

 $ curl https://sso.darkstar.lan/auth/realms/foundation/.well-known/openid-configuration | jq

The output of that command is lengthy but it starts with:

 % Total    % Received % Xferd  Average Speed   Time    Time     Time  Current 
                                Dload  Upload   Total   Spent    Left  Speed 
100  5749  100  5749    0     0  41485      0 --:--:-- --:--:-- --:--:-- 41659 
{ 
 "issuer": "https://sso.darkstar.lan/auth/realms/foundation", 
 "authorization_endpoint": "https://sso.darkstar.lan/auth/realms/foundation/protocol/openid-connect/auth", 
 "token_endpoint": "https://sso.darkstar.lan/auth/realms/foundation/protocol/openid-connect/token", 
 "introspection_endpoint": "https://sso.darkstar.lan/auth/realms/foundation/protocol/openid-connect/token/introspect", 
 "userinfo_endpoint": "https://sso.darkstar.lan/auth/realms/foundation/protocol/openid-connect/userinfo", 
 "end_session_endpoint": "https://sso.darkstar.lan/auth/realms/foundation/protocol/openid-connect/logout", 
 "frontchannel_logout_session_supported": true, foundation
 "frontchannel_logout_supported": true, 
 "jwks_uri": "https://sso.darkstar.lan/auth/realms/foundation/protocol/openid-connect/certs", 
 "check_session_iframe": "https://sso.darkstar.lan/auth/realms/foundation/protocol/openid-connect/login-status-iframe.html"
, 
 "grant_types_supported": [
  ........

We will be able to use this Discovery protocol when setting up an Etherpad container in Episode 6.

Done

We are now ready to use Keycloak as IAM service for other applications that are waiting for us to install and configure. This setup is secure by default, but I do invite you to read more about the advanced configuration of Keycloak, they have extensive documentation at https://www.keycloak.org/documentation . For instance, do you want new users to be able to register themselves? Allow them to configure 2-Factor Authentication? Update their profile? Force password expiry? Custom password complexity configuration?

You may want to add groups to the realm and not just users, and limit the use of certain applications to specific groups (you may not want to let everyone use the Jitsi video conferencing platform for instance).

If your network already manages its users in an Identity provider like LDAP or Kerberos, Active Directory or eDirectory, or if you want to allow people to use their Google, Facebook etc identities to authenticate against your Keycloak, you should look into the functionality behind ‘Identity Providers’ in the left sidebar:

In that case, Keycloak will not store user identity information in its MariaDB database but instead use these Identity Providers as the remote backend.

Thanks

I hope you made it this far… and you liked it. Leave your comments, encouragements, fixes and general feedback in the section below.

Cheers, Eric


Attribution

Keycloak architecture images have been taken from the keycloak.org/documentation web site. The remainder are screenshots taken from my own Keycloak instance.

Slackware Cloud Server Series, Episode 1: Managing your Docker infrastructure

Hi all!
This is the first installment of a series of articles I intend to write in early 2022. With Slackware 15.0 around the corner, I think it is a good time to show people that Slackware is as strong as ever a server platform. The core of this series is not about setting up a mail, print or web server – those are pretty well-documented already. I’m going to show what is possible with Slackware as your personal cloud platform.

A lot of the work that went into developing Slackware between the 14.2 and 15.0 releases was focusing on desktop usage. The distro is equipped with the latest and greatest KDE and XFCE desktops, a low-latency preemptive kernel, Pipewire multimedia framework supporting capture and playback of audio and video with minimal latency, et cetera. I have been enjoying Slackware-current as a desktop / laptop powerhouse for many years and built a Digital Audio Workstation and a persistent encrypted Live Distro with SecureBoot support out of it.

Slackware Cloud Server Series – Summary

The imminent release of Slackware 15.0 gives me fresh energy to look into ‘uncharted’ territory. And therefore I am going to write about setting up collaborative web-based services. Whether you will do this for the members of your family, your friends, your company or any group of people that you interact with a lot, this year you will hopefully learn how to become less dependent on the big ‘cloud’ players like Google, Microsoft, Zoom, Dropbox. What I will show you, is how to setup your own collaboration platform on a server or servers that you own and control. Think of file-sharing, video-conferencing, collaborative document editing, syncing files from your desktop and your phone to your cloud server. If the series is received well, I may additionally write about expanding your cloud server to a private platform for watching movies, listening to network audio, and so on.

I have a good notion of what I will write about, but I am sure that as this series grows and I tell you stories, you will get triggered about subjects that I may not have considered yet. So here’s a challenge for you, the reader: let me know what you think would be a good addition to the series. What makes Slackware great as a “personal cloud” platform to bind people together.

Topics you can expect in this series:

  • Episode 1 (this article): Managing your Docker Infrastructure
    Here I will show you how to setup and manage Docker containers on Slackware, considering graphical management and firewalling. This is the foundation for what we will be doing in subsequent episodes.

    • Docker architecture
      • Examples
    • Docker Compose
    • Building a Docker image and running a container based on it
    • Help on commands
    • Obtain information about images and containers
    • Stop and remove a container
    • Refresh a container with the latest image from the vendor
    • Managing  containers, images, volumes, networks etc
    • Difference between load/save and import/export
    • Limiting the log size for your containers
    • Graphical management tool
    • Docker’s effect on iptables firewall
      • Generic iptables
      • UFW (Uncomplicated Firewall)
      • Firewalld
      • Alien’s Easy Firewall Generator (EFG)
    • Thanks
    • Attribution
  • Episode 2: Identity and Access management (IAM)
    Setting up Keycloak for Identity and Access Management (IAM) to provide people with a single user account for all the Slackware Server Services we will be creating.
  • Episode 3: Video Conferencing
    Setting up Jitsi Meet . This makes us independent of cloud conferencing services like MS Teams, Zoom or Google Meet. The Jitsi login is again offloaded to our Keycloak IAM provider.
  • Episode 4: Productivity Platform
    Setting up NextCloud as the productivity hub where you can store and read your documents, host your photo library, hold video meetings, manage your activities, read and send emails, keep track of where your smartphone went, chat with people and a lot more. I will also show how to integrate the Jitsi video conferencing solution which was the topic of the previous episode into our NextCloud platform.
    NextCloud will be setup on your ‘bare metal’ server. User authentication to the platform will be handled by our Keycloak IAM server.
  • Episode 5: Collaborative document editing
    Integrating Collabora Online Development Edition (CODE) with NextCloud and move from reading/displaying your documents to collaborative real-time document editing with friends, family or colleagues in your self-hosted LibreOffice Online server.
  • Episode 6: Etherpad with Whiteboard
    Setting up an improved Etherpad real-time collaborative editor with more power than the out-of-the-box version which is used with Jitsi Meet, at the same time integrating it with Keycloak IAM for authentication.
  • Episode 7: Decentralized Social Media
    Setting up Mastodon as an open source alternative to the Twitter social media platform.
  • Episode 8: Media streaming platform
    Setting up the Jellyfin media platform. If you have a decent collection of digital or digitized media (audio, video, photos) your cloudserver will become your friends’ autonomous alternative to Netflix and the likes. Single Sign On is provided to your users via Keycloak IAM.
  • Episode 9: Cloudsync for 2FA Authenticator
    Setting up an Ente backend server as a cloud sync location for the Ente Auth 2FA application (Android, iOS, web).
    Stop worrying that you’ll lose access to secure web sites when you lose your smartphone and with it, the two-factor authentication codes that it supplies. You’ll be up and running with a new 2FA authenticator in no time when all your tokens are stored securely and end-to-end encrypted on a backend server that is fully under your own control.
  • Episode X: Docker Registry
    Setting up a Docker Registry. A local index and registry of Docker images allows us to become independent of Docker’s commercially driven limitations on images you create and want to share with the world or use privately. I will for instance use the public Docker Hub for all the services that are discussed in this series of articles, and I will point out the limitations of doing so.
    I am not decided on the actual implementation of the Registry. The Docker Hub is an implementation of the aforementioned Registry product and it is Open Source but it does not do authentication and it has no user interface. Docker (the company) adds a lot to this service that is not Open Source to make the Hub the popular platform that it became.
    So perhaps I will combine this Registry with Portus, which is an Open Source authorization service and user interface for the Docker Registry. It is created/maintained by the OpenSuse team. It can use Keycloak as the OIDC (OpenID Connect) provider, and so our Keycloak IAM server will do the Single Sign On.
    Or I will use Quay, which is Red Hat’s solution for self-hosted Docker Registry including a web-based user interface that looks a lot like the Docker Hub. Quay can also offload the authentication/authorization to an OIDC provider like Keycloak. In addition, it allows scanning your hosted images for known security vulnerabilities using Clair, another Red Hat product and part of Project Quay.

Managing your Docker Infrastructure

In a previous article, I have shared my Docker related packages with you for Slackware 14.2 and 15.0 (well, -current formally since we are still waiting for 15.0). I assume you are running the newest Slackware almost-at-version 15.0 and have already installed those four Docker packages (containerd, runc, docker and docker-compose), you have added your user account to the ‘docker‘ group and have at least once rebooted your computer or manually ran “/etc/rc.d/rc.docker start“.
I also assume that you have a basic understanding of containers and how they differ from Virtual Machines. A brief summary:

Containers run directly on the host kernel and the ‘bare metal’. The Docker engine hides the host operating system particulars from the applications that run in the containerized environment. Docker uses cgroups and Linux kernel capabilities to shield container processes from other containers and the host, but using a “ps” command on the host you can easily see all the container processes.
A Virtual Machine on the other hand, is a virtualized machine hardware environment created by a hypervisor program like QEMU, VMWare, VirtualBox etc. Inside that virtual machine you can run a full Operating System which thinks it is running on real hardware. It will be unaware that it is in fact running inside a VM on a host computer which  probably runs a completely different OS.
From the host user perspective, nothing that goes on in the VM is actually visible; the user merely sees the hypervisor running.
And from a Docker container as well as VM user perspective, anything that happens outside that environment is invisible. The host OS can not be reached directly from within the guest.

What I am not going to discuss in the scope of this article is orchestration tools like Kubernetes (K8s) or Docker Swarm, that make it possible or at least a lot more convenient to manage a cluster of servers running Docker containers with multiple micro-services that are able to scale on-demand.

Docker architecture

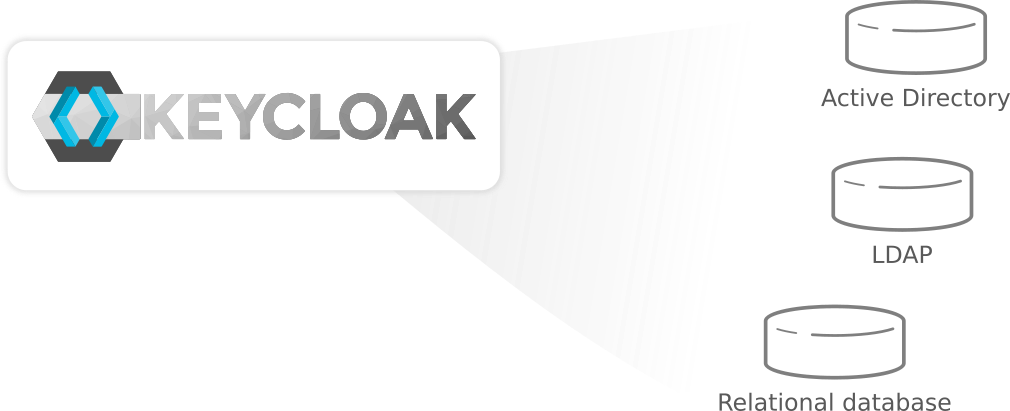
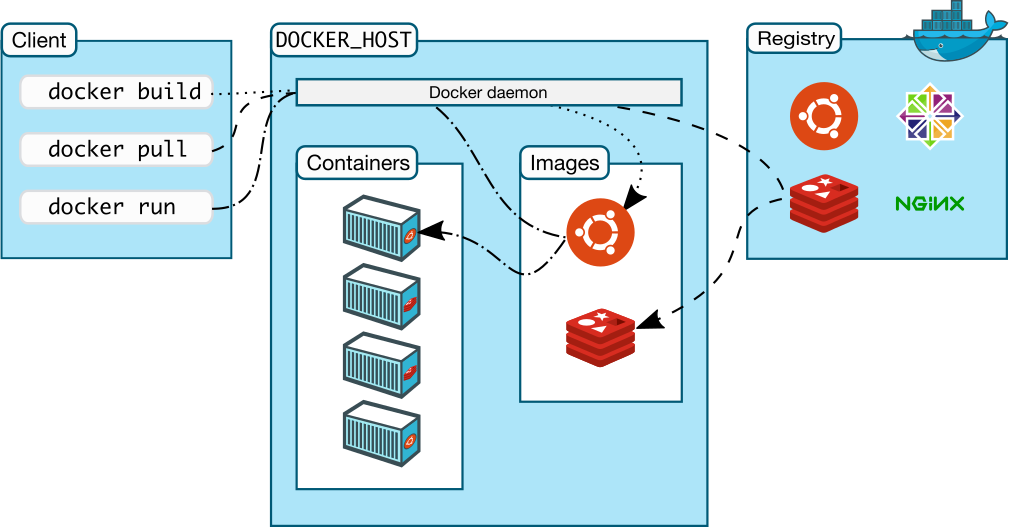
You create and run a Docker container from (layers of) pre-existing images that inherit from each other, using the ‘docker run‘ command. You can save a container that you created, ‘flattening’ the layers the container consists of into one new image using ‘docker commit‘.
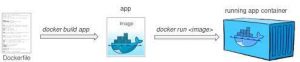
You start and run a container by referring the Docker image it should be based on, and if that image is not available locally then Docker will download it from a Docker Registry (by default hub.docker.com but it can also be a private Registry you run and control yourself). You can also manually download an image using the ‘docker pull‘ command in advance of the ‘docker run‘ command which is going to use that image so that you don’t have to wait for an image download at the moment suprême of starting your container.

Building an image yourself using the ‘docker build‘ command is essentially ruled by a Dockerfile and a context (files on the local filesystem which are used in the creation of the image). The container which is based on that image typically runs an application or performs a task.

Examples

An example: running an application which is not provided by your Slackware OS. A container can run a Postgres database server which you then use on your host computer or in other containers. This Postgres container will typically be started on boot and keeps running until shutdown of the host computer. It’s as trivial as running:

$ docker run -d --restart unless-stopped --name slack-postgres -e POSTGRES_PASSWORD=**** postgres

Another example: building Slackware packages reliably and without introducing unwanted dependencies. In this case, you use a container based from a Slackware Docker image, to download and compile a Slackware package, and then export the resulting package from within the container to the host computer’s local filesystem. Such a Docker container based on a Slackware image will be able to offer the same OS with the same configuration, every time it starts and functions independently of the host. You could be compiling Slackware packages on a Debian host for instance.
Exercise left for the reader: you will have to create that Slackware Docker image yourself… it is not available online. 

Docker Compose

Also created by the Docker company, docker-compose is a separate application which uses the capabilities of Docker. The 2.x release of Docker Compose which I offer in my repository is written in the Go language which makes it fully self-contained. The previous 1.x releases that you can obtain from SlackBuilds.org were heavily dependent on Python and for that version of docker-compose you had to install 13 dependent packages.

Docker Compose expands on the Docker concept of a single container with a single purpose. Compose is a tool for defining and running multi-container Docker applications. The individual Docker applications themselves are defined by a Dockerfile, which makes their deployment reproducible in any Docker environment.
You write a Compose file (typically called docker-compose.yml) which defines the container services that you want to run. This Compose file is written in YAML and according to the Compose file specification . The file describes an application service which is built out of multiple Docker containers  as well as their shared resources and private communication channels. Docker-compose reads the yaml file and creates data volumes and internal networks, starts the defined containers and connects them to the just-created volumes and networks. There’s a lot more you can do in a Compose file, check out the reference.

The result of the ‘docker-compose up -d‘ command is the start-up of a complex service running multiple inter-dependent applications (you’ll see those referred to as micro-services) that usually have a single point of interaction with its users (an IP address/port or a https URL). Essentially a black-box where all the internal workings are hidden inside that collection of containers. As an administrator there’s little to nothing to configure and as an user you don’t have to know anything about that complexity.
And again you could be trivially running applications in Docker containers on your Slackware host that you would not be able to run on the bare host OS without a lot of weeping and gnashing of teeth .

Docker Compose offers a lot of versatility that regular Docker does not. Whether you use one or the other depends on the complexity of that what you want to achieve. In future episodes of this article series, I will give examples of both.

Building a Docker image and running a container based on it

The ‘docker build’  command has a lot of parameters but it accepts a single argument which is either a directory containing a Dockerfile and the required context (local files to be used in the image creation process), or a URL the content of which it will download and interpret as a Dockerfile. You can also use the “-f” switch to specify a filename if it’s not called “Dockerfile” literally, or pipe a Dockerfile content into the ‘docker build‘ command via STDIN. It’s good practice to ‘tag’ the resulting image so that you’ll understand its purpose later on. You can then upload or ‘push’ the image to a Docker Registry, either the public one or a private registry that you or your company control.
Let me give a comprehensive example. We will build a new Slackware image which is based on my Slackware ‘base‘ image on the public Docker Hub (docker pull liveslak/slackware:latest). The Dockerfile will add a couple of packages, create a user account called “alien” and start a login shell if needed.
Note that in this example I will write the Dockerfile on the fly using ‘cat‘ and a ‘here-document‘ to pipe it into the ‘docker build‘ command. I will tag the resulting image as ‘slacktest‘ using the “-t” switch of the ‘docker build‘ command:

$ cat <<'EOT' | docker build -t slacktest -
FROM liveslak/slackware:latest 
MAINTAINER Eric Hameleers <alien@slackware.com> 
ARG SL_UID="1000" 
ARG SL_GID="users" 
ARG SL_USER="alien" 
# Install compiler toolchain and supporting tools. 
RUN rm -f /etc/slackpkg/templates/compilertoolchain.template
RUN for PKG in \ 
ca-certificates \ 
curl \ 
cyrus-sasl \ 
gc \ 
gcc \ 
git \ 
glibc \ 
glibc-profile \ 
glibc-zoneinfo \ 
guile \ 
intltool \ 
kernel-headers \ 
libmpc \ 
libffi \ 
libtasn1 \ 
make \ 
mpfr \ 
nettle \ 
p11-kit \ 
perl \ 
; do echo $PKG >> /etc/slackpkg/templates/compilertoolchain.template ; done 
RUN slackpkg -batch=on -default_answer=y update gpg 
RUN slackpkg -batch=on -default_answer=y update 
RUN slackpkg -batch=on -default_answer=y install-template compilertoolchain 
# Refresh SSL certificates: 
RUN /usr/sbin/update-ca-certificates -f 
# Create the user to switch to: 
RUN useradd -m -u "${SL_UID}" -g "${SL_GID}" -G wheel "${SL_USER}" && \ 
sed -ri 's/^# (%wheel.*NOPASSWD.*)$/\1/' /etc/sudoers 
USER "${SL_USER}" 
ENV HOME /home/"${SL_USER}" 
WORKDIR /home/"${SL_USER}" 
# Start a bash shell if the container user does not provide a command: 
CMD bash -l
EOT

The output of this ‘docker build’ command shows that the process starts with downloading (pulling) the slackware base image:

Sending build context to Docker daemon  3.072kB 
Step 1/16 : FROM liveslak/slackware:base_x64_14.2 
base_x64_14.2: Pulling from liveslak/slackware 
Digest: sha256:352219d8d91416519e2425a13938f94600b50cc9334fc45d56caa62f7a193748 
Status: Downloaded newer image for liveslak/slackware:base_x64_14.2 
---> 3a9e2b677e58 
Step 2/16 : MAINTAINER Eric Hameleers <alien@slackware.com> 
---> Running in d7e0e17f68e6 
Removing intermediate container d7e0e17f68e6 
---> 75b0ae363daf
...(lot of output snipped) ...
Successfully built e296afb023af
Successfully tagged slacktest:latest
$ docker images |grep slacktest
slacktest                latest          e296afb023af   2 minutes ago   387MB

Here you see how a Dockerfile uses ‘FROM’ to download a pre-existing image from the Hub and then RUNs several commands which it applies to the base image which was downloaded from Docker Hub, creating a new image and then naming it “slacktest” with a tag “latest” and an ID of “e296afb023af“. In that process, several intermediate layers are created, basically every command in the Dockerfile which you would normally execute on the command-line will create one. The end result is an image which consists of multiple layers. You can use the ‘history’ command so see how these were built:

$ docker history e296afb023af 
IMAGE          CREATED          CREATED BY                                      SIZE      COMMENT 
e296afb023af   49 minutes ago   /bin/sh -c #(nop)  CMD ["/bin/sh" "-c" "bash…   0B 
e1224d15abac   49 minutes ago   /bin/sh -c #(nop) WORKDIR /home/alien           0B 
4ce31fa86cca   49 minutes ago   /bin/sh -c #(nop)  ENV HOME=/home/alien         0B 
365bffd67f07   49 minutes ago   /bin/sh -c #(nop)  USER alien                   0B 
05d08fe94b47   49 minutes ago   |3 SL_GID=users SL_UID=1000 SL_USER=alien /bi…  336kB 
3a300b93311f   49 minutes ago   |3 SL_GID=users SL_UID=1000 SL_USER=alien /bi…  218kB 
7a14f55146dd   50 minutes ago   |3 SL_GID=users SL_UID=1000 SL_USER=alien /bi…  233MB 
a556359ec6d3   51 minutes ago   |3 SL_GID=users SL_UID=1000 SL_USER=alien /bi…  6.21MB 
da19c35bed72   52 minutes ago   |3 SL_GID=users SL_UID=1000 SL_USER=alien /bi…  2.13kB 
604fece72366   52 minutes ago   |3 SL_GID=users SL_UID=1000 SL_USER=alien /bi…  161B 
1c72e034ef06   52 minutes ago   |3 SL_GID=users SL_UID=1000 SL_USER=alien /bi…  0B 
3f020d0c2024   52 minutes ago   /bin/sh -c #(nop)  ARG SL_USER=alien            0B 
91a09ad8693a   52 minutes ago   /bin/sh -c #(nop)  ARG SL_GID=users             0B 
96d433e0162d   52 minutes ago   /bin/sh -c #(nop)  ARG SL_UID=1000              0B 
75b0ae363daf   52 minutes ago   /bin/sh -c #(nop)  MAINTAINER Eric Hameleers…   0B 
3a9e2b677e58   11 days ago                                                      148MB     Imported from -

That last line shows the image “3a9e2b677e58” which is the slackware ‘base‘ image which I downloaded from Docker Hub already 11 days ago.

If we now use ‘docker run’  to create a container based on this image we would expect it to give us a bash prompt as user ‘alien’. Let’s try it and run an interactive container connecting it to a pseudo terminal using the “-ti” switch:

$ docker run -ti slacktest 
alien@88081b465a98:~$ id 
uid=1000(alien) gid=100(users) groups=100(users),10(wheel) 
alien@88081b465a98:~$ exit
logout
$ docker ps -a | grep slacktest
88081b465a98   slacktest                   "/bin/sh -c 'bash -l'"   2 minutes ago   Exited (0) 16 seconds ago
$ docker rm 88081b465a98 
88081b465a98
$

Indeed we ended up as user “alien” in a machine whose hostname is the ID of the container (88081b465a98). And with the final command, we could remove the container without first stopping it, because it was already stopped when we issued the “exit” command.

Help on commands

Working with Docker containers, it is good practice that you get familiar with the command-line client (aptly name ‘docker’). You’ll find a lot of command-line examples in this article which should really become part of your hands-on toolkit.
The ‘docker’ tool has some 30 sub-commands and all of them have built-in help. To get the full list of available  docker commands run:

$ docker --help

The help per command can be found by suffixing it with “–help”. Many commands have sub-commands and these will also show help:

$ docker system --help
$ docker system prune --help

Obtain information about images and containers

The ‘docker’ command-line utility can give you a lot of information about your docker infrastructure. I will discuss a graphical management tool a bit further down, but here are some useful commands:

Get a listing of all images on your Docker host:

$ docker images

Get a listing of all running containers:

$ docker ps

Also list those containers that are in a stopped state:

$ docker ps -a

Show diskspace used by all your images, containers, data volumes and caches:

$ docker system df

Show the logs of a container:

$ docker logs CONTAINER_ID

Get the ID of a container or an image:

$ docker ps -aqf "name=containername"

The “containername” is interpreted as a regular expression. If you omit the “q” switch you will see the full info about the container, instead of only the container ID. Find an image ID using the following command (if you use a containername instead of an imagename you have a second way to get a container ID):

$ docker inspect --format="{{.Id}}" imagename

Note that in this case, “imagename” needs to be the exact string of the image (or container) as shown in the ‘docker ps‘ output, not a regular expression or part of the name.

Get the filesystem location of a data volume:

Data volumes are managed by Docker, on a Linux host the actual physical location of a Docker volume is somewhere below “/var/lib/docker/volumes/“. but on a Windows Docker host that will be something entirely different.
Using the ‘docker inspect‘ command you can find the actual filesystem location of a data volume by evaluating the “Mountpoint” value in the output. Example from my local server:

$ docker inspect volume portainer_data
[
  {
    "CreatedAt": "2021-08-01T12:44:24+02:00",
    "Driver": "local",
    "Labels": {},
    "Mountpoint": "/var/lib/docker/volumes/portainer_data/_data",
    "Name": "portainer_data",
    "Options": {},
    "Scope": "local"
  }
]

You could use this information to access data inside that volume directly, without using Docker tools.

More:

There’s a lot more but I leave it up to you to find other commands that are informational for you.

Stop and remove a container

Note that when you stop and remove a container, you do not delete the image(s) on which the container is based! So what is the usefulness of removing containers? Simple: sometimes a container crashes or gets corrupted. In such a case you simply stop the container, remove it and start it again using the exact same command which was used earlier to start it. The container will be rebuilt from scratch from the still existing images on your local file-system and the service it provides will start normally again.
As an example, create and run the ‘hello-world‘ container, then stop and remove it again:

$ docker run hello-world
Hello from Docker! 
This message shows that your installation appears to be working correctly.
...
$ docker ps -a |grep hello-world
0369206ddf2d   hello-world                 "/hello"  ...
$ CONTAINER_ID=$(docker ps -a |grep hello-world | awk '{print $1}')
$ docker stop $CONTAINER_ID
$ docker rm $CONTAINER_ID

Refresh a container with the latest image from the vendor

Suppose you are running a Docker container for some complex piece of software. You can’t simply run “slackpkg upgrade-all” to upgrade that software to its latest version or to fix some security vulnerability. Instead, what you do with a container is to refresh the Docker image which underpins that container, then stop the container, remove the container layer, remove the old vendor image, and then start the container again. On startup  of the container, it will now be based on the latest vendor image.
Configuration of a container happens either inside of data volumes that you maintain outside of the container and/or on the startup command-line of that container. Deleting the container or the image layers is not touching any of your configuration or your data.
This is the strong point of container life cycle management – it’s so easy to automate and scale up.

As an example, let’s refresh a container that I have running here at home (the Portainer container that’s discussed further down).

Download the latest Portainer Community Edition image from Docker Hub:

$ docker pull portainer/portainer-ce

Find the ID (first comumn) of the portainer container that we currently have running:

$ docker ps -af "name=portainer"

Stop and remove the container:

$ docker stop CONTAINER_ID
$ docker rm CONTAINER_ID

Find the ID of the portainer image which is oldest (look in the CREATED column) and remove it:

$ docker images | grep portainer
$ docker image rm OLDIMAGE_ID

Check the ID of the remaining image:

$ docker images | grep portainer

Start the container using the same command you would have used before to start it:

$ docker run -d --restart unless-stopped -p 127.0.0.1:9000:9000 --name portainer -v /var/run/docker.sock:/var/run/docker.sock -v /usr/share/docker/data/portainer:/data portainer/portainer-ce

And now we are running the same Portainer configuration, but with the latest available software version. A matter of seconds if you would script this.

Managing  containers, images, volumes, networks etc

As time passes and you experiment with containers, you will inevitably end up with stuff on your host computer that is no longer being used. Think of images which you wanted to try out with ‘docker run‘ or downloaded using ‘docker pull‘. Or cached data resulting from image building. The ‘docker system df‘ command I showed you earlier will give you a scare perhaps if you run it… see here the output when I run it on my server:

TYPE TOTAL ACTIVE SIZE RECLAIMABLE
Images 11 10 3.424GB 390.3MB (11%)
Containers 10 3 531.8MB 32.01MB (6%)
Local Volumes 3 1 0B 0B
Build Cache 0 0 0B 0B

The “reclaimable” percentage is data which is no longer being used by any container that Docker knows about. You can safely delete that data. The following command will do that for you:

$ docker system prune

If you want to make sure that every un-used scrap of image data is deleted, not just the dangling symlinked images, run:

$ docker system prune -a

And if you want to remove un-used data volumes, you would run:

$ docker system prune --volumes

. . . of course you execute this command only after you have verified that the affected volumes do not contain data you still need.

Difference between load/save and import/export

Docker manages images, containers, data volumes etc in an OS independent way. Meaning you are able to transport data volumes, images and containers from one host to another, or even from one type of OS (Linux) to another (MS Windows) and preserve compatibility.

Import and export commands – used for migration of container filesystems

Docker command ‘docker export‘ allows you to create a (compressed) tar archive containing the bare file system of a container:

$ docker export my_container | xz > mycontainer.tar.xz

This filesystem tarball can again be imported into a new ‘filesystem image‘. Also look at my example of creating a Slackware base image using ‘docker import‘.

$ xz -cd mycontainer.tar.xz | docker import - my_newcontainer

The export and import commands don’t preserve the container’s configuration and underlying image information, you are dealing with just the filesystem. This makes these commands quite suited for creating Docker base images which you can then base your future containers and images on via the “FROM” keyword in a Dockerfile.
For actual Docker migrations to another host, the load and save commands are better suited. Read on:

Load and save commands – used for host migration of images

Docker command ‘docker save‘  allows you to create a (compressed) tar archive of a Docker image, containing all its layers, tags, history and configuration. The only thing that is not added to this tarball are the data volumes.

If you want to migrate a container, you first save (commit) its changes as a new Docker image using the ‘docker commit’ command.

$ docker commit CONTAINER_ID my_important_image

… and then save that image in a OS-agnostic way into a tarball. The ‘save’ command does not compress the data so we use ‘xz’ for that:

$ docker save my_important_image | xz > my_important_image.tar.xz

This compressed tarball can be copied to another host (potentially with a different OS running on the host) and ‘docker load‘ allows you to load this image (even when compressed) with all its tag information and history into the new host’s Docker environment.

$ cat my_important_image.tar.xz | docker load

You can then use the ‘docker run‘ command as usual to start a new container based off that image.

And what to do with the data volumes? Docker manages its volumes in an OS agnostic way which means we can probably not just create a tarball from the volume directory on the host, since that may not be compatible with how a data volume is implemented on another host. If we use Docker commands to save a data volume and load it on another host, we should be covered. The Docker documentation on volumes has an example on how to migrate data volumes.

Saving a data volume to a tarball:

Suppose your ‘portainer‘ container uses a data volume called ‘portainer_data‘ which is mounted on the container’s “/data” directory, containing important data which you want to migrate to another host.
To generate a tarball of the data in this volume, you create a one-shot container based on some base image (I’ll use ‘alpine’) that does not do anything in itself, and give that container the command to create the backup of your ‘portainer_data‘ volume. The steps are:

  • Launch a new container and mount the volume from the ‘portainer‘ container
  • Mount a local host directory as /backup
  • Pass a command that tars the contents of the ‘portainer_data‘ volume to a backup.tar file inside our /backup directory.
  • When the command completes and the container stops, we are left with a backup of our ‘portainer_data‘ volume; the file “backup.tar” in our current directory.
$ docker run --rm --volumes-from portainer -v $(pwd):/backup alpine tar cvf /backup/backup.tar /data

… and on a new host, load this tarball into the data volume of the ‘portainer’ container which you have already setup there but it’s still missing its data:

$ docker run --rm --volumes-from portainer -v $(pwd):/backup alpine bash -c "cd /data && tar xvf /backup/backup.tar --strip 1"

Voilà!

Limiting the log size for your containers

Docker captures the standard & error output (stdout/stderr) for all your containers and writes these to logfiles in JSON format. By default, Docker does not impose size restrictions on its log files.
These logfiles are shown when you run a ‘docker logs CONTAINER_ID‘ command.
This behavior could potentially fill up your hard drive if you run a container which generates an extensive amount of logging data. By modifying Docker’s “/etc/docker/daemon.json” configuration file we can limit the maximum size of the container log files. This is what you need to add to the Docker daemon configuration to limit the size of any log file to 50 MB and keep at most two backups after log rotation:

{
  "log-driver": "json-file",
    "log-opts": {
    "max-size": "50m",
    "max-file": "3"
    }
}

More details to be found at https://docs.docker.com/config/containers/logging/json-file/.

Graphical management tool

There’s a nice graphical web-based administration tool for your Docker infrastructure which itself runs in a container (you can also install it on bare metal as a self-contained executable), called portainer. Portainer will listen at a TCP port of your host and you can point your web browser at http://localhost:9000/ to access the GUI. The Community Edition (portainer-ce) is open source and free and this is what we’ll install and run as a Docker container.
The Portainer developers posted a tutorial and feature walk-through of their product on Youtube:

Some considerations before we start implementing this.

Data persistence:
Portainer wants to keep some data persistent across restarts. When it is run from within a container, you want to have that persistent data outside of your container, somewhere on the local filesystem. The Docker concept for persistent data management is called “volumes”. Docker volumes are created as directories within “/var/lib/docker/volumes/” on Linux. A volume is made available in the container using the “-v” switch to the ‘docker run‘ command, which maps a host volume to an internal container directory. Docker manages its volumes in an OS agnostic way, making it possible to transparently move your containers from Linux to Windows for instance.
We will not use a Docker volume in this example but instead create the “/usr/share/docker/data/portainer” directory and pass that as the external location for the container’s internal “/data” directory.

Network security:
We will expose the Portainer network listen port to only localhost and then use an Apache reverse proxy to let clients connect. Note that port 9000 exposes the Portainer UI without SSL encryption; we will use Apache reverse proxy to handle the encryption.

Application security:
Below you will see that I am mapping the Docker management socket “/var/run/docker.sock” into the container. Normally that would be very bad practice, but Portainer is going to be our Docker management tool and therefore it needs the access to this socket.

This batch of commands will get your Portainer-CE instance up and running and it will be restarted when Docker starts up (eg. after rebooting).

# mkdir -p /usr/share/docker/data/portainer
# docker run -d --restart unless-stopped -p 127.0.0.1:9000:9000 --name portainer -v /var/run/docker.sock:/var/run/docker.sock -v /usr/share/docker/data/portainer:/data portainer/portainer-ce

Two of the three network ports that Portainer opens up are not being exposed (mapped) to the outside world:
Port 8000 exposes a SSH tunnel server for Portainer Agents, but we will not use this. Portainer Agents are installed on Docker Swarm Clusters to allow central management of your Swarm from a single Portainer Server.
Also, the Portainer container generates a self-signed SSL certificate on first startup and uses it to offer https encrypted connections on port 9443 but our reverse proxy solution allows the use of a proper Let’s Encrypt certificate.

Now that the Portainer container is running, connect a browser on your host computer to http://localhost:9000/ to perform initial setup; basically defining the password for the Portainer admin user account.

The reverse proxy configuration including adding a Let’s Encrypt certificate is a bit beyond the scope of this article, but you can read this earlier blog post to learn about securing your webserver with SSL certificates.

I will share the block that you would have to add to your Apache configuration somehow. With this configuration and proper SSL setup your Portainer would be accessible via https://your_host_name/portainer/ instead of only at http://localhost:9000/ :

# Create a reverse proxy:
<Location /portainer>
    ProxyPass http://127.0.0.1:9000
    ProxyPassReverse http://127.0.0.1:9000
</Location>

Here is a screenshot of my Docker infrastructure at home as interpreted by Portainer:

Have a look at Portainer to see if it adds something useful to your Docker management toolkit. For me the most useful feature is the real-time container logging display, which is a lot more convenient than trying to scroll back in a Linux screen session.

Docker’s effect on iptables firewall

Docker dynamically modifies your host’s iptables ruleset on Linux when it starts, in order to provide container isolation. See https://docs.docker.com/network/iptables/ for the rationale. This can sometimes interfere with pre-existing services, most prominently the Virtual Machines that you may also be running and whose virtual network has been bridged to your host’s network interface.
I use vde (virtual distributed ethernet) for instance to provide transparent bridged network connectivity for the QEMU VM’s that I use when building packages for Slackware.
With this bridged network setup, your host computer essentially acts as a router, forwarding network packets across the bridge.
When Docker starts, it will add two custom iptables chains named ‘DOCKER’ and ‘DOCKER-USER’, adds its own custom rules to the ‘DOCKER’ chain and then sets the default FORWARD policy to DROP. Thereby killing the network connectivity for the already bridged networks… Bad. But even though Docker has a configurable parameter to disable iptables, this only prevents the creation of these custom chains and rules when the Docker daemon starts. Docker confesses that there is no guarantee that later on when you start containers, your iptables rulesets will stay un-touched. So, disabling iptables management in Docker is not an option. I’ll tell you a bit on how to deal with this (all information gleaned from the Internet).

Generic iptables

Since Docker sets the policy for the FORWARD chain to DROP, for your bridged networks this will result loss of connectivity (packets are no longer forwarded across the bridge).
You can use the custom DOCKER-USER chain to ensure that this bridging is not disrupted. Docker inserts these custom chains in such a way that rules defined in the DOCKER-USER chain have precedence over rules in the DOCKER chain. You have to add an explicit ACCEPT rule to that DOCKER-USER chain:

# iptables -I DOCKER-USER -i br0 -j ACCEPT

Where ‘br0‘ is the name of your network bridge (adapt if needed).

UFW (Uncomplicated Firewall)

UFW is a tool created for Ubuntu but popular on all distros, which aims at simplifying iptables ruleset management by providing a higher-level commandline interface. There’s a package build script for it on SlackBuilds.org.

UFW allows to insert rules that are evaluated  after all other chains have been traversed. This allows the user to nullify the unwanted behavior of Docker which kills bridged networks. See this github discussion for the full details.

Append the following at the end of /etc/ufw/after.rules (replace eth0 with your external facing interface):

# Put Docker behind UFW
*filter
:DOCKER-USER - [0:0]
:ufw-user-input - [0:0]

-A DOCKER-USER -m conntrack --ctstate RELATED,ESTABLISHED -j ACCEPT
-A DOCKER-USER -m conntrack --ctstate INVALID -j DROP
-A DOCKER-USER -i eth0 -j ufw-user-input
-A DOCKER-USER -i eth0 -j DROP
COMMIT

And undo any and all of:

  • Remove “iptables”: “false” from /etc/docker/daemon.json
  • Revert to DEFAULT_FORWARD_POLICY=”DROP” in /etc/default/ufw
  • Remove any docker related changes to /etc/ufw/before.rules

Firewalld

Firewalld is a dynamically managed firewall which works with a ‘zones‘ concept and gets its triggers from a D-Bus interface. There’s a package build script available on SlackBuilds.org.

If you are running Docker version 20.10.0 or higher with firewalld on your system with and Docker has iptables support enabled, Docker automatically creates a firewalld zone called docker and inserts all the network interfaces it creates (for example, docker0) into the docker zone to allow seamless networking.

Consider running the following firewalld command to remove the docker interface from the ‘trusted‘ zone.

# Please substitute the appropriate zone and docker interface
$ firewall-cmd --zone=trusted --remove-interface=docker0 --permanent
$ firewall-cmd --reload

Restarting the docker daemon (/etc/rc.d/rc.docker restart) will then insert the interface into the docker zone.

Alien’s Easy Firewall Generator (EFG)

If you used my EFG to create a firewall configuration, you will be bitten by the fact that Docker and Docker Compose create new network devices . Permissive rules need to be be added to the INPUT and OUTPUT chains of your “rc.firewall” or else ‘dmesg’ will be full of ‘OUTPUT: packet died’.

The Docker network interface is called “docker0” and for each container, Docker creates an additional bridge interface, the name of which starts with “br-” and is followed by a hash value. Therefore, these lines need to be applied at the appropriate locations in the script:

DOCK_IFACE="docker0"
BR_IFACE="br-+"
$IPT -A INPUT -p ALL -i $DOCK_IFACE -j ACCEPT
$IPT -A INPUT -p ALL -i $BR_IFACE -j ACCEPT
$IPT -A OUTPUT -p ALL -o $DOCK_IFACE -j ACCEPT
$IPT -A OUTPUT -p ALL -o $BR_IFACE -j ACCEPT

Thanks

… for reading until the end! I hope you gained some knowledge. Feel free to leave constructive feedback in the comments section below.

Cheers, Eric


Attribution

Most of the firewall-related information comes from docker.com and github.com. Please inform me about errors.
All images in this article were taken from docs.docker.com website.

Newer posts »

© 2024 Alien Pastures

Theme by Anders NorenUp ↑