My thoughts on Slackware, life and everything

Tag: network

Integrating NetworkManager into KDE while keeping the Gnome out

I think that I am not wrong when I say that Networkmanager is the de-facto way of network configuration management in Linux. Most Linux distributions have implemented it. Slackware on the other hand, traditionally encourages the use of “vi” for network configuration management (by editing “/etc/rc.d/rc.inet1.conf“)… but in recent times, the WICD daemon has been added to the “/extra” directory of Slackware, and that includes a graphical network configuration utility. A lot of (particularly mobile) users like WICD, and so do I.

WICD is for the most part a one-man exercise and the main developer has stated that he is not able to work on the program as much as it deserves. That is not too good news, but I still have hopes for the project.

In the meantime, switching to NetworkManager is not a decision that should be taken lightly. Not because NetworkManager itself will give us issues, but because NM is only the service framework and it does not come with configuration utilities (either GUI or cli oriented – I do not consider the nmcli program adequate) that allow you, the computer’s user, to configure your network connections.

Traditionally, distros will add the “nm-applet” aka “network-manager-applet” to that purpose. The nm-applet is a graphical configuration utility that lives in your desktop’s system tray area. It is being developed by the NetworkManager team. However it is is a Gnome applet, and as such it is riddled with Gnome dependencies. Precisely for that reason it is not trivial to add nm-applet  to Slackware, one of the few Linux distros that does not contain Gnome.

I think that if you are a Slackware GUI lover, you should consider yourself very lucky that the WICD developer team has one passionate Slackware user (NaCl) as member!

Having said all that, I do not have any issues with Networkmanager itself. It’s just the default configuration tool which sucks because of its Gnome allegiance. Hmm, that is not completely true… in the well-known take-a-blunt-knife-and-kill-your-software style of Redhat they managed to break API as well as ABI compatibility with the release of the 0.9 series of NM last august… where did I hear this story before? Like with PolicyKit, HAL and systemd, Redhat managed to cause a lot of fuss when developers decided to throw away their code and start over with fresh insights…

Applications which have been written to interact with the old  0.8 interface of NM have to be re-written and that takes time. At this moment, many NM-aware programs still do not support NM 0.9.

While all of that passed, I have been keeping an eye on what happens in the KDE camp. The KDE software compilation has never had a good network configurator for the 4.x series and the team which was developing KNetworkManager seems to have dissolved. But there is good news: a new networkmanagement plasmoid (KDE widget) plus accompanying KControl is available, it supports NM 0.8.x and is stable enough that I have come to prefer it over WICD.

I have built a set of supporting packages (many thanks to Robby Workman for some of these SlackBuild scripts):

  • NetworkManager (the actual network service framework)
  • cnetworkmanager (a commandline interface to NM if you don’t like the GUI)
  • mobile-broadband-provider-info (world-wide database of mobile access providers)
  • ModemManager (accompanying bradband modem management)

These packages allowed me to recompile the kde-workspace package and make it pick up support for NM in KDE’s solid device management. And finally I added the package for the required configuration GUI, networkmanagement

You can get these packages from my ktown repository or any of its mirrors, I built them for KDE 4.7.2 and you will find them inside the directory called “test“.

You can install these packages (kde-workspace needs to be upgraded of course, not installed a second time) with a single command after downloading the packages appropriate for your hardware architecture (32bit or 64bit). Run the following command in the directory which contains the six packages:

# upgradepkg –install-new *.t?z

And please read the README file which specifies in great detail how to enable NetworkManagement while at the same time disabling WICD!

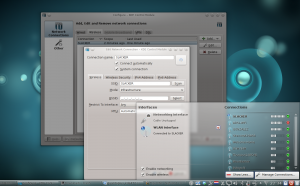
How does it look in KDE after you rebooted? Well, here is a screenshot:

My goal for the next releases of KDE (in case I will still be building the packages for it) is to compile kde-workspace in the presence of NetworkManager and thus add support for NM to the kde-workspace package. Then it will be up to you if you want to actually switch to NM or keep using WICD. The kde-workspace package will work fine even if you did not install NetworkManager.

Give me feedback! Eric
 

Out of the box PXE install server in Slackware 13.37

I had a lot of fun creating my Easter Egg for Slackware 13.37. It did not matter that Pat announced it on the slackware.com front page – it’s OK that it got some exposure. The added functionality is useful enough.

So, why an easteregg at all… and what about that PXE server?

In the last weeks before the eventual release it became pretty clear that the go-live date would be somewhere around Easter. All showstoppers had been dealt with. There was a bit of leeway and I skimmed through my TODO file (where I write down the ideas I get for Slackware improvements, as well as reminder notes for fixes that I think are important but not urgent). One of the ideas I wanted to implement was a PXE server that would run out of the box when booting the Slackware DVD.

I decided to do a quick hack session and come up with a proof of concept to see if it worked. Initially my plan was to incorporate the result into a custom initrd to be posted on my own web site, but after two (long!) nights of trying I had something that could be tested by others in the core team.

My good pal mRgOBLIN is a willing subject for this kind of non-public testing. He hammers at everything network related that I add to the installer, and he tends to find all the bugs and corner cases.

Two more days, and I had something that was working well, complete with documentation, and Pat Volkerding added it without hesitation and without mentioning it in the ChangeLog.txt. It has been inside the Slackware installer since April 15… and no one noticed. This was intended as an easteregg (well, at least that’s what I kept calling it) but it adds real valuable functionality to the installer. It’s more than just a prank.

Writing the scripts actually uncovered a couple of bugs in the network configuration of the installer which I fixed. Therefore I decided to write an article about how this “pxeserver”can be used by you.

You probably know that I have an article in my wiki about setting up a PXE boot server for network installation (it’s at http://alien.slackbook.org/dokuwiki/doku.php?id=slackware:pxe) which is what Slackware’s “usb-and-pxe-installers/README_PXE.TXT” file is based on. But even with all the details in those instructions, it’s still one bridge too far for many people – and not everybody has the luxury of having a Slackware server running in his network.

Setup a PXE server

So, one of the ideas written in my TODO file was “add a PXE server to the Slackware installer“. My intention was to provide an easy method for network installations of Slackware, provided you have one spare computer with a network card (no wireless!!!). This is how it goes, using the Slackware 13.37 installation media:

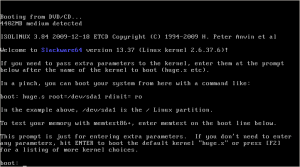
You insert the Slackware 13.37 DVD (or CD1) into the spare computer, and boot from the optical medium:

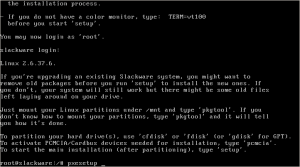
Instead of typing “setup” as usual, you type “pxesetup” this time:

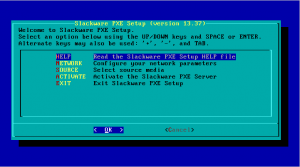
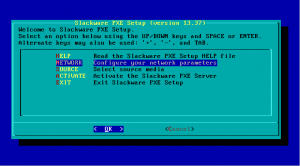
The “pxesetup” script will load a main dialog which is modeled after the Slackware setup:

There are four relevant main selections (apart from EXIT which will drop you back to the prompt): HELP, NETWORK, SOURCE and ACTIVATE. I will go through these choices using the screenshots below, and you will see that there is surprisingly little for you to configure… it is very user-friendly.

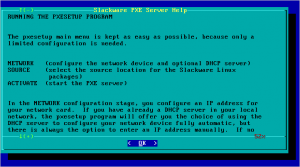
HELP:

The HELP section should be self-explaining – it is the manual for the PXE server:

NETWORK:

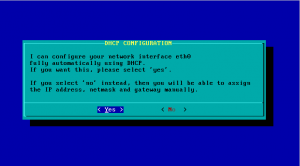
The NETWORK section is where you determine how the computer’s network card gets configured:

If you boot this PXE server in a network with a DHCP server for automatic network address assignment (as is the case with your typical domestic setup where the Cable/DSL router provides the DHCP server) then pxesetup will prompt you to use that. It saves you from typing IP addresses and netmasks. You can of course still decide to enter a specific static IP address even if there is a DHCP server available, by clicking “No”:

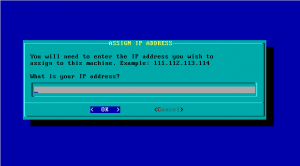
If no DHCP server was found in your local network (Slackware’s installer checks this when it boots and before you even see the command prompt), then have no choice but to enter a static IP address, netmask and possibly (but not necessarily) a default gateway:

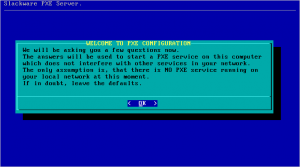
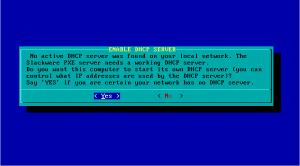
After the network interface has been configured, you will see a number of dialogs that let you determine whether the installer should start a DHCP server or not. If your network already runs a DHCP server, then it should not be disrupted by a “rogue” DHCP server. Instead, pxesetup will only provide the netboot functionality by acting as a proxy DHCP server,:

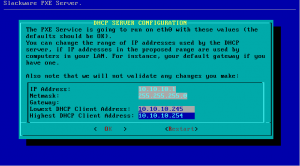
A working DHCP server is required for PXE boot. So, if your network does not provide one, pxesetup will start its own built-in DHCP server and it will show you two additional dialogs in order to collect the required information:

The setup program tries to make an educated guess about the range of IP addresses to be used if it is going to start a DHCP server. A dialog will present the proposed configuration. There are two configurable items in that dialog: the lower and upper values for the IP address range that will be used by the built-in DHCP server.

The IP addresses in this range will be available for the PXE clients that request a network boot configuration from the PXE server. Please check this address range, and if you think you have a computer in your network that uses an IP address in this range, you can change the values for the upper and/or lower values and resolve the conflict. This range of IP addresses must not be used by any computer on your LAN !

If you are satisfied with the values, select “OK” to continue to the next section.

SOURCE:

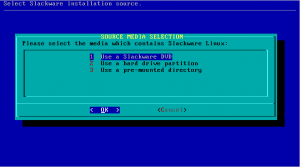
The SOURCE section uses the exact same dialog screens as you know from the Slackware installer. The only correct selection is “Use a Slackware DVD” (There is one exception which I will explain in more detail all the way down, and that is when you used the “usbimg2disk.sh” script to create a complete Slackware installer on a bootable USB stick):

The pxesetup program will find the Slackware DVD or CD and that’s it! More information is not required and the PXE server will be started automatically. Another service is started as well at that moment: a HTTP server which will serve up Slackware packages to the clients that use our PXE server.

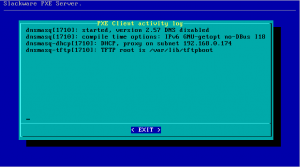
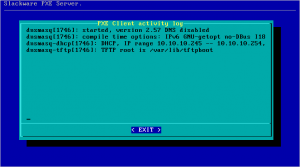
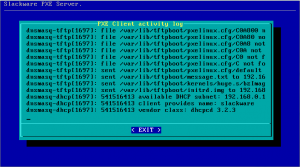
On-screen you will see the log file of the dnsmasq program which provides most of the netboot functionality. The first screenshot is the case where your network provides a DHCP server, while the second screenshot shows the situation where the Slackware PXE server has started its own internal DHCP server:

You can press the “EXIT” at any time, which will kill the PXE services (DHCP, TFTP and HTTP). You can then restart these services from the main menu again, by selecting the ACTIVATE entry.

PXE server works, what about PXE clients?

There is no fun with a PXE server if you do not have PXE clients that use it to boot from so that you can install Slackware on them! Make sure that the computer that you want to install Slackware on is connected to the network with a cable, and power it up. In the BIOS (or using whatever method is available for that machine) select “LAN boot” and watch what happens when the computer boots. You will see a prompt that says:

Press [F8] for a boot menu…

Actually pressing the [F8] key gives you two choices: continue with netbooting, or fallback to boot-up from the local hard disk. Or if you don’t do anything at all (takes 2 seconds only) your network card will start looking for a PXE server and the communication starts. This can be witnessed on the PXE server’s screen:

What happens next should all look pretty familiar: the Slackware welcome screen will appear and you can either press [ENTER] for the default kernel or make your own choice of parameters. The noteworthy part is where you get to select the package SOURCE. There is only one working option, and that is “Install from FTP/HTTP server“. After selecting this option, your computer’s network card will be configured using DHCP, and then you will notice that the questions for “URL of the ftp or http server where the Slackware sources are stored” and “What is the Slackware source directory?” have default values already filled-in! You should accept these values, since they are supplied by the PXE server!

The remaining steps should be familiar if you have ever tried installing from a HTTP server before.

  • Using a USB based installer instead of the CD/DVD !

I hinted at using a USB installer earlier on. So what else did I cook up? The most recent change I made to the “usbimg2disk.sh” script which you find in the “usb-and-pxe-installers” directory on the DVD or any Slackware mirror, added some functionality for running the PXE server off the USB stick. You need to create a full USB installer for this to work (“full” meaning that the USB stick is made bootable and all Slackware packages are copied to the stick).

  • If you boot this USB installer, the vfat partition on the USB stick (which contains the Slackware packages) will be automatically mounted on directory “/usbinstall”.
  • If you run “pxesetup” (or even if you run the normal “setup” by the way) and come to the point of selecting the packages location in the SOURCE menu, you should pick “3: Use a pre-mounted directory“. Actually, that item will be the default choice! When you select that option, you will notice that there is a value for that directory name already filled in. All you have to do is to accept that directory name.
  • Any questions? Leave them in the comments section below and I will answer them.

    Have fun! Eric

    By the way, have I ever told you how I hate the layout engine of wordpress? I am unable to make this post look the way I want it. Or is it the template? Apologies for the awkward placement of the images.

    Running X Window on MS Windows

    I am less than mobile at the moment. Recovery from surgery takes longer than I expected (one week has passed and I still can wear normal trousers only for short periods of time).

    It takes me some effort to go up two stairs and work at my Slackware desktop system, so that left me less than happy yesterday when I was facing the living room PC which is running Vista. I still wanted to work with my trusted Slackware display, and of course there is a solution for that.

    Ever heard of XDMCP or “X Display Manager Control Protocol“? A Linux (or as it stands, any UNIX) computer running a graphical login manager like KDM can be configured to listen for remote login requests made by computers on the LAN. The protocol used for this, is XDMCP.

    What I needed to do was twofold:

    1. enable XDMCP on my Slackware box, two floors up
    2. install an X server for MS Windows

    A Slackware computer does not enable XDMCP by default. The reason should be obvious – security reasons. Unlike remote logins using ssh, the XDMCP network packets travel across your wires unencrypted.

    If you are not too concerned about security (for instance, nobody else uses your local network) these simple steps enable XDMCP – if security is an issue you may want to have a look at NoMachine’s NX technology instead.

    • In the file “/etc/X11/xdm/xdm-config” comment out this line (by placing a ! in front):
      DisplayManager.requestPort: 0
      which prevents XDM from listening to XDMCP requests
    • In the file “/etc//X11/xdm/Xaccess” uncomment this line (remove the #):
      #* #any host can get a login window
      so that any host is allowed to see the login window
    • If you are going to use KDM as the graphical login manager, then edit the file “/etc/kde/kdm/kdmrc” and comment out this line in the section “[X-:*-Core]“:
      ServerArgsLocal=-nolisten tcp
      which inhibits KDM from listening on a network socket
      Also, look in section “[Xdmcp]” and change
      Enable=false
      to
      Enable=true
    • Finally, make sure that your machine starts in the graphical runlevel ( for Slackware that is runlevel 4) by editing the file “/etc/inittab” and changing
      id:3:initdefault:
      to
      id:4:initdefault:

    Simple enough isn’t it?

    When you have rebooted your Slackware computer, it will be listening on your local network for incoming login requests. When you have KDE installed, then Slackware will use KDM as the login manager. Otherwise,  XDM will be used. If you decide to install one of the 3rd-party Gnome add-ons that exist for Slackware (GnomeSlackBuild, gware, dropline, gnomeslacky) then by default GDM will be running to manage your logins.

    Next step is to install a X-Server for the MS Windows machine. There is one that I really like a lot. It is called Xming and you can find it at http://www.straightrunning.com/XmingNotes . It is a cross-compiled X.Org using the mingw compiler. Xming comes in two flavours – a version that is non-free (you have to pay to get access to the binaries) and a version that is in the “public domain” (you are free to use and distribute it). The author has written a page with an overview of the component licenses and has all his patches to the original X.Org/freetype/Mesa sourcecode available for download. The free version lags a bit behind with regards to version number but it does all the things I need. The installer comes with a handy tool called “Xlaunch” which is a wizard-like application to configure access to the remote server.

    After installation of Xming, and running Xlaunch, it took only a few mouseclicks and entering my Slackware hostname to be greeted by my familiar KDM login screen 🙂

    Note: if you have two Linux computers, the story is even simpler if you want to perform a remote graphical login. After enabling XDMCP on one computer, you run the following command on the other (assuming you are already running X locally and want a second parallel X session to the remote machine on IP address 192.168.0.11):

    • X -query 192.168.0.11 :1

    To switch between your local and remote X sessions, use the <Ctrl><Alt>F8 and <Ctrl><Alt>F7 key combinations.

    Enjoy! Eric

    Network configuration

    I am at home because I can not work… due to recent surgery (inguinal hernia) I can only “sit” (or rather, lean back) in a soft couch and can not wear other trousers than jogging pants. But this is boring! So I thought of stuff to do – things I had been neglecting.

    My Wiki was in dear need of new articles and article updates… voilá I had a goal!

    The first fruit of my labour is a new article about Slackware’s network configuration. While the online books like Slackware Linux Essentials (the official Slackbook) and Daniël de Kok’s Slackware Linux Basics are good introductions to ?ettin? the network up and running, an in-depth overview of the (im)possibilities and further background information on the format of the configuration file rc.inet1.conf has been lacking in Slackware. I know, maybe I should write a “man rc.inet1.conf” someday. And such a man page may even spring to life in the near future… certainly, the material I wrote for the Wiki will serve as input for that.

    Apart from documenting “normal” wired configuration, I spent a lot of time on wireless networking, because that is one of the areas people struggle most. And it really is so simple to setup – but without properly documented parameters it is harder than it should be. I hope the Wiki article will help people and if not, I always welcome questions, advice, hints and corrections. There is a chapter with some historical facts about the advancement of Slackware’s network support because I was involved in it a lot.

    Without further ado, I suggest that you take a look at “Configuring your network in Slackware“.

    Have fun reading! Eric

    © 2024 Alien Pastures

    Theme by Anders NorenUp ↑