Updates in liveslak
New ISO’s for Slackware Live Edition (based on liveslak-1.5.1) are available for download. You’ll find SLACKWARE (32bit/64bit), XFCE (32bit/64bit), DAW, LEAN, CINNAMON and MATE updated images (see below for download locations). I also refreshed the ‘bonus’ section with nvidia and broadcom-sta drivers matching the installed kernel, and other useful stuff.
All 32bit ISOs will boot a SMP kernel from now on, since the non-SMP kernels still refuse to execute the init script in the initramfs.
Firewall testers needed
This newest release of liveslak brings something that was recently discussed on linuxquestions.org. What about adding a basic firewall configuration to the freshly installed Slackware system? A new Slackware Linux computer may have several ports open already and some people are paranoid about any prying from the outside.
You will find as many firewall ideas as there are people in the discussion. So I based the core of the liveslak firewall on the code of Easy Firewall Generator of which I host a slightly modified version at http://www.slackware.com/~alien/efg/ . I added ipv6 support too. I know that this is old code, it’s also still using iptables instead of nftables but I wanted something functional that I knew well.
But in particular I want people to test the dialog-based configurator and give me feedback. You’ll notice that the configurator allows you to go back and forth in the various dialog windows. I also want to know what you think of the questions and the level of simplicity. Also look at the installed rc.firewall script. Does it do what you need it to do?
Also, does the resulting firewall configuration what you expected it to do? Is there anything that does not work?
Now, how does this firewall configurator work and where do I find it anyhow?
Every liveslak ISO since liveslak 1.5.1 has this functionality included. The firewall configurator will be invoked only when you use the (also included) setup2hd script to install the content of the Live ISO to your hard drive:

Adding a firewall is an optional step! You can choose to skip it during installation. The relevant files will be installed to your computer and you can call “myfwconf” at any time in future if you change your mind.
Note that this is a simple firewall. It does not do any NAT, it is meant for a single-homed single-purpose personal computer running Slackware which you want to protect from external attacks. The rc script will add a lot of sysctl tweaks to make your system safer, this is independent of opening (or not) any TCP or UDP ports via iptables.
Do I get this firewall when I use a Live ISO to install regular Slackware?
The firewall configurator is not available during installation of regular Slackware (i.e. from a HTTP/FTP mirror or a NFS/SMB network location).
If you would like to see the option of installing a firewall also for a regular Slackware installation, let me know. I am open to suggestions.
Some screenshots…
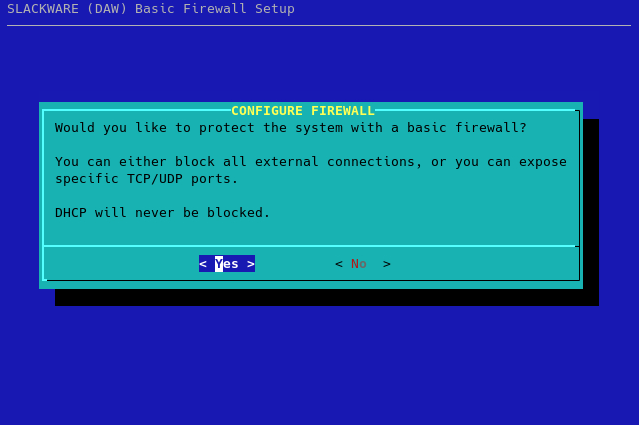
During the installation of the Live OS to your hard drive, the firewall dialog is inserted to the pkgtools setup directory so that it will be called during Slackware’s post-install configuration. The first question you will see when going through the configuration steps of your fresh installation is whether you want a firewall at all. You can opt out at this point, by selecting “No”, and no further questions will be asked:
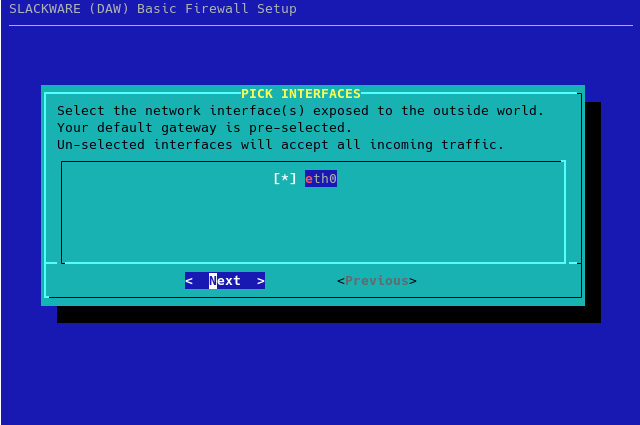
Next you will be asked to select the external network interface(s) that you want to have firewalled. Sometimes you’ll have more than one network interface (such as a laptop with its wired and wireless interfaces) which you want to protect with a firewall. This dialog will show you all detected interfaces and will have the one with the default gateway selected by default:
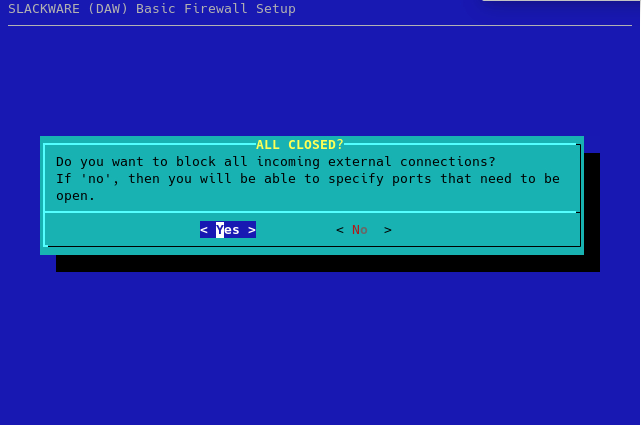
Next question to answer is whether you want a firewall to completely block all external connections (excluding DHCP traffic) or that you want to have specific ports open to the outside. Select “No” if you don’t want a completely blocking firewall:
If you selected “No” in the previous dialog, you will be presented with a choice of common network protocols that you can open up from the outside by selecting them:

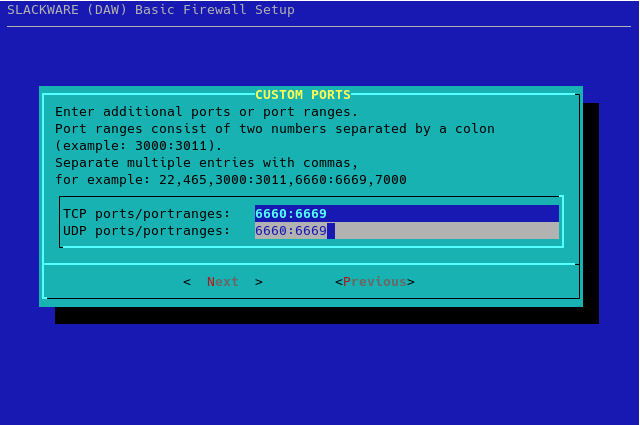
The next dialog allows you to specify additional TCP/UDP ports and/or port ranges to remain open:
You will have a final opportunity to review the choices you made:
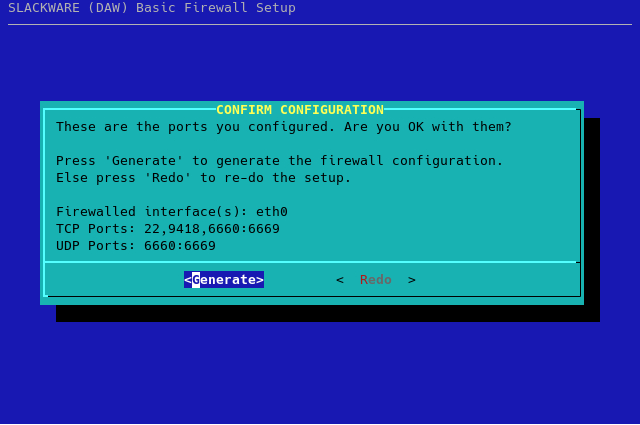
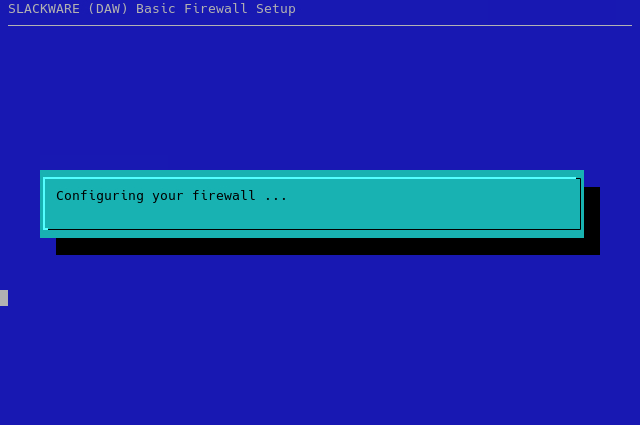
Pressing “Generate” will generate ‘ipv4’ and ‘ipv6’ configurations for iptables in the directory ‘/etc/firewall/’ and install the scripts “/etc/rc.d/rc.firewall”, “/usr/sbin/myfwconf” and “/var/lib/pkgtools/setup/setup.firewall”. The “myfwconf” script is the actual configurator shown in the screenshots. The “rc.firewall” script executes on boot and activates your firewall, whereas “setup.firewall” is a convenient script to be called from pkgtools:
Note that you can use the “Previous” button at any stage of the configuration to go to the previous dialog(s) and change your inputs. Pressing “Esc” at any time will bring you back to the very first dialog but then the default choice will become “No” instead of a “Yes”.
Download Slackware Live Edition
You can find a set of new ISOs based on liveslak on download.liveslak.org/latest/, the 64bit versions of them support Secure Boot.
Some people report that the ISO images won’t boot when copied (using ‘cp’ or ‘dd’ for instance) to a USB stick but they all boot properly if you use the ‘iso2usb.sh‘ script provided with liveslak to transfer the ISO content to a USB stick. Of course, this will give you nice persistent storage of all your modifications with optional data encryption, ideal for a secure on-the-road Slackware environment.
Get liveslak sources
The liveslak project is hosted in git. Its browsable cgit interface is here: https://git.liveslak.org/liveslak/
A set of the liveslak scripts can also be downloaded from http://www.slackware.com/~alien/liveslak/ or https://slackware.nl/people/alien/liveslak/
Remember Secure Boot
All 64bit ISOs are able to boot on a computer with SecureBoot enabled. You’ll need to enroll the liveslak public key (a SSL certificate in DER encoding format with the filename ‘liveslak.der‘) into such a computer during the very first boot. That certificate file can be found in the EFI partition inside the ISO image or on the USB stick you produced. It can also be downloaded from https://download.liveslak.org/secureboot/liveslak.der if you want. This DER certificate does not change when new ISO’s are released, so an updated ISO should boot normally on your SecureBoot-enabled system using the stored version of the ‘liveslak.der’ certificate which you enrolled in the past.
Cheers, Eric
Recent comments