If you live or work (as a journalist for example) in a country which limits free access to information, and you have difficulties penetrating the state firewalls for access to the outside world, you may want to read on. In this article I will inform you about an interesting Open Source VPN solution called Outline which puts you (or your company) in full control. I will also show in great detail how to setup such a VPN server yourself.
One caveat though – you’ll have to rent an online Linux server in a ‘free country’.
Luckily, the cost can be fairly low especially if you share your VPN server with friends or colleagues.
What is Outline
 Jigsaw is a daughter company of Alphabet, which is also Google’s parent company. It’s mission: “Jigsaw is a unit within Google that forecasts and confronts emerging threats, creating future-defining research and technology to keep our world safer.”
Jigsaw created the Open Source program “Outline” specifically to enable journalists and news organizations to work in adverse and hostile environments such as dictatorships with state-controlled and censored access to information. Access to information should always be free, uncensored and uncontrolled!
Outline is a client-server solution which uses the VPN capabilities of your device’s Operating System to encrypt and tunnel all your device’s traffic (like web searches, DNS queries) through a SOCKS proxy running on a remote server that you, or your organization, controls.
Outline is able to bypass the Great Firewall for instance. Note that Outline does not provide anonymity; all your traffic will exit from your Outline server. Your online activity will appear to originate there and not from the location you are actually in. Once you have installed an Outline client on your device (an Android phone, a Windows/Linux/Mac computer) you can try sites like dnsleak.com and ipv6leak.com to verify that your network communication is indeed not leaking data that may be snooped by your country’s enforcers. The pixelprivacy website provides a guide to help you understand, find and fix DNS leaks: https://pixelprivacy.com/resources/dns-leak/
The Outline Server runs on a Linux server. You use Outline’s Server Manager program to create the Outline Server configuration. The Manager application comes with pre-configured setups for Google Cloud Platform, Azure Web Services and DigitalOcean. While that’s nice, I will focus in this article on installing Outline on an online Linux machine that you yourself manage – any Linux cloud server, VPS or even your machine at home will do.
No commercial VPN offering will be as secure as the one that you run and control yourself! And if you wonder about the quality of the Outline source code – Jigsaw had their code audited twice, by Radically Open Security (in 2017) and Cure53 (in 2018) and you can read their reports online.
Outline Clients are available for Windows, Android, Linux, macOS and iOS. The client is what sets up the VPN connection to an Outline Server.
Use your own online VPS
Or any other kind of online subscription really. I am happy with the price, feature set and performance of the small dedicated servers offered by online.net aka scaleway. Especially the unmetered 1 Gbps connectivity is important when you want to offer a proxy server to accommodate your users’ secure internet access.
Your linux server needs to be able to run Docker, the light-weight containerization program. For obvious reasons, I will assume that your server is running Slackware, and you’ll have to install a couple of packages first through slackbuilds.org.
Setting up your Slackware server
The Outline Server runs as a docker container. We need to install docker first because it is not a standard offering in the Slackware distro.
Docker has a set of dependencies which we also need to install first: tini, google-go-lang, docker-proxy, libseccomp, runc and containerd.
To make our life easier, we will use sbopkg to manage building and installing these packages from the slackbuilds.org scripts.
If you did not yet install sbopkg, download and install it now (the current version of sbopkg may differ from the package version in the example below):
# wget https://github.com/sbopkg/sbopkg/releases/download/0.38.1/sbopkg-0.38.1-noarch-1_wsr.tgz
# installpkg sbopkg-0.38.1-noarch-1_wsr.tgz
If you are running Slackware-current instead of a stable release like 14.2, then you need to edit the following two files before you run sbopkg for the first time:
# vi /etc/sbopkg/sbopkg.conf
# vi /usr/sbin/sqg
… and change the lines:
REPO_NAME=${REPO_NAME:-SBo}
REPO_BRANCH=${REPO_BRANCH:-14.2}
to:
REPO_NAME=${REPO_NAME:-SBo-git}
REPO_BRANCH=${REPO_BRANCH:-current}
When that’s been taken care of, we need to initialize the local sbopkg database by letting it clone the git repository of slackbuilds.org. Next we run the SlackBuild Queuefile Generator (sqg) script which is part of the sbopkg package. The sqg script examines the “.info” files of the complete slackbuilds.org locally downloaded copy. It uses the dependency information inside these info files to generate “queue files”. A queue file contains the list of packages which have to be built before the actual program you are interested in… aka “the dependencies”. This saves us from reading these info files ourselves to find out what it is that we need to build and in what order.
# sbopkg -r
# sqg -a
After you have initialized the sbopkg program this way, you could now simply run:
# sbopkg -k -i docker
And that should compile and install all the docker dependencies (skipping those packages that are already installed to avoid duplicate effort) and finally, also the docker package.
There’s a snag however… when you install the “google-go-lang” package, it is not ready for use yet. The google-go-lang package installs a profile script “/etc/profile.d/go.sh” which is essential to compile the “runc” and “containerd” packages. So, we cut the compilation in two halves and run the “go.sh” script in between:
# sbopkg -k -i google-go-lang
# source /etc/profile.d/go.sh
# sbopkg -k -i docker
Note that sbopkg checks whether a queuefile exists with the name of the program you attempt to compile. Therefore you will be asked the question whether you want to compile just the “docker” SlackBuild script or the “docker” queuefile. You must select “Queuefile (Q)”.
Assuming the compilation runs error-free you end up with a batch of packages which sbopkg will automatically have installed for you. If you want to save these packages for re-use, you will find them in the “/tmp” directory or whatever your $TMP variable points to. Save them to a less volatile location.
When the packages are installed, we still do not have a system which runs Docker containers automatically. So we add the following block of script code to the file “/etc/rc.d/rc.local” – this causes the Docker daemon to start automatically on every boot:
if [ -x /etc/rc.d/rc.docker ]; then
  # Start Docker daemon
  echo "Starting Docker Daemon: /etc/rc.d/rc.docker start"
  /etc/rc.d/rc.docker start
fi
And to achieve a proper shutdown of your Docker containers when you want to shutdown your server, add the following code block to the file “/etc/rc.d/rc.local_shutdown” – note that this file does not exist by default on a Slackware server, so you may have to create the file “/etc/rc.d/rc.local_shutdown” first, and make it executable:
if [ -x /etc/rc.d/rc.docker ]; then
  # Stop Docker daemon
  echo "Stopping Docker Daemon: /etc/rc.d/rc.docker stop"
  /etc/rc.d/rc.docker stop
fi
We will start docker manually this one time, because I do not want to reboot:
# /etc/rc.d/rc.docker start
This ends the Slackware server preparation for Outline.
Setting up the Outline server
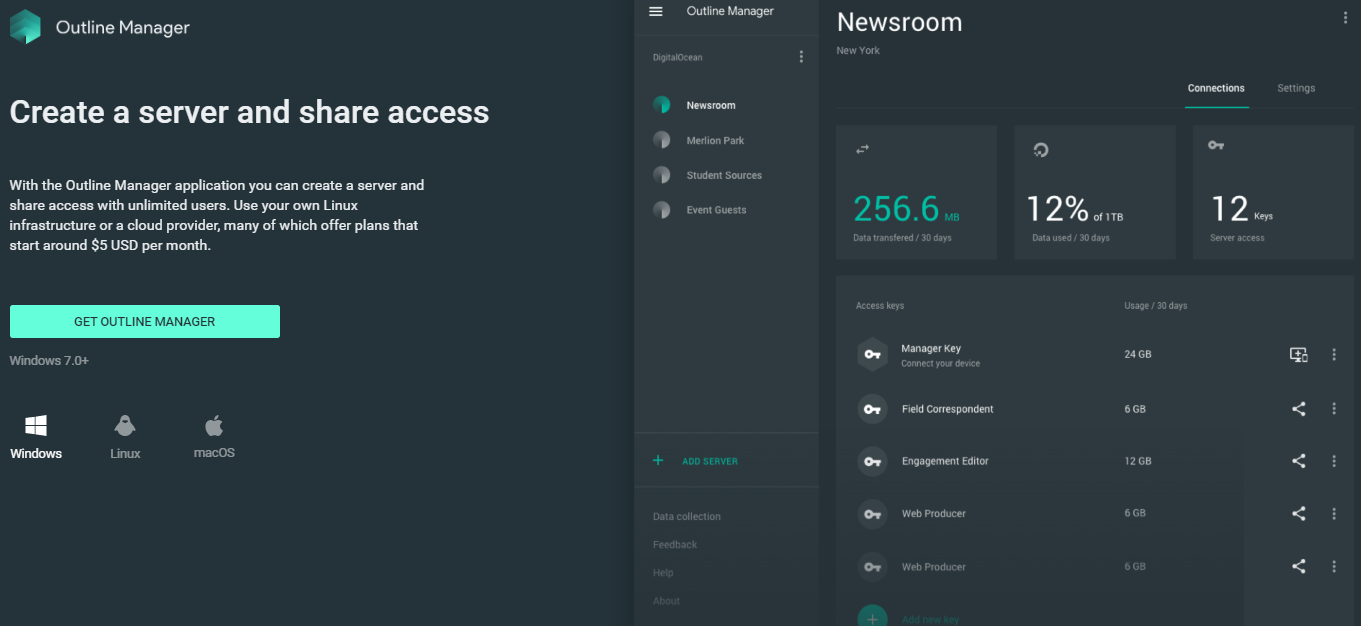
The Outline website offers downloads for the Outline Manager. This software sets up and manages your Outline VPN server and it also generates the access keys that a computer or smartphone needs in order to connect with your Outline Server. You’ll generate separate access keys for every user of your Outline server. Never share a key with more than one user or they will be able to see the other’s online activity and all data!
Outline Manager is available as a Windows or MacOS binary and a Linux AppImage. We’ll proceed to download the variant which suits our OS:
Again, I guess it is logical that I downloaded the Linux AppImage because my laptop runs Slackware 🙂
Start the binary after making it executable:
alien@hogan:~$ chmod +x ~/Downloads/Outline-Manager.AppImage
alien@hogan:~$ ~/Downloads/Outline-Manager.AppImage
(electron) 'getName function' is deprecated and will be removed. Please use 'name property' instead.
Outline Manager is starting
Launching web app from outline://web_app/index.html?version=1.3.0&sentryDsn=https%3A%2F%2F533e56d1b2d64314bd6092a574e6d0f1%40sentry.io%2F215496
(node:13952) ProtocolDeprecateCallback: The callback argument of protocol module APIs is no longer needed.
(node:13952) ProtocolDeprecateCallback: The callback argument of protocol module APIs is no longer needed.
Checking for update
Generated new staging user ID: 7d7c2930-c574-5d3f-afd9-20401310d20f
Update for version 1.3.0 is not available (latest version: 1.3.0, downgrade is disallowed).
.. and the GUI appears:
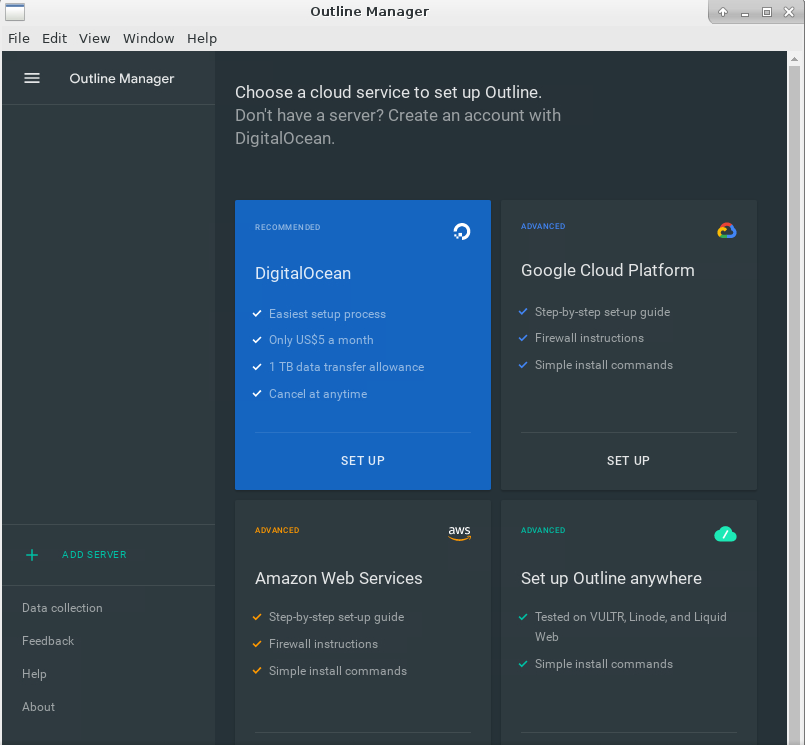
The first screen in the Outline Manager offers four choices in setting up an Outline Server. If you already have a paid account with DigitalOcean, Google Cloud Platform or Azure Web Services, you can click the corresponding square and you’ll have a server setup in no time. As I saiod before, I am more interested in a self-hosted VPN on a server which I control. So click the fourth square labeled “Set up Ouline anywhere” and this brings us to the second screen:
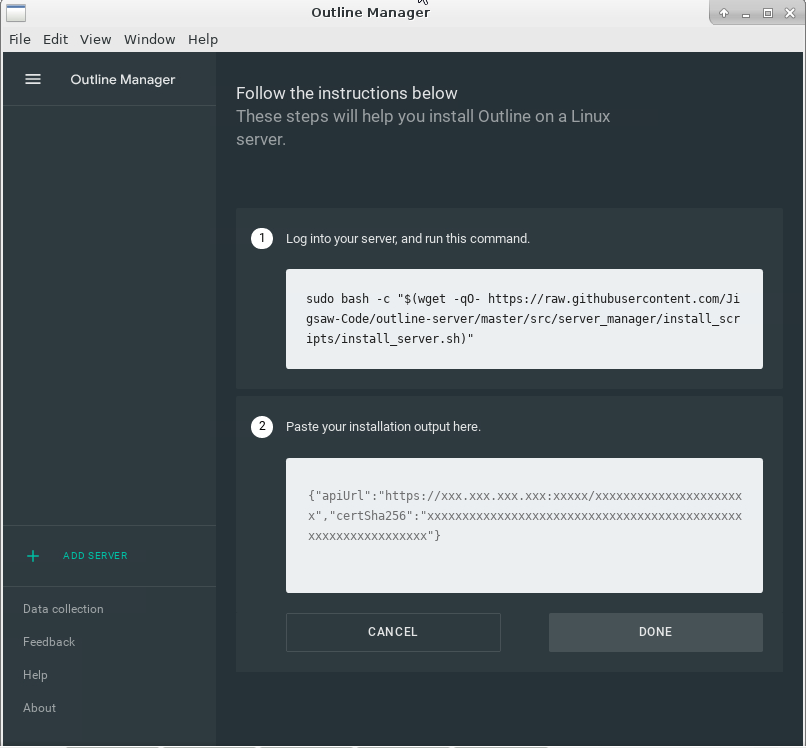 This shows a two-stage approach: the first box shows a command we need to run on a server we control; the command will download and prep an Outline Docker container. You’ll notice below that “Shadowbox” is started, this is the ShadowSocks server which is the actual proxy implementation. Additionally a “Watchtower” is started, this is a service which will keep your Outline Docker container updated automatically with security/bugfixes and new features.
At the end of the setup, a unique configuration string will be emitted which we then have to enter in the Manager‘s input field as proof that we control the server. This is what that looks like:
alien@server:~$ sudo bash -c "$(wget -qO- https://raw.githubusercontent.com/Jigsaw-Code/outline-server/master/src/server_manager/install_scripts/install_server.sh)"
> Verifying that Docker is installed .......... OK
> Verifying that Docker daemon is running ..... OK
> Creating persistent state dir ............... OK
> Generating secret key ....................... OK
> Generating TLS certificate .................. OK
> Generating SHA-256 certificate fingerprint .. OK
> Writing config .............................. OK
> Starting Shadowbox .......................... OK
> Starting Watchtower ......................... OK
> Waiting for Outline server to be healthy .... OK
> Creating first user ......................... OK
> Adding API URL to config .................... OK
> Checking host firewall ...................... OK

CONGRATULATIONS! Your Outline server is up and running.

To manage your Outline server, please copy the following line (including curly
brackets) into Step 2 of the Outline Manager interface:

{"apiUrl":"https://xx.xx.xx.xx:yyyyy/zzzzzzzzzzzzzzzzzz","certSha256":"e4888ec20b2302bcec440655e515625de7a9b6dfe180d7ecd54791a644a6ae32"}

If you have connection problems, it may be that your router or cloud provider
blocks inbound connections, even though your machine seems to allow them.

Make sure to open the following ports on your firewall, router or cloud provider:
- Management port yyyyy, for TCP
- Access key port bbbbb, for TCP and UDP
These last two lines mention the (randomly chosen during installation) TCP and UDP ports which are used by the Outline Server. If your online server is firewalled (and it should be… if not, go to http://www.slackware.com/~alien/efg and generate a firewall configuration stat) you need to open these TCP & UDP ports in your firewall before pasting the red line into your Outline Manager window.
If the firewall is OK, and you enter the above red line, then the Manager will contact the Server to validate the setup. And once that succeeds, you’re all set!
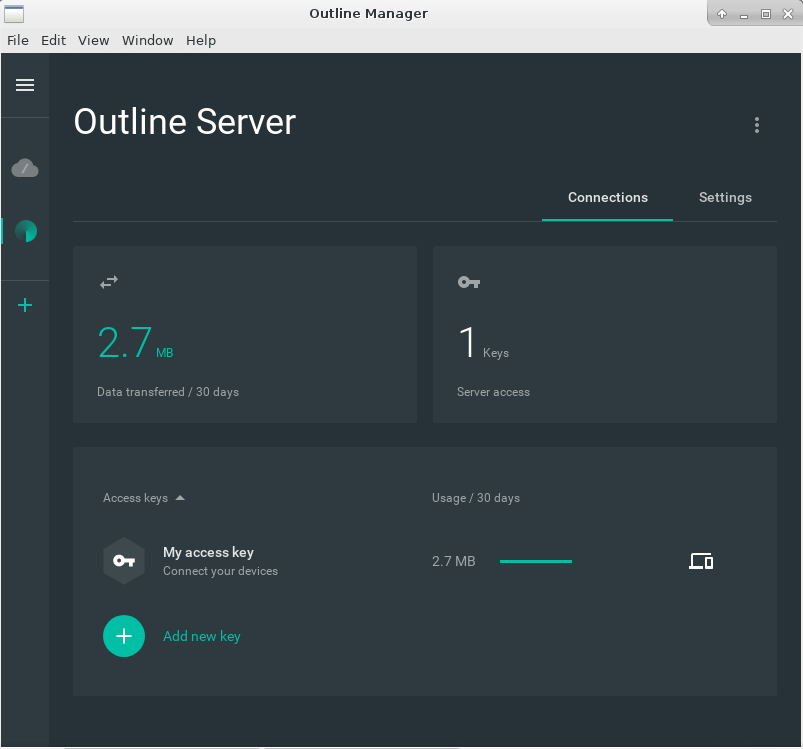
The Outline Manager window will look like below with a configured Outline Server. One single access key has already been generated for you as part of the server installation, and you can add more. You can also revoke keys that you shared and that are in use by people you don’t trust, and you see the amounts of data traffic each user consumes (but you can not see the actual content):
Install an Outline Client
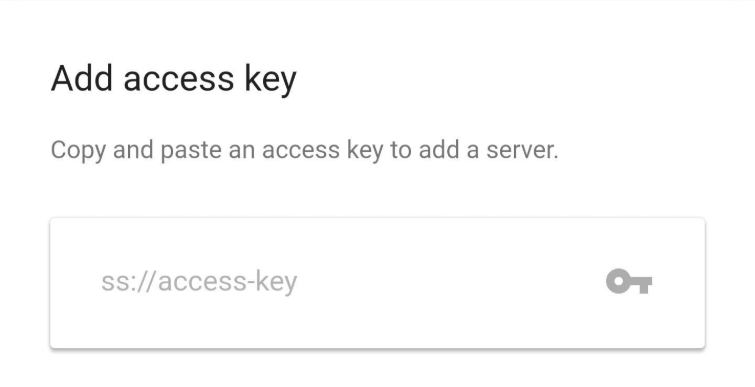
On your computer you can download and install an Outline Client from the getoutline.org web site, for your phone you can get the Outline app from the respective Store. The Linux Outline Client is offered as an AppImage similar to the Manager application, and it runs on Slackware:

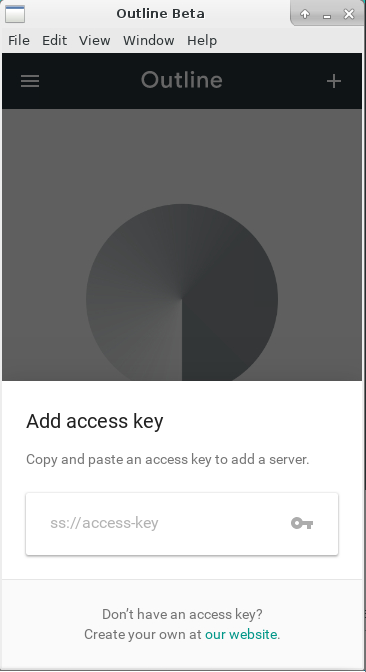
The client needs an access key so it knows where to connect and how to authenticate. An access key is nothing more than a URI which starts with “ss://”
As a server administrator, you use the Outline Manager application to create and share these access keys with your prospective users in a secure manner – by using a chat app with end-to-end encryption or encrypted emails for instance. The Access key contains the IP address of your server, not a hostname, so that DNS lookups are not needed to make the initial connection.
After connecting the Client to the Server and establishing a VPN tunnel (or rather a sophisticated encrypted proxy setup), all subsequent DNS queries (and the rest of your online requests) are tunneled to the Outline Server.
And once the access key is loaded into the Client, all you need to setup a VPN at any time is just to open the application and press the big “Connect” button.
Summarizing
I hope this article helps some groups of people or organizations in non-free countries to re-gain their access to sources of uncensored information. The Outline VPN software is Open Source, free to use and security-audited. There’s a (small) cost involved to run an online Linux server – either a cheap Virtual Private Server (VPS) or a real server in a network you control. Take good care to rent a server with a generous monthly bandwidth plan to avoid unexpected high cost afterwards. Online.net offers servers with unlimited bandwidth for instance.
Good luck out there!
Eric
Recent comments