My thoughts on Slackware, life and everything

Tag: pxe

Slackware Live Edition Beta 8

blueSW-64pxYesterday I uploaded new ISO images for the Slackware Live Edition. They are based on the liveslak scripts version 0.8.0 (beta 8). This version of Slackware Live Edition is using Slackware64-current dated “Fri Apr 15 20:37:37 UTC 2016” as the base. Indeed, that is Slackware 14.2 Release Candidate 2, we are getting nearer a stable release.

For background info on my project “Slackware Live Edition” please read the previous articles.

I created an ISO for the following Live OS variants:

  • SLACKWARE (full Slackware, no 3rd party software)
  • XFCE (trimmed-down but quite functional version of Slackware, fits on a CDROM media)
  • PLASMA5 (full Slackware minus KDE4, and then extended with Plasma 5 and packages from the AlienBOB repository such as calibre, chromium, ffmpeg, libreoffice, openjdk, p7zip, qbittorrent, veracrypt, vlc)
  • MATE (full Slackware minus KDE4, and then extended with the Mate Desktop Environment)

What’s new in 0.8.0?

The ISO images I mentioned above are all 64bit. This time, to humor the complainer on LQ who felt insulted because I was neglecting 32bit Slackware users, I have added a 32bit version of the SLACKWARE variant too.

New functionality of the Live OS:

  • Two new boot parameters “nfsroot” and “nic” add support for network booting the Live OS (PXE client).
    The Live filesystem will be assembled from squashfs modules located on a NFS export. A network-booted Live OS will have no persistence due to a limitation still present in the overlayfs (no writable filesystem layer on NFS). See the documentation on how to use this new network-boot feature.
    A future version of liveslak will allow you to run Slackware Live Edition as a PXE server as well as a PXE client. You can bring a single USB stick to a LAN party and in a few minutes’ time, all computers (connected through cables and switches) will be running your Slackware Live Edition…
  • The “setup2hd” hard disk installer was largely re-written to address a ‘logical error’ in determining what needed to be installed. This time, the script will really and properly install the full OS minus the Live modifications to your hard drive.
  • More customization options were added to liveslak, for those who develop their own variant of Slackware Live. This includes a “post-installation hook” in the “setup2hd” script which allows you to write a custom post-installation script that does things I do not want to add to the setup2hd script itself.
    The purpose of these customizations is that you do not have to edit the liveslak scripts themselves which makes it easier to maintain your custom product as I keep developing liveslak.
  • The initrd.img file is now compressed with XZ instead of GZIP. This reduces its size with roughly 30% – which is the space I needed to add network kernel modules and firmware to the initrd in order to support network booting. The XFCE ISO still fits on a CDROM!
    I could not detect longer boot-up times due to the switch to XZ compression.
  • An option was added to enable 32bit EFI support in the 32bit version of Slackware Live Edition – however this is disabled by default, since UEFI-capable computers are 64bit machines and you should probably be using the 64bit OS then.
  • Small improvements and bug fixes were applied to liveslak. Check out the commit log if you are interested.

Download the ISO images

As stated above, you can choose between several variants of Slackware Live Edition. There’s ISO images for the SLACKWARE, XFCE, PLASMA5 and MATE flavours using the latest Slackware-current packages available (Fri Apr 15 20:37:37 UTC 2016) as well as the latest Plasma 5 release  which I yet have to upload to ‘ktown‘ (Frameworks 5.21.0, Plasma 5.6.3 and Applications 16.04.0 on top of Qt5 5.6.0). And Mate was updated to 1.14.

Download locations for the ISO images plus their MD5 checksum and GPG signature should be available soon at any of the following locations – look in the “0.8.0” subdirectory for ISOs based on the liveslak-0.8.0 scripts. I made a symlink called “latest” which will always point to the latest set of ISO images.

Good to know when you boot the ISO

The Slackware Live Edition comes with two user accounts: user ‘root’ (with password ‘root’) and user ‘live’ (with password ‘live’). My advice: login as user live and use “su” or “sudo” to get root access.
Note: the “su” and “sudo” commands will ask for the ‘live’ user’s password!

Consult the documentation for assistance with the various boot parameters you can use to tailor the Live OS to your needs.

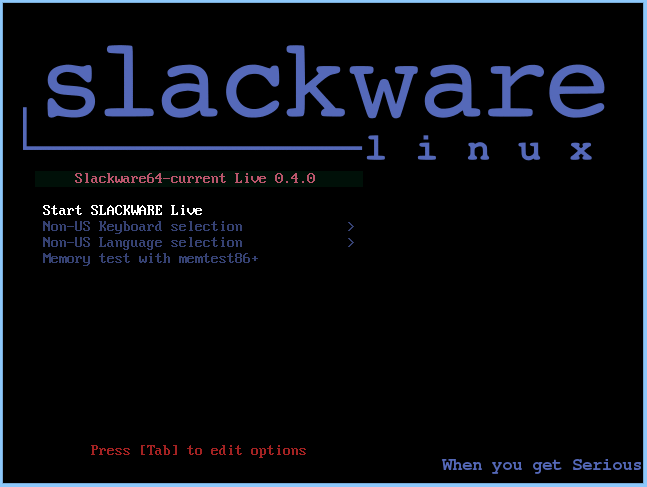
Slackware Live Edition is able to boot both on BIOS-based computers (where syslinux takes care of the boot menu) and UEFI systems (where grub builds the boot menu, which looks quite similar to the syslinux menu):

slackwarelive-0.4.0_syslinux

I will soon update the original blog article (http://alien.slackbook.org/blog/slackware-live-edition/) because that is what most sites are linking to. The information in there is not reflecting the liveslak’s current capabilities and may present the wrong picture. I will save the original article under a different name.

Spinoffs

  • There is now a Live ISO for people who want to experiment with the Cinelerra CV non-linear video editor. It is using the liveslak scripts and all the customization I enabled in those scripts. It is called CINELIVE, see https://cinelerra-cv.org/cinelive.php .
  • FluxFlux , a Linux Live for older computers, plans to switch to liveslak: https://fluxflux.net/?p=647 but the project seems to be stalled for the moment.

Have fun! Eric

Out of the box PXE install server in Slackware 13.37

I had a lot of fun creating my Easter Egg for Slackware 13.37. It did not matter that Pat announced it on the slackware.com front page – it’s OK that it got some exposure. The added functionality is useful enough.

So, why an easteregg at all… and what about that PXE server?

In the last weeks before the eventual release it became pretty clear that the go-live date would be somewhere around Easter. All showstoppers had been dealt with. There was a bit of leeway and I skimmed through my TODO file (where I write down the ideas I get for Slackware improvements, as well as reminder notes for fixes that I think are important but not urgent). One of the ideas I wanted to implement was a PXE server that would run out of the box when booting the Slackware DVD.

I decided to do a quick hack session and come up with a proof of concept to see if it worked. Initially my plan was to incorporate the result into a custom initrd to be posted on my own web site, but after two (long!) nights of trying I had something that could be tested by others in the core team.

My good pal mRgOBLIN is a willing subject for this kind of non-public testing. He hammers at everything network related that I add to the installer, and he tends to find all the bugs and corner cases.

Two more days, and I had something that was working well, complete with documentation, and Pat Volkerding added it without hesitation and without mentioning it in the ChangeLog.txt. It has been inside the Slackware installer since April 15… and no one noticed. This was intended as an easteregg (well, at least that’s what I kept calling it) but it adds real valuable functionality to the installer. It’s more than just a prank.

Writing the scripts actually uncovered a couple of bugs in the network configuration of the installer which I fixed. Therefore I decided to write an article about how this “pxeserver”can be used by you.

You probably know that I have an article in my wiki about setting up a PXE boot server for network installation (it’s at http://alien.slackbook.org/dokuwiki/doku.php?id=slackware:pxe) which is what Slackware’s “usb-and-pxe-installers/README_PXE.TXT” file is based on. But even with all the details in those instructions, it’s still one bridge too far for many people – and not everybody has the luxury of having a Slackware server running in his network.

Setup a PXE server

So, one of the ideas written in my TODO file was “add a PXE server to the Slackware installer“. My intention was to provide an easy method for network installations of Slackware, provided you have one spare computer with a network card (no wireless!!!). This is how it goes, using the Slackware 13.37 installation media:

You insert the Slackware 13.37 DVD (or CD1) into the spare computer, and boot from the optical medium:

Instead of typing “setup” as usual, you type “pxesetup” this time:

The “pxesetup” script will load a main dialog which is modeled after the Slackware setup:

There are four relevant main selections (apart from EXIT which will drop you back to the prompt): HELP, NETWORK, SOURCE and ACTIVATE. I will go through these choices using the screenshots below, and you will see that there is surprisingly little for you to configure… it is very user-friendly.

HELP:

The HELP section should be self-explaining – it is the manual for the PXE server:

NETWORK:

The NETWORK section is where you determine how the computer’s network card gets configured:

If you boot this PXE server in a network with a DHCP server for automatic network address assignment (as is the case with your typical domestic setup where the Cable/DSL router provides the DHCP server) then pxesetup will prompt you to use that. It saves you from typing IP addresses and netmasks. You can of course still decide to enter a specific static IP address even if there is a DHCP server available, by clicking “No”:

If no DHCP server was found in your local network (Slackware’s installer checks this when it boots and before you even see the command prompt), then have no choice but to enter a static IP address, netmask and possibly (but not necessarily) a default gateway:

After the network interface has been configured, you will see a number of dialogs that let you determine whether the installer should start a DHCP server or not. If your network already runs a DHCP server, then it should not be disrupted by a “rogue” DHCP server. Instead, pxesetup will only provide the netboot functionality by acting as a proxy DHCP server,:

A working DHCP server is required for PXE boot. So, if your network does not provide one, pxesetup will start its own built-in DHCP server and it will show you two additional dialogs in order to collect the required information:

The setup program tries to make an educated guess about the range of IP addresses to be used if it is going to start a DHCP server. A dialog will present the proposed configuration. There are two configurable items in that dialog: the lower and upper values for the IP address range that will be used by the built-in DHCP server.

The IP addresses in this range will be available for the PXE clients that request a network boot configuration from the PXE server. Please check this address range, and if you think you have a computer in your network that uses an IP address in this range, you can change the values for the upper and/or lower values and resolve the conflict. This range of IP addresses must not be used by any computer on your LAN !

If you are satisfied with the values, select “OK” to continue to the next section.

SOURCE:

The SOURCE section uses the exact same dialog screens as you know from the Slackware installer. The only correct selection is “Use a Slackware DVD” (There is one exception which I will explain in more detail all the way down, and that is when you used the “usbimg2disk.sh” script to create a complete Slackware installer on a bootable USB stick):

The pxesetup program will find the Slackware DVD or CD and that’s it! More information is not required and the PXE server will be started automatically. Another service is started as well at that moment: a HTTP server which will serve up Slackware packages to the clients that use our PXE server.

On-screen you will see the log file of the dnsmasq program which provides most of the netboot functionality. The first screenshot is the case where your network provides a DHCP server, while the second screenshot shows the situation where the Slackware PXE server has started its own internal DHCP server:

You can press the “EXIT” at any time, which will kill the PXE services (DHCP, TFTP and HTTP). You can then restart these services from the main menu again, by selecting the ACTIVATE entry.

PXE server works, what about PXE clients?

There is no fun with a PXE server if you do not have PXE clients that use it to boot from so that you can install Slackware on them! Make sure that the computer that you want to install Slackware on is connected to the network with a cable, and power it up. In the BIOS (or using whatever method is available for that machine) select “LAN boot” and watch what happens when the computer boots. You will see a prompt that says:

Press [F8] for a boot menu…

Actually pressing the [F8] key gives you two choices: continue with netbooting, or fallback to boot-up from the local hard disk. Or if you don’t do anything at all (takes 2 seconds only) your network card will start looking for a PXE server and the communication starts. This can be witnessed on the PXE server’s screen:

What happens next should all look pretty familiar: the Slackware welcome screen will appear and you can either press [ENTER] for the default kernel or make your own choice of parameters. The noteworthy part is where you get to select the package SOURCE. There is only one working option, and that is “Install from FTP/HTTP server“. After selecting this option, your computer’s network card will be configured using DHCP, and then you will notice that the questions for “URL of the ftp or http server where the Slackware sources are stored” and “What is the Slackware source directory?” have default values already filled-in! You should accept these values, since they are supplied by the PXE server!

The remaining steps should be familiar if you have ever tried installing from a HTTP server before.

  • Using a USB based installer instead of the CD/DVD !

I hinted at using a USB installer earlier on. So what else did I cook up? The most recent change I made to the “usbimg2disk.sh” script which you find in the “usb-and-pxe-installers” directory on the DVD or any Slackware mirror, added some functionality for running the PXE server off the USB stick. You need to create a full USB installer for this to work (“full” meaning that the USB stick is made bootable and all Slackware packages are copied to the stick).

  • If you boot this USB installer, the vfat partition on the USB stick (which contains the Slackware packages) will be automatically mounted on directory “/usbinstall”.
  • If you run “pxesetup” (or even if you run the normal “setup” by the way) and come to the point of selecting the packages location in the SOURCE menu, you should pick “3: Use a pre-mounted directory“. Actually, that item will be the default choice! When you select that option, you will notice that there is a value for that directory name already filled in. All you have to do is to accept that directory name.
  • Any questions? Leave them in the comments section below and I will answer them.

    Have fun! Eric

    By the way, have I ever told you how I hate the layout engine of wordpress? I am unable to make this post look the way I want it. Or is it the template? Apologies for the awkward placement of the images.

    © 2024 Alien Pastures

    Theme by Anders NorenUp ↑