Linux and Android
No worries, even though this article is a side-step into the Android ecosystem, it is still on-topic for Slackware users.
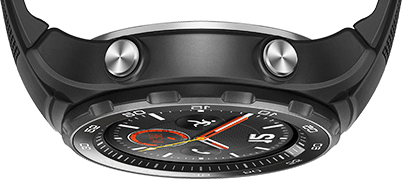
I recently bought a Huawei Watch 2, when it was in a sale on Amazon. It’s the 4G version and long ago I had made a deal with myself that if a smartwatch with GPS and room for a SIM card would go below 300 euros, I was going to buy it. And so it happened, and the watch is a lot of fun. It’s incredibly light-weight and fits comfortably. Despite grumpy reviews it is a solid design and does not feel like cheap junk at all. I still need to find a provider who will allow me to use a second SIM card for my mobile subscription, so for the moment this watch is SIM-less. It talks to my phone over Wi-Fi and Bluetooth so nothing’s lost and I have full connectivity on the watch. The idea is to have a SIM in the watch so I can go outdoors for a long run without having to take my phone with me.
An Android Wear watch will pair with only one single phone. It’s quite picky about its friends. Therefore, if you switch phones and want to pair the watch to your new phone, it will wipe and reset itself to factory defaults. That was not what I wanted when I traded my four years old HTC One M8 for a HTC 10 phone. Yes, that too was a bargain sale – I got it for 272 euros which is roughly 65% of the regular price around here.
So I went searching for ways around my dilemma, and as it turns out: it is quite easy to de-couple an Android watch from its pal the phone, and let it pair with a new phone, while keeping its current settings and content. I am going to document that process here, because much of it is generic enough that you can use it to manage the internals of any Android device, like your phone.
The singularly important tool for interacting with Android devices is the Android Debug Bridge, or “adb” for short. It’s a program or rather a suite of tools that run on Linux, Windows and OS/X and allow you to execute commands remotely on the Android device. Commonly the bridge is used over a USB connection between Computer and Android device, but in this article I will show you that you can just as easily use a Wireless connection.
Installing Android Debug Bridge
First, let’s setup the Linux computer. In our case, that will of course be a Slackware computer, right? 🙂
ADB is a small part of the “Android SDK Platform-Tools” and in the past, this meant you had to install the complete SDK in order to gain access to adb and fastboot. Recently, Google has started making adb and friends available as a separate, much smaller (around 5 MB) ZIP download. The URL is static but the content will be refreshed from time to time.
- Download the ZIP containing the platform-tools for Linux:
wget https://dl.google.com/android/repository/platform-tools-latest-linux.zip - Extract the ZIP file to /usr/local (you need to be root):
unzip -d /usr/local platform-tools-latest-linux.zip
That leads to a directory /usr/local/platform-tools/ with a lot of stuff in it. - Create two wrapper scripts for the ‘adb’ and ‘fastboot’ binaries inside the extracted directory. This way, typing “adb” or “fastboot” will work in any directory:
cat << EOT > /usr/local/bin/adb
#!/bin/bash
/usr/local/platform-tools/adb “$@”
EOT
chmod 755 /usr/local/bin/adbcat << EOT > /usr/local/bin/fastboot
#!/bin/bash
/usr/local/platform-tools/fastboot “$@”
EOT
chmod 755 /usr/local/bin/fastboot - Download and install a UDEV rules file which identifies most if not all known Android devices and makes udev create device-files for them when the Android connects (strictly speaking, his is only relevant for remote debugging over USB… if you connect over wireless then device-files are not used). The file is community-maintained and part of a git repository for Ubuntu. After installing the UDEV rules, you need to reload udevd’s cached rules:
wget -O /etc/udev/rules.d/51-android.rules https://raw.githubusercontent.com/NicolasBernaerts/ubuntu-scripts/master/android/51-android.rules
chmod 644 /etc/udev/rules.d/51-android.rules
/etc/rc.d/rc.udev reload
You’re all set now to connect to your Android device and interact with it. Thanks to the UDEV rules you’ve installed, you won’t have to be root to use ‘adb‘ and ‘fastboot‘ as long as your user account is a member of the “plugdev” group.
Tip: if you have a USB stick with the Slackware Live Edition, you can repeat the above with one change: instead of installing the debugger tools to /usr/local , the wrapper scripts to /usr/local/bin and the UDEV rules to /etc/udev/rules.d/ you (i.e. with “/” as the root) you install the lot to the /rootcopy/ directory of the USB stick, keeping the same directory structure and thus ending with /rootcopy/usr/local/bin/ and /rootcopy/etc/udev/rules.d/ . That will make your Slackware Live a powerful tool to manage Android devices.
Enable remote adb debugging
Android devices do not allow remote debugging by default and it is not immediately visible how to enable this capability. You will have to enable developer options on your Android. This takes the form of a secret ritual… and enables several new menus and options in your Settings.
First, generic Android instructions:
- Open the “Settings” on your Android.
- Scroll down to “About phone” (or “About Tablet”)
- Find the entry which shows the “Build number”.
- Repeatedly, tap the “Build number” line. After a couple of taps, a popup message tells you that you are an “X amount” of clicks away from becoming a Developer. As you keep tapping the number “X” will decrease to zero which completes the process.
Android Wear instructions:
- Swipe down from the top of the screen.
- Tap the “Settings” icon (gear icon).
- Scroll down and tap “System”.
- Scroll down and tap “About”.
- Then scroll down and tap “Build Number” repeatedly.
- Keep tapping until you get the message “You’re now a developer”.
- Swipe to the right twice.
- Scroll down and you’ll see new “Developer Options”.
In the new Developer Options menu you will find “ADB debugging” which you have to enable. For the Android Wear device, it makes sense to also enable “Debug over Wi-Fi” since at least my watch does not have a micro-USB connector.
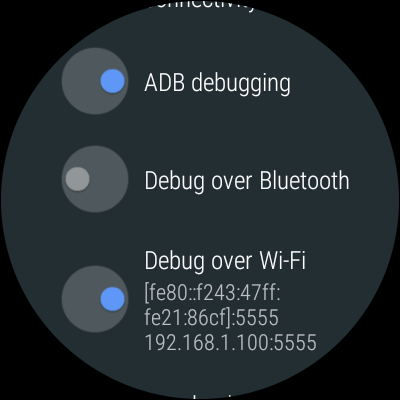
If you look at the screenshot you’ll notice that the watch’s IP address is shown in the “Debug over Wi-Fi” section. We will need that IP address soon.
Connect to Android using adb
Connecting to a device which is connected through USB is simple. You request an overview of detected devices and if your device (phone or tablet) is detected, it will be listed and you can control it remotely:
adb devices
With a smartwatch, you first need to connect to its IP addres over the port number shown in the screenshot above:
adb connect 192.168.1.100:5555
You do not need to be root to do this.
Any of the above two commands will start the adb daemon if it is not yet running. In case of connecting to a smartwatch, you will have to accept the incoming connection on the watch-side.
You can now start sending commands to be executed on the Android device. For phones, this is usually part of the rooting process followed by installing a custom ROM. That is beyond the scope of this article.
Pair your watch with a new phone
Now that the pre-requisites have been taken care of, let’s go through the steps to pair the Android Wear watch with a new phone. You do not need to be root to do this.
- Disable Bluetooth on your old (if you have it still) and new phone.
- Open an adb shell – basically a remote shell on the watch. You’ll notice the prompt (sawshark:/ $), sawshark is the Android codename for my Huawei Watch 2 Sport:
adb shell sawshark:/ $ - Execute the command that instructs Package Manager to clear stored data & cache (“pm clear”) of the Google Play Services (“com.google.android.gms”) and reboot the watch:
pm clear com.google.android.gms && rebootThis clears the pairing information including the keys to communicate securely with the paired phone, but does not trigger a factory reset which happens if you un-pair the phone via the watch settings menu.
- Make sure you have installed the Android Wear app on your new phone but do not enable Bluetooth on the phone yet.
- From the computer, connect to your watch again over Wi-Fi (accept the incoming connection request on your watch) using the “adb connect” command shown earlier. Start a new “adb shell”.
- At the remote prompt enter the command to make the watch visible for Bluetooth discovery by telling Activity Manager to start an Activity specified by the intent “android.bluetooth.adapter.action.REQUEST_DISCOVERABLE” (and make sure you accept the ‘OK’ prompt on your watch):
am start -a android.bluetooth.adapter.action.REQUEST_DISCOVERABLE - Now is the time to start Android Wear on your new phone, allow the app to turn on Bluetooth and start scanning for a Android Wear watch to pair with. When the phone finds your watch, an accept request will show on both. Once you have accepted both prompts, new pairing keys will be generated and stored in the watch’s Google Play Services app. You can synchronize the watch data to your phone and manage it from there.
Good luck! Eric

Recent comments